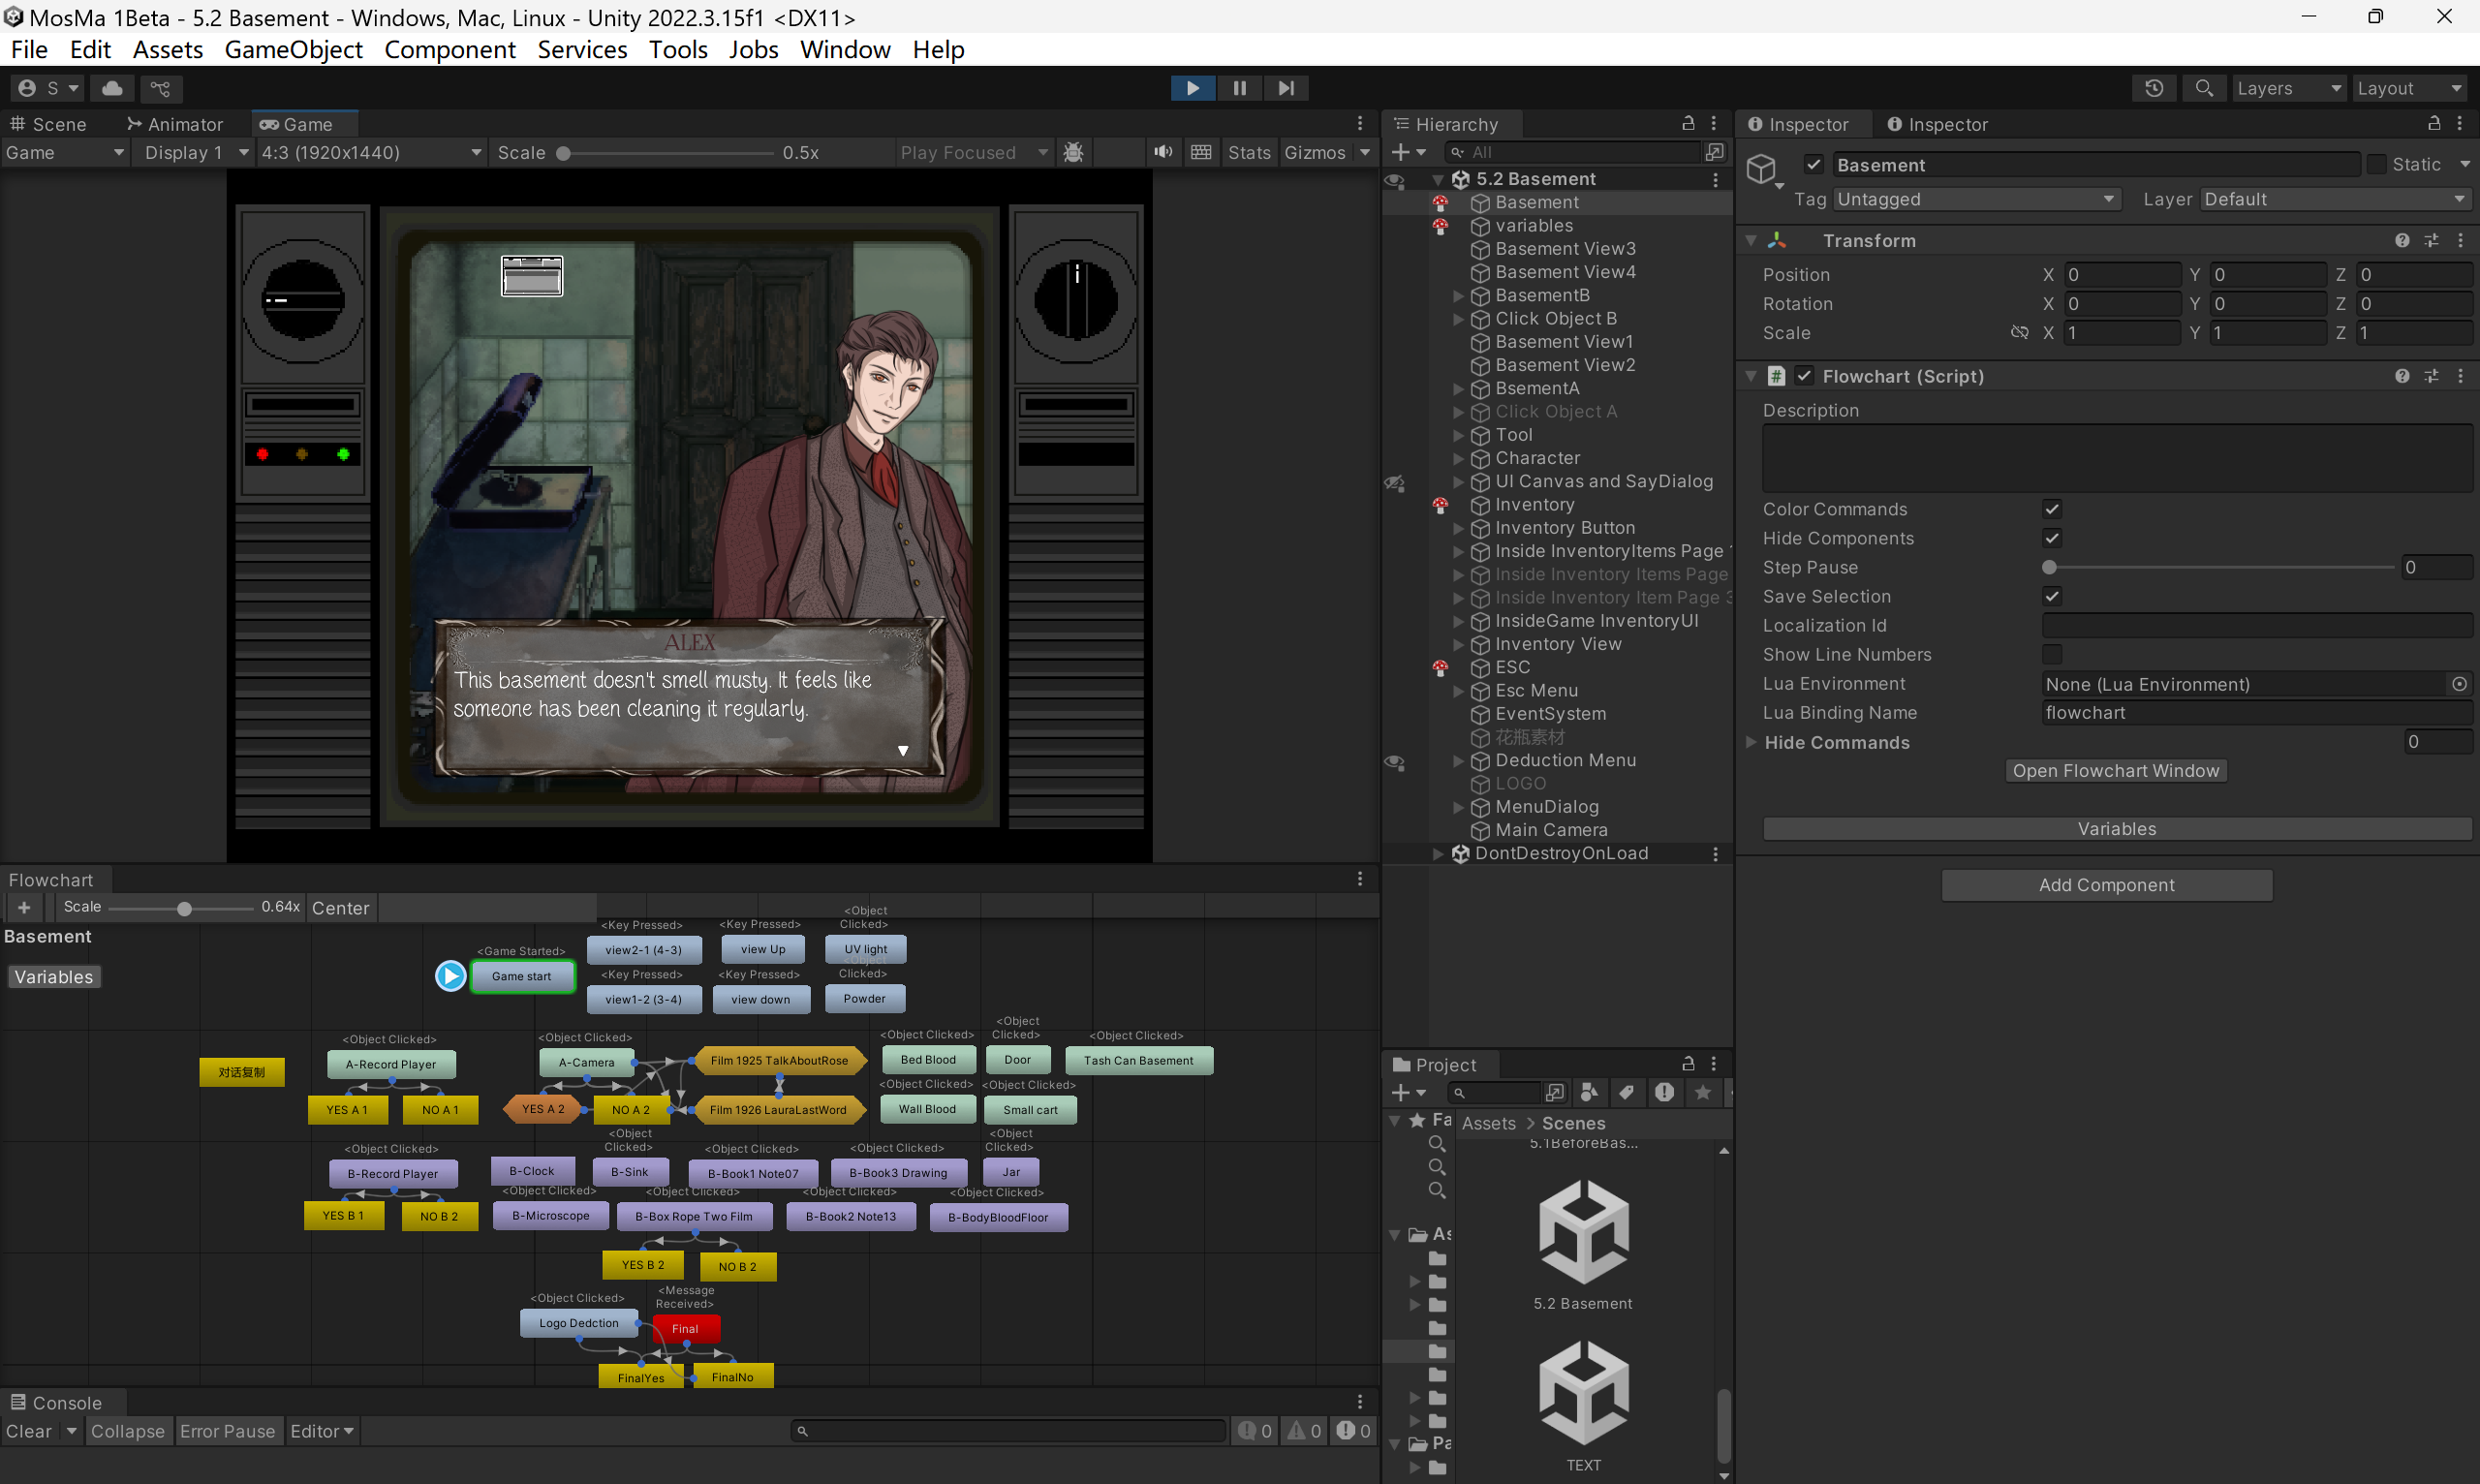
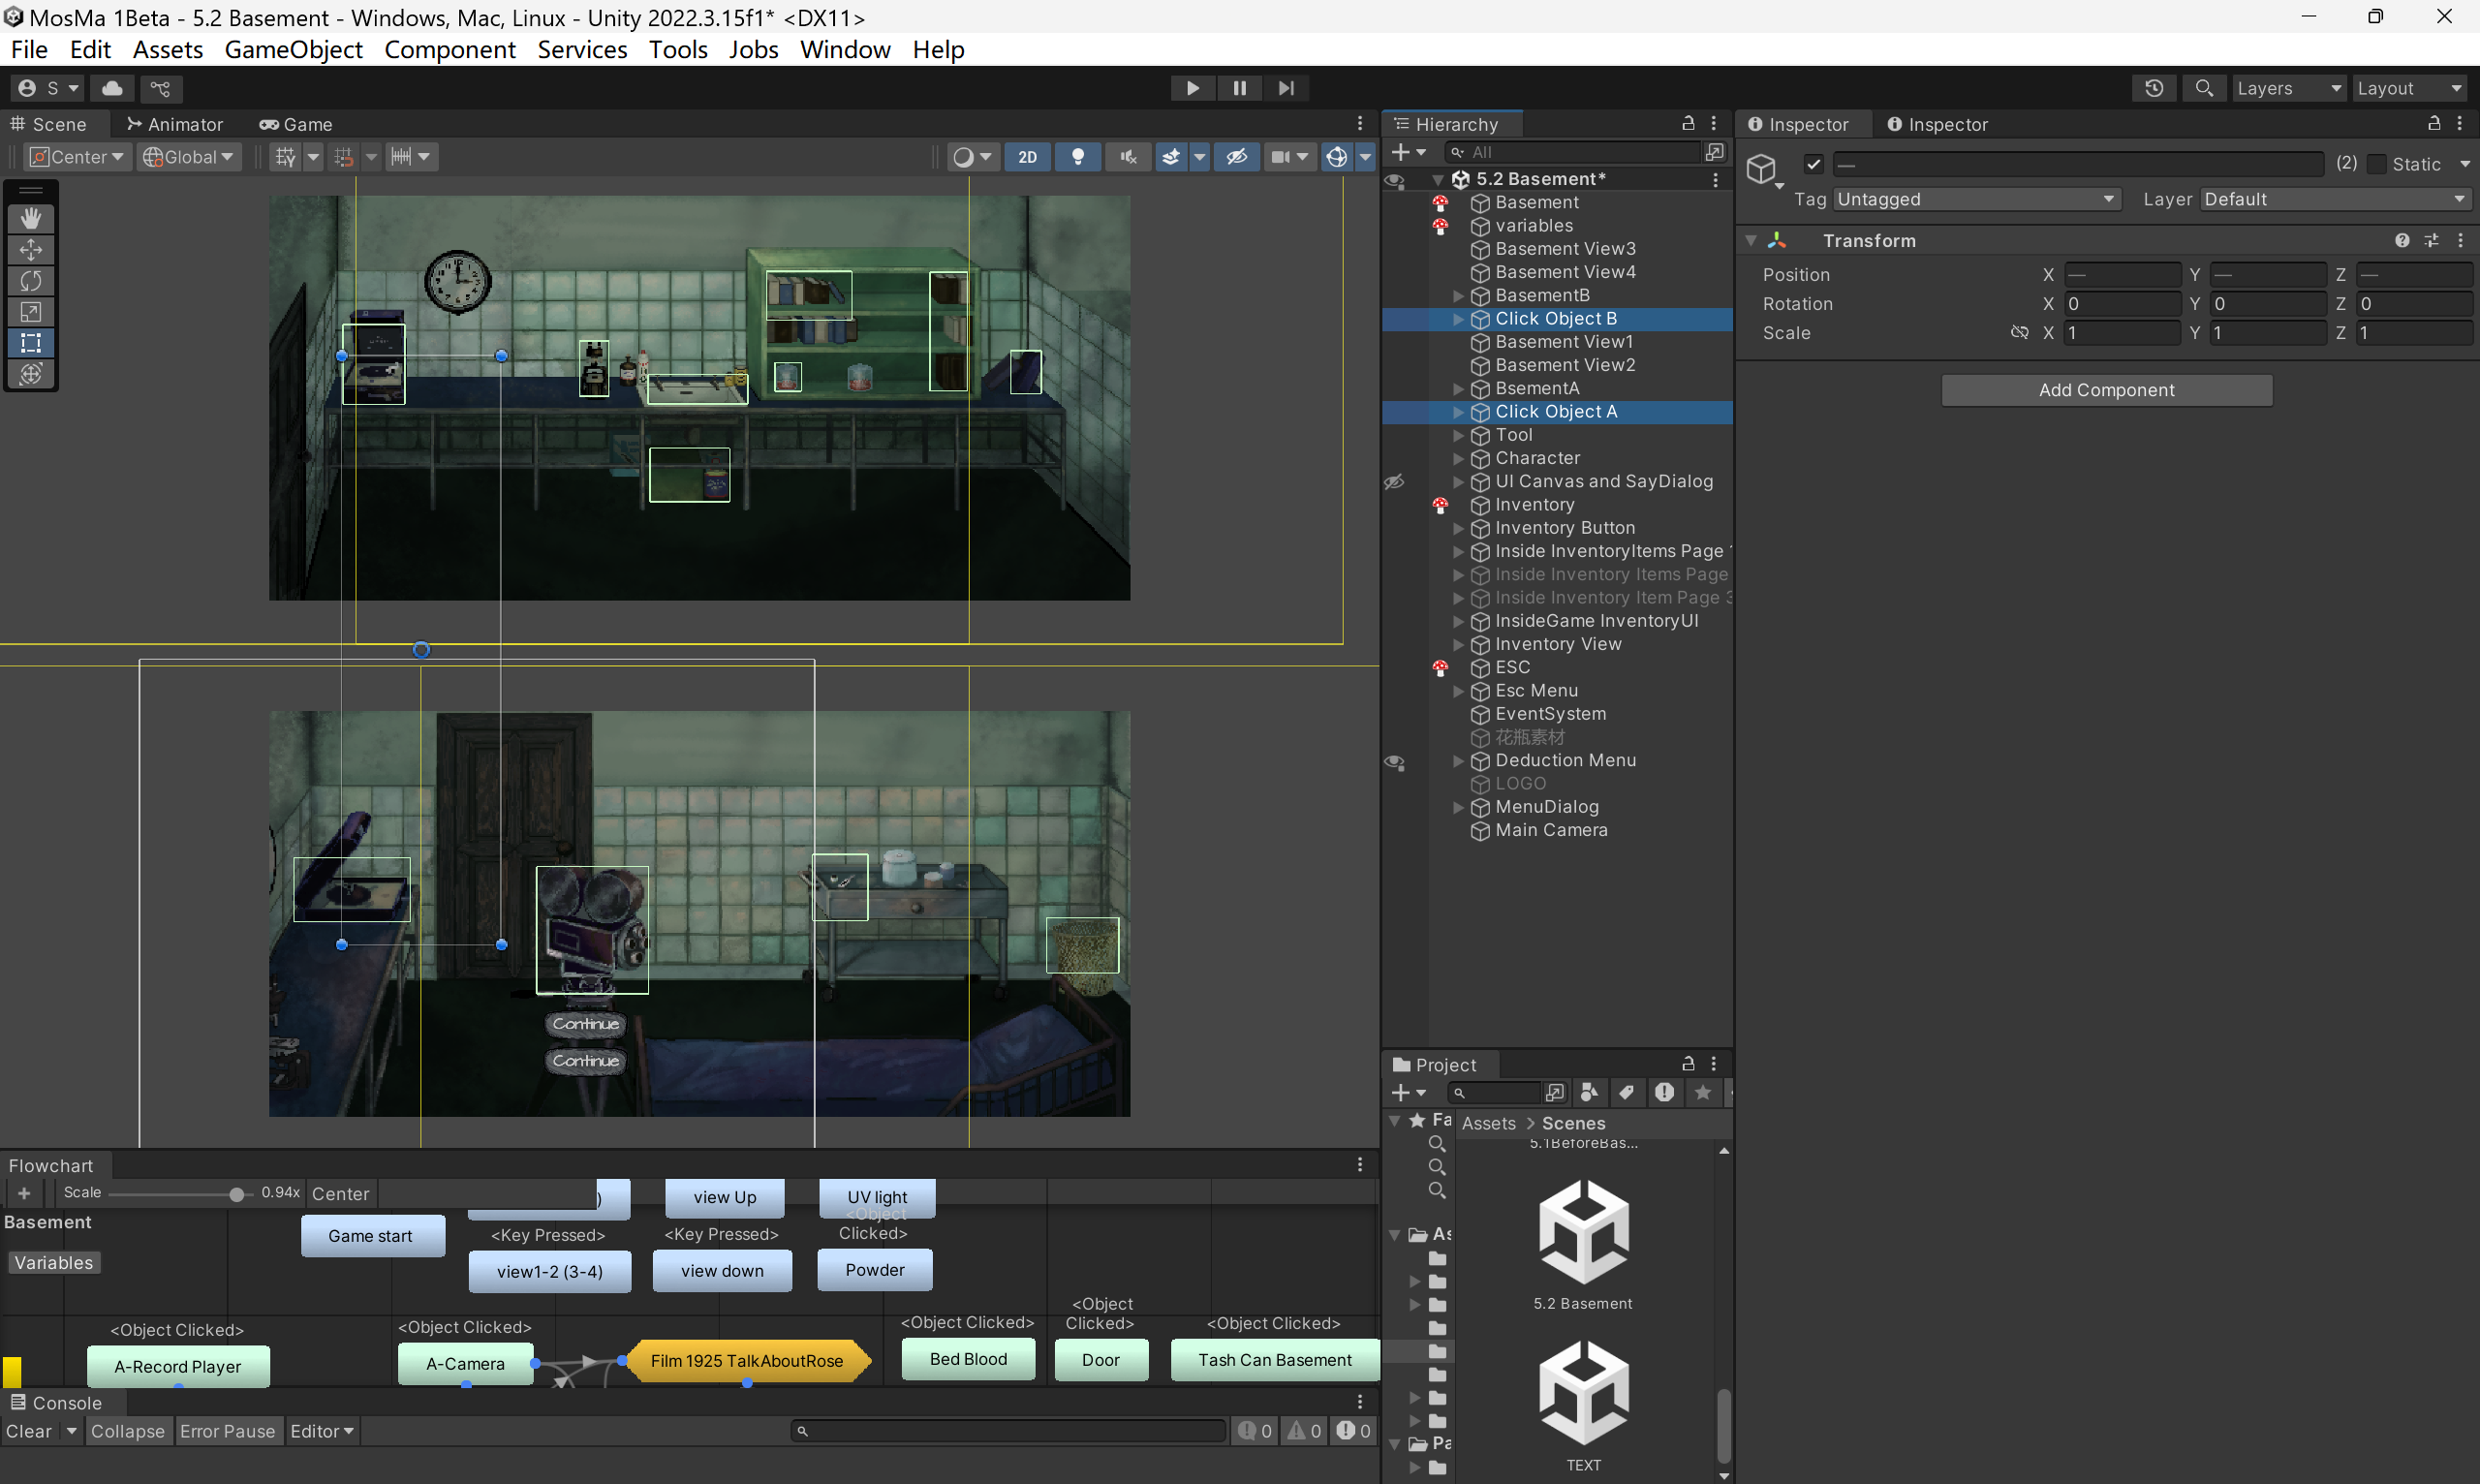
Scene: 5.2_Basement is the place with the most information and items in the entire game. I spent a considerable amount of time assembling the structure of the scene and the item interactions. However, the advantage is that this is the final scene of the game, and by this point, I have gained a deeper understanding of Fungus through previous scene construction. As a result, programming the basement turned out to be much smoother than I had anticipated, rather than as difficult as I had imagined.
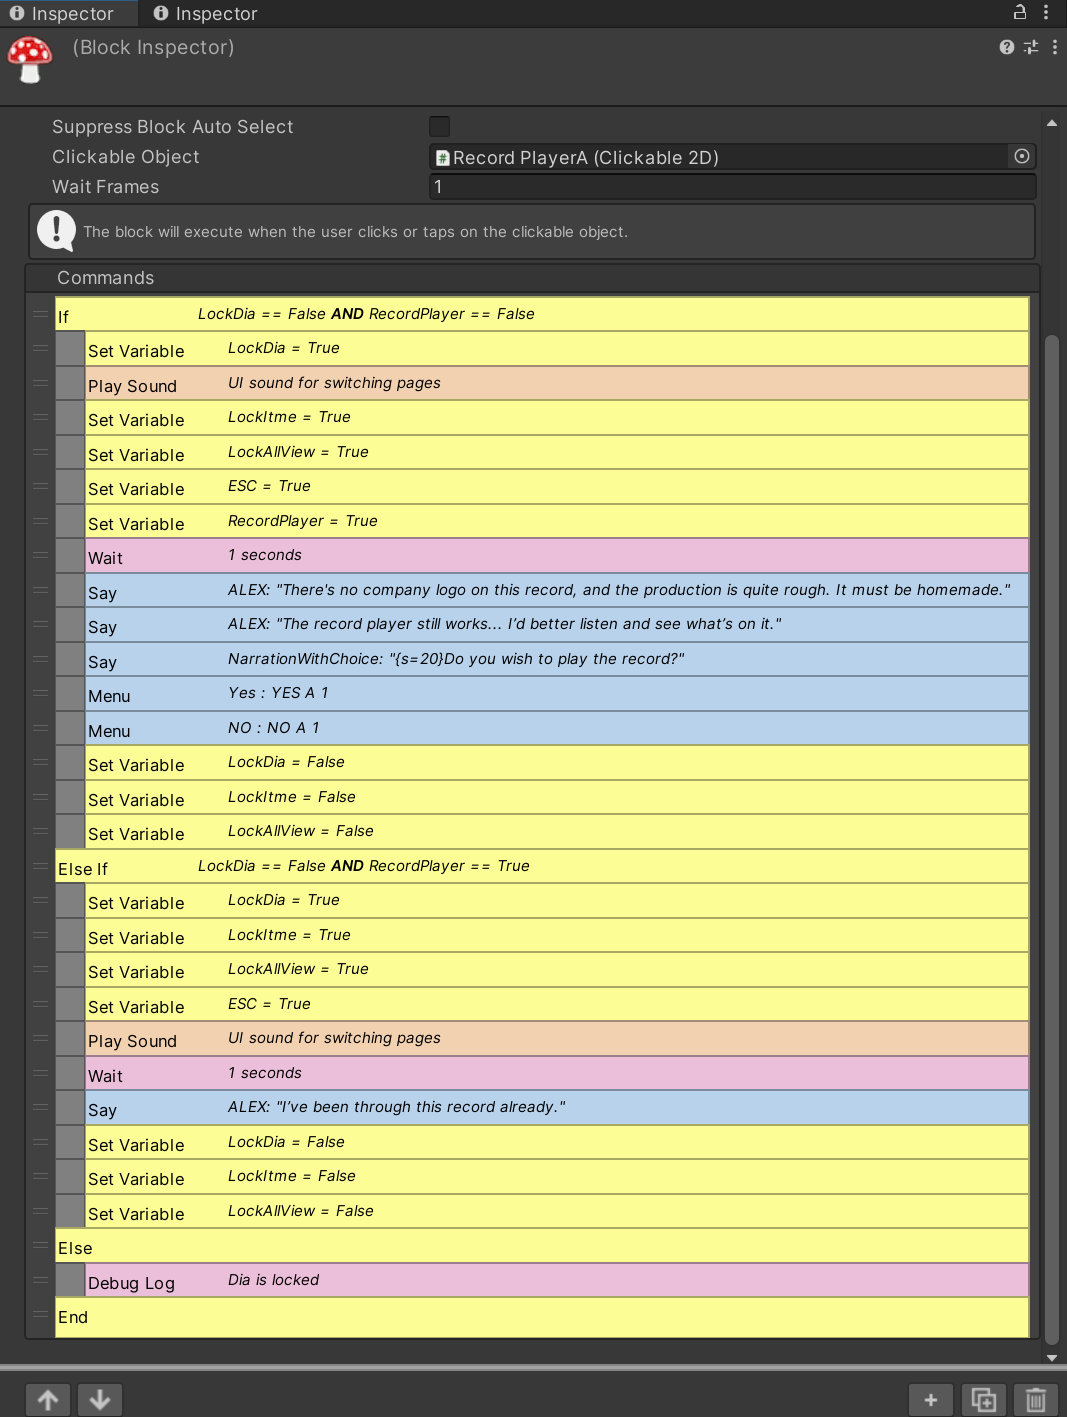
Basement A, Object Clicked: Record Player
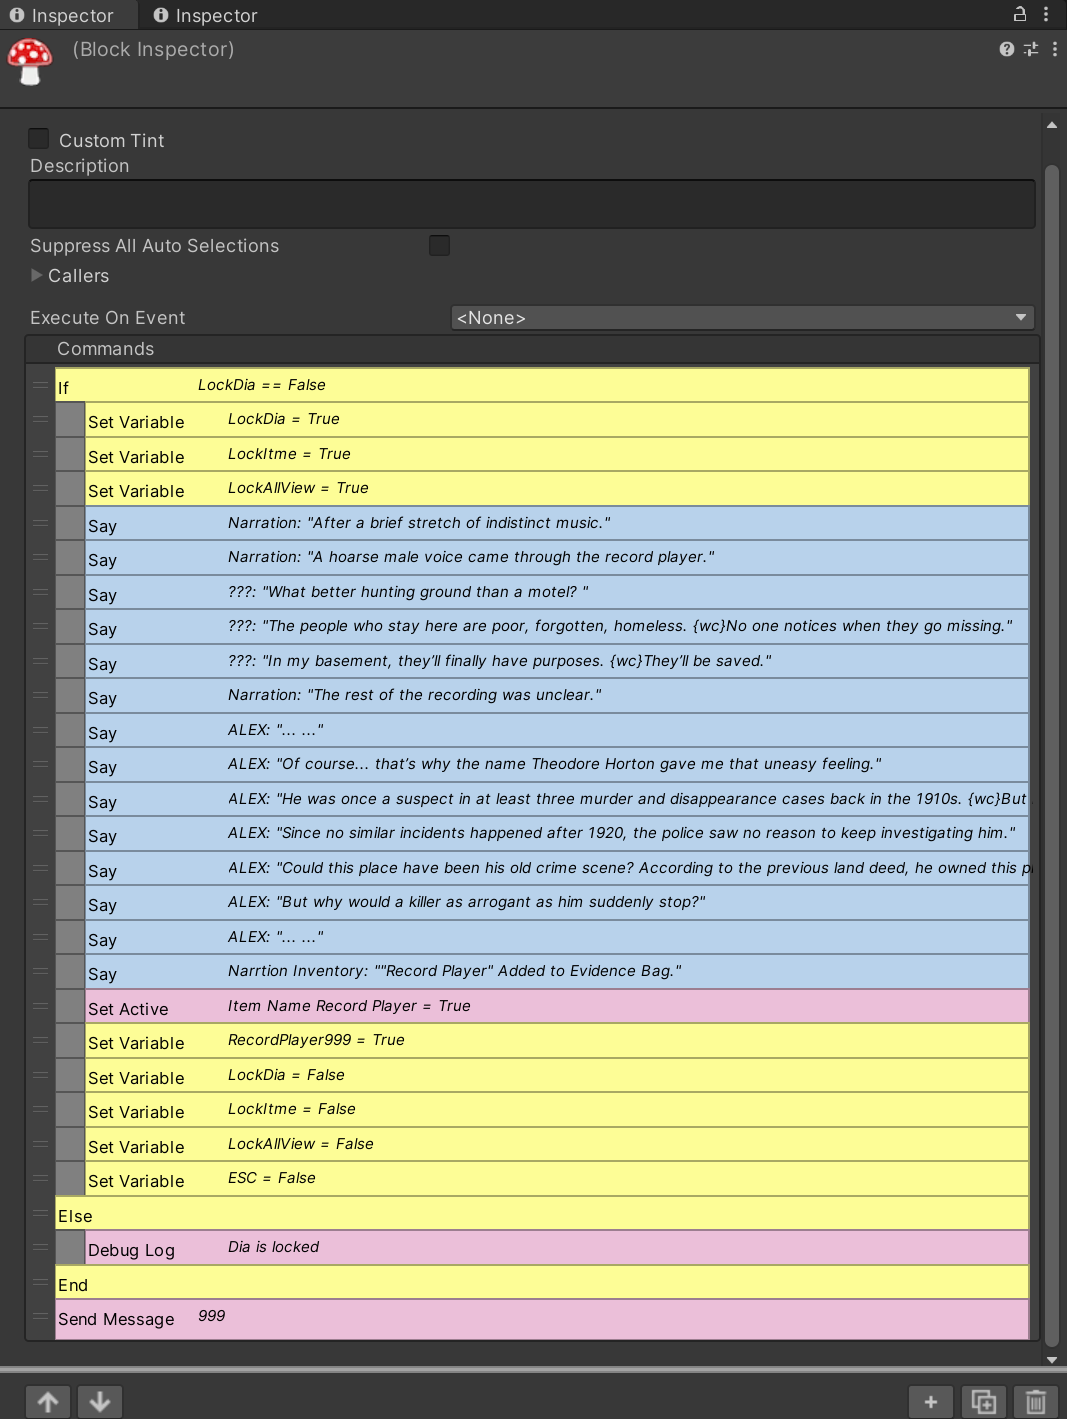
This segment about Theodore Horton is intended to reveal his true identity: a serial killer. It also serves to pay off the earlier hint left on the property deed. At the same time, it’s a piece of deliberately misleading information for the player, since the basement was originally Theodore Horton’s slaughterhouse, Laura’s disappearance here naturally leads players to suspect him as the murderer.

The record player here is the same one seen in Basement B, as Basement background A and B are only two different perspectives of the same room. Therefore, the record player block from Basement B won’t be shown again later.
Basement A, Object Clicked: Camera
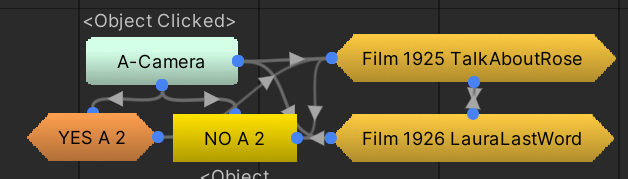
The camera interaction is the most complex one in the entire game. I spent a lot of time debugging its code, because aside from the film that comes with the camera, players can also find two additional rolls throughout the game. This meant I had to account for various scenarios, such as whether the player is carrying any film, whether they’ve already viewed the first film, and so on.
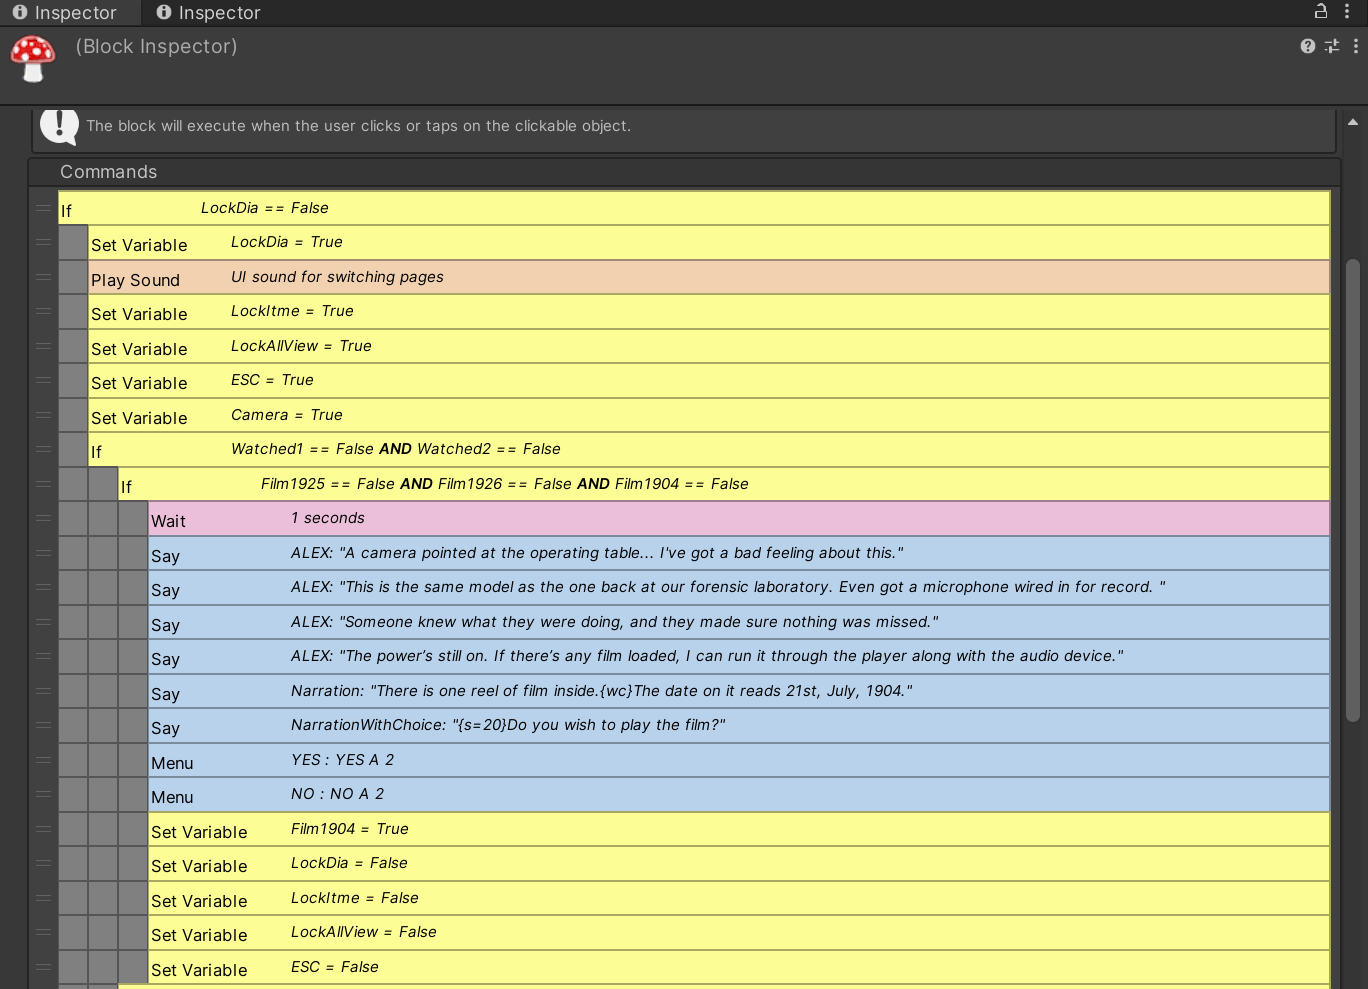
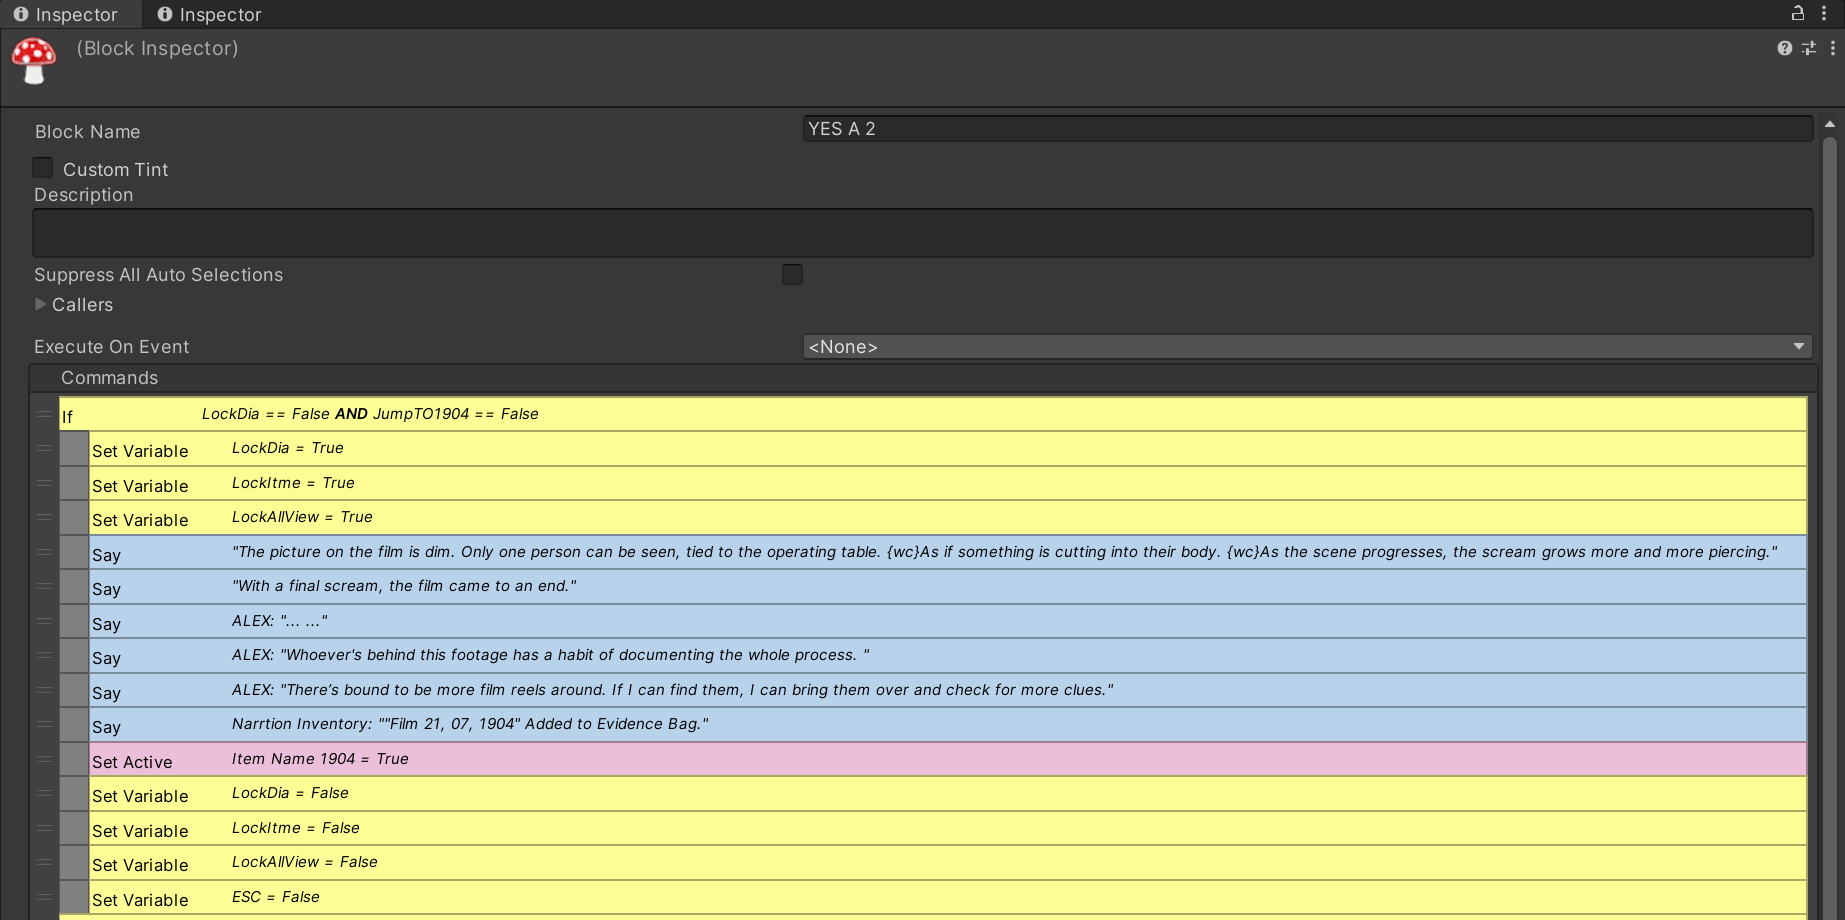
First, there’s the case where the player hasn’t viewed any of the film (1904, 1925, or 1926).
- 1904 = false, 1925 = false, 1926 = false
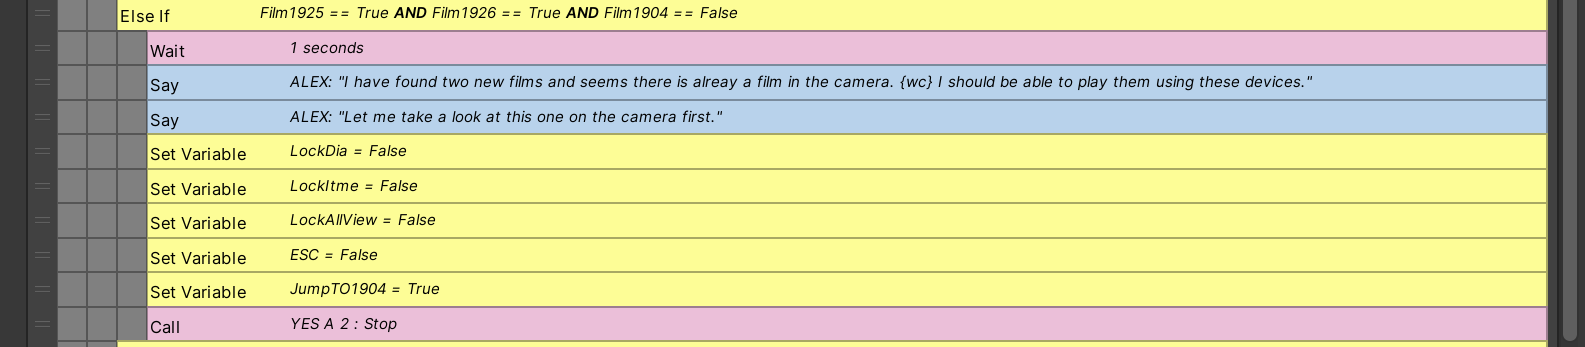
Second, the player goes to Basement B first and picks up the 1925 and 1926 films, but without having viewed the 1904 film. To ensure the flow of the game proceeds correctly, the player will be automatically directed to view the 1904 film first.
- 1904 = false, 1925 = true, 1926 = true

Third, if the player hasn’t found the 1925 and 1926 films yet, but has already finished viewing the 1904 film.
- 1904 = true, 1925 = false, 1926 = false

Fourth, if the player has already viewed the 1904 film and has also found the 1925 and 1926 films.
- 1904 = true, 1925 = true, 1926 = true
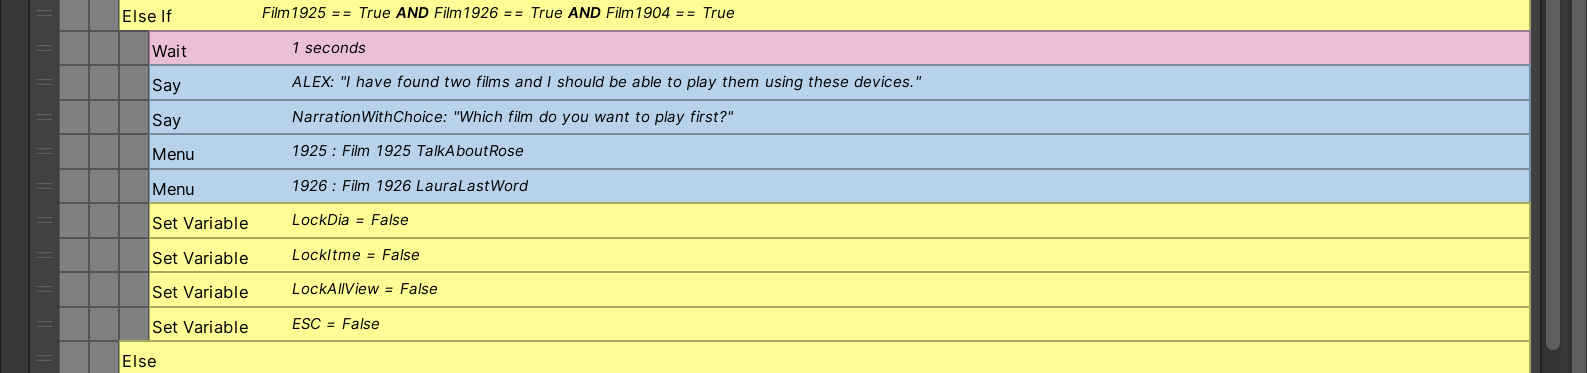
The player can choose to view either the 1925 or 1926 film first, and whichever they choose, there are corresponding commands in place to ensure the remaining film is played afterwards.
- Play the 1925 film first

- Play the 1926 film first
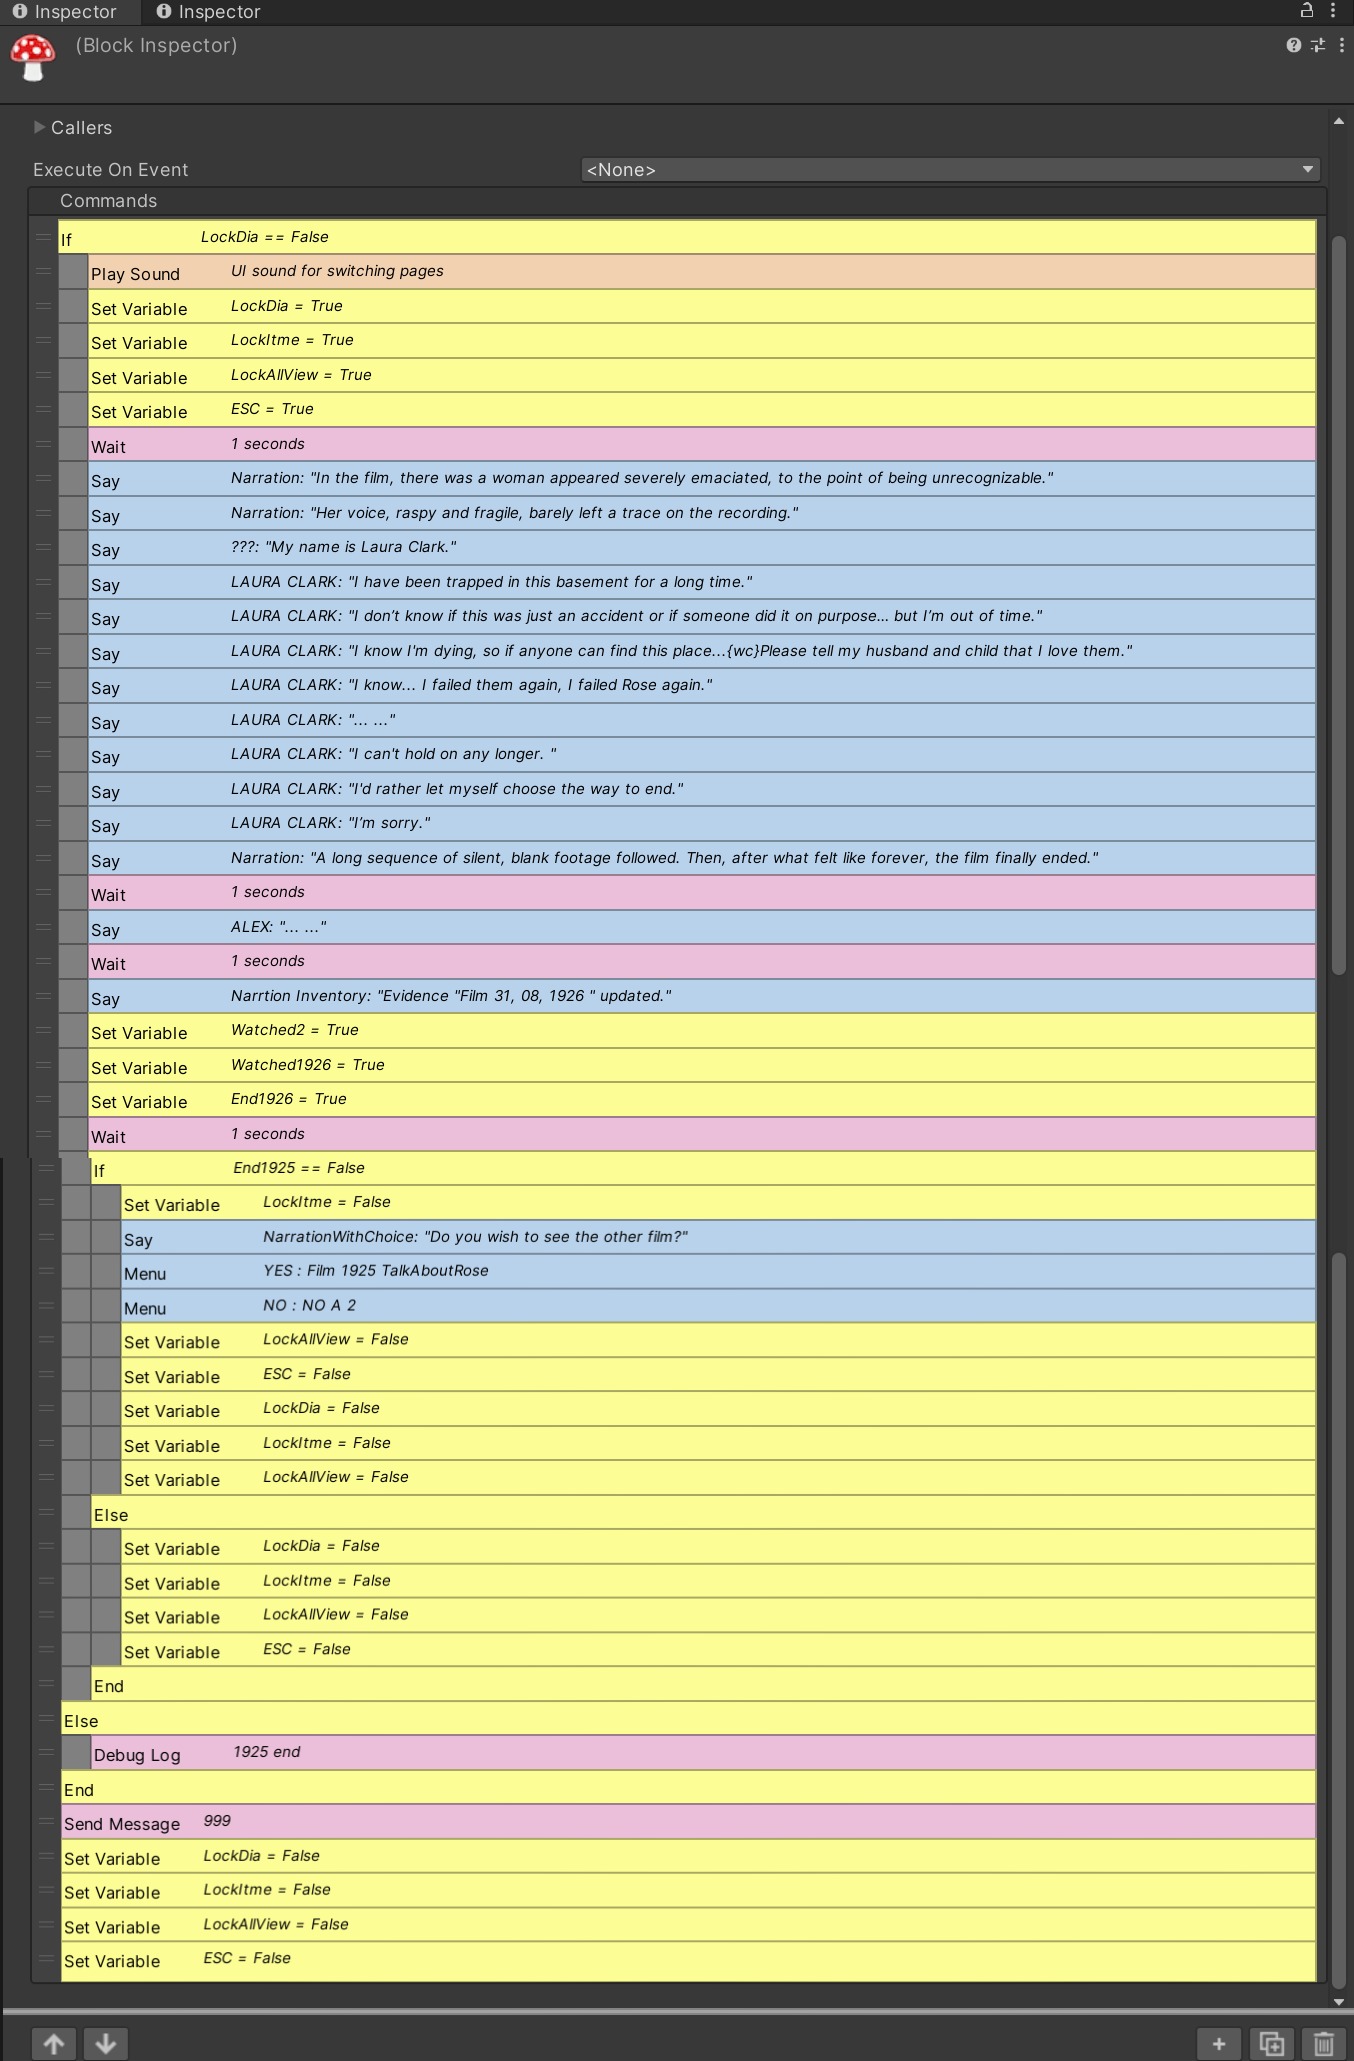
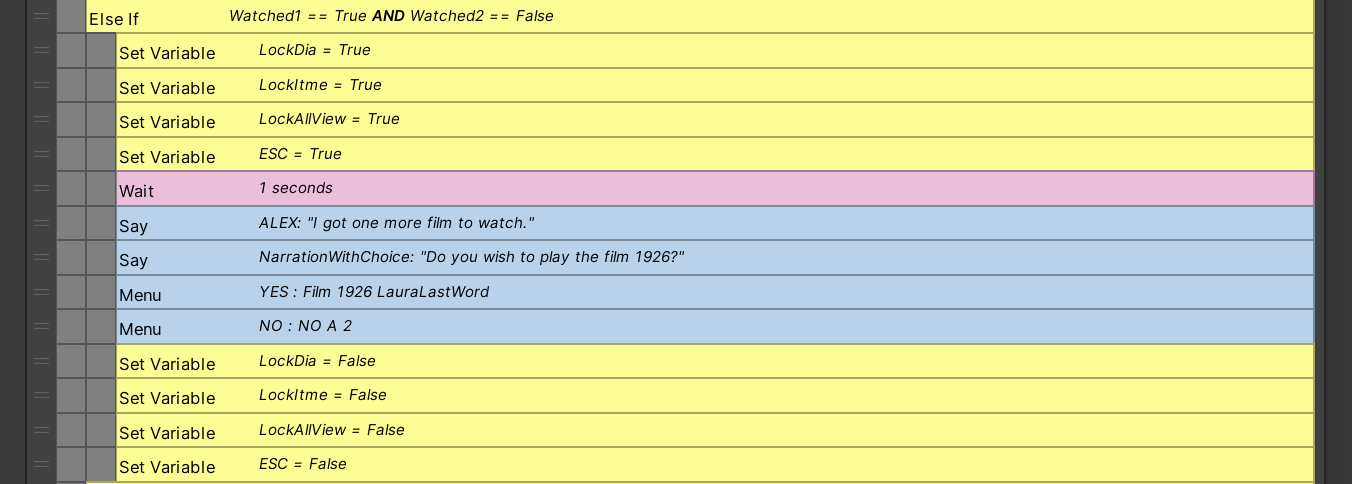
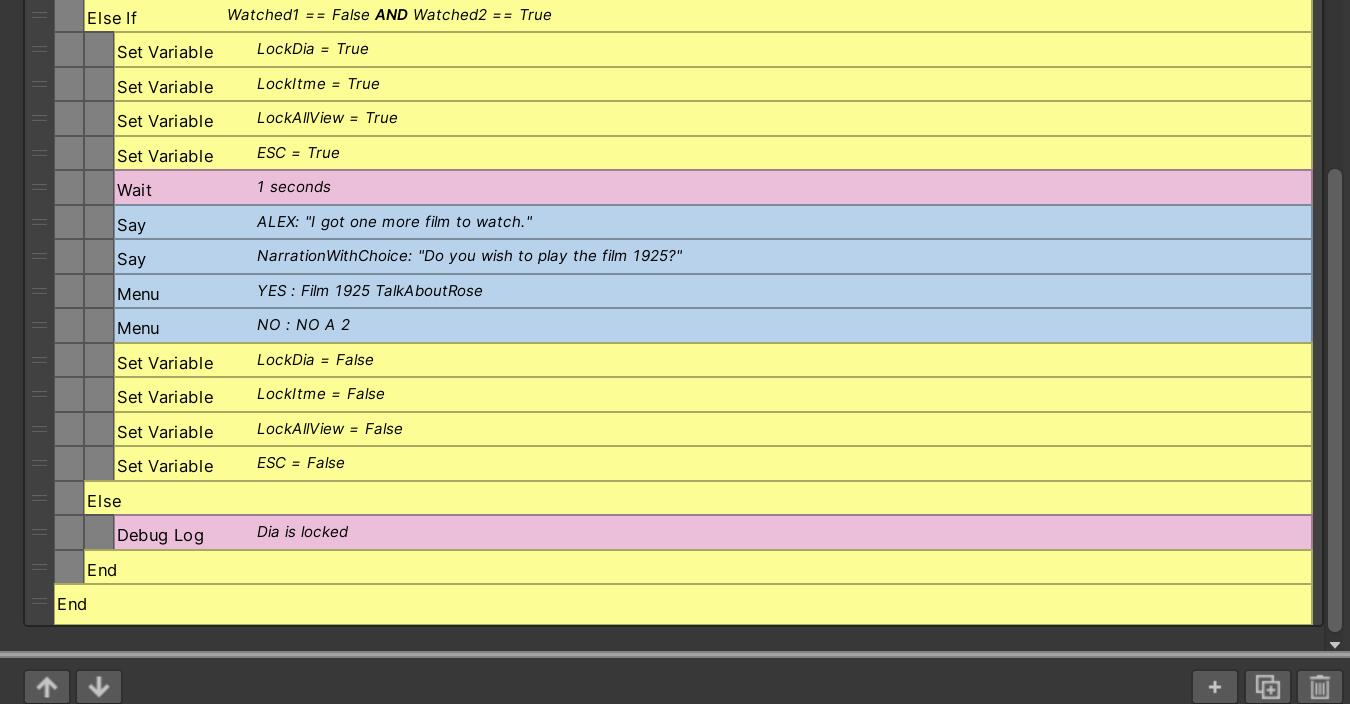
Moreover, after watching either the 1925 or 1926 film, the player can choose ‘NO’ to skip the remaining one. Although during testing I found that most players chose to continue watching, however, you never know. So, I also created two separate command paths in the camera block to handle the possibility of the player choosing not to watch the remaining film.
- watched 1925 = true, watched 1926 = false
- watched 1925 = false, watched 1926 = true
It took me quite a while to fully sort out the camera logic. Initially, I assumed most players would click on the camera first, since it’s in the first scene and quite visually prominent. But then I considered, what if a player clicks on the box in Basement B first? That’s why I added a condition for when 1925 = true and 1926 = true, but 1904 = false.
To my surprise, during our playtests, many players completely overlooked the camera and didn’t click on it at all. That made me quite glad I had accounted for this possibility and implemented the corresponding branches.
This way of thinking comes from my experience playing many Japanese RPG puzzle games and Baldur’s Gate 3, both of which offer a wide range of unexpected narrative branches. I remember playing an RPG as a child where, if you spoke to a certain NPC more than ten times, they would suddenly have new, completely different dialogue. Baldur’s Gate 3 takes this even further by carefully considering a vast array of player choices.
I really enjoy that sense of freedom in gameplay, the feeling that even the most unexpected actions can lead to meaningful outcomes. That’s exactly the kind of experience I wanted to create in my own game. Although setting up the camera logic was a long and really painful process, seeing that all the different player choices are actually working as intended has been incredibly rewarding, and something I feel genuinely proud of.
Basement A, Object Clicked: Marks on the Door
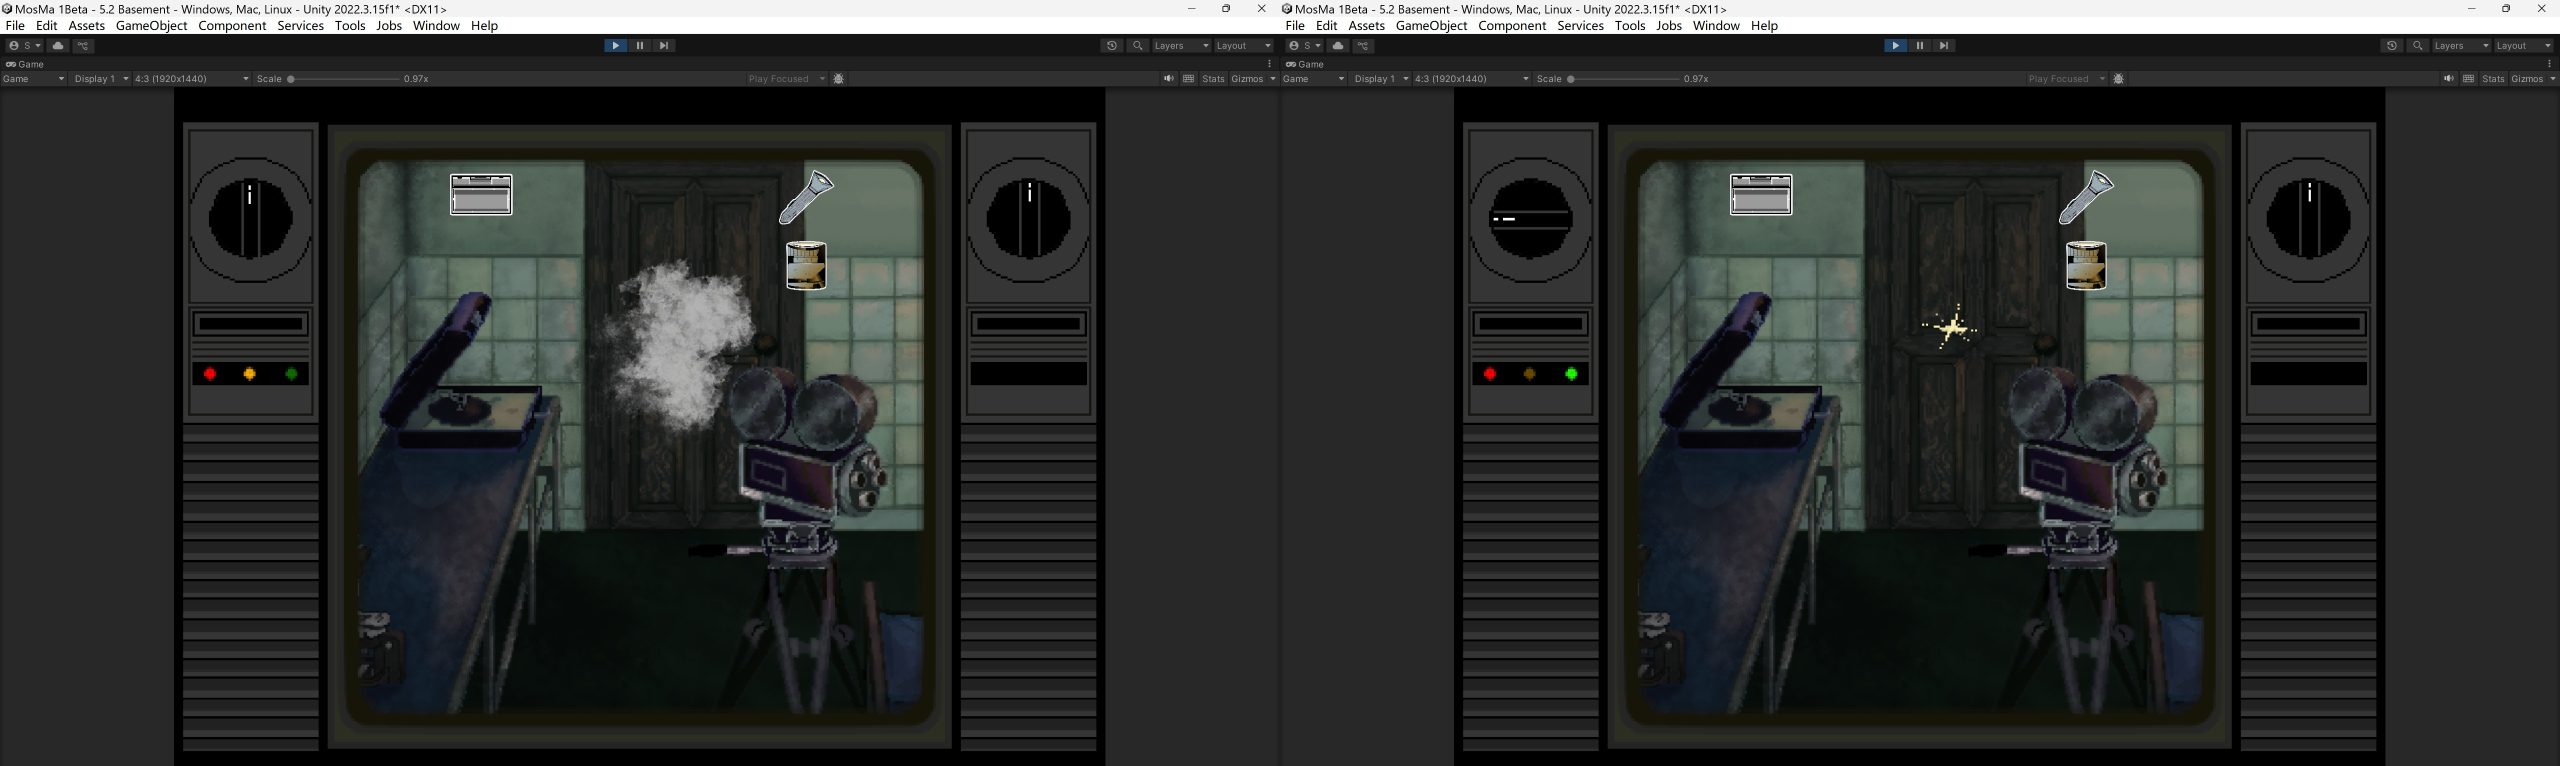
After the player uses the fingerprint powder item, a new point of interest will appear on the door in Basement A. I’ve also added a spark effect to guide the player’s attention.
This passage is also a foreshadowing, as Theodore Horton would tie his victims to the operating table and ensure they couldn’t escape. Therefore, the marks on the door are highly suspicious. It hints that Laura had desperately tried to leave the basement, which is why there are numerous signs on the door.
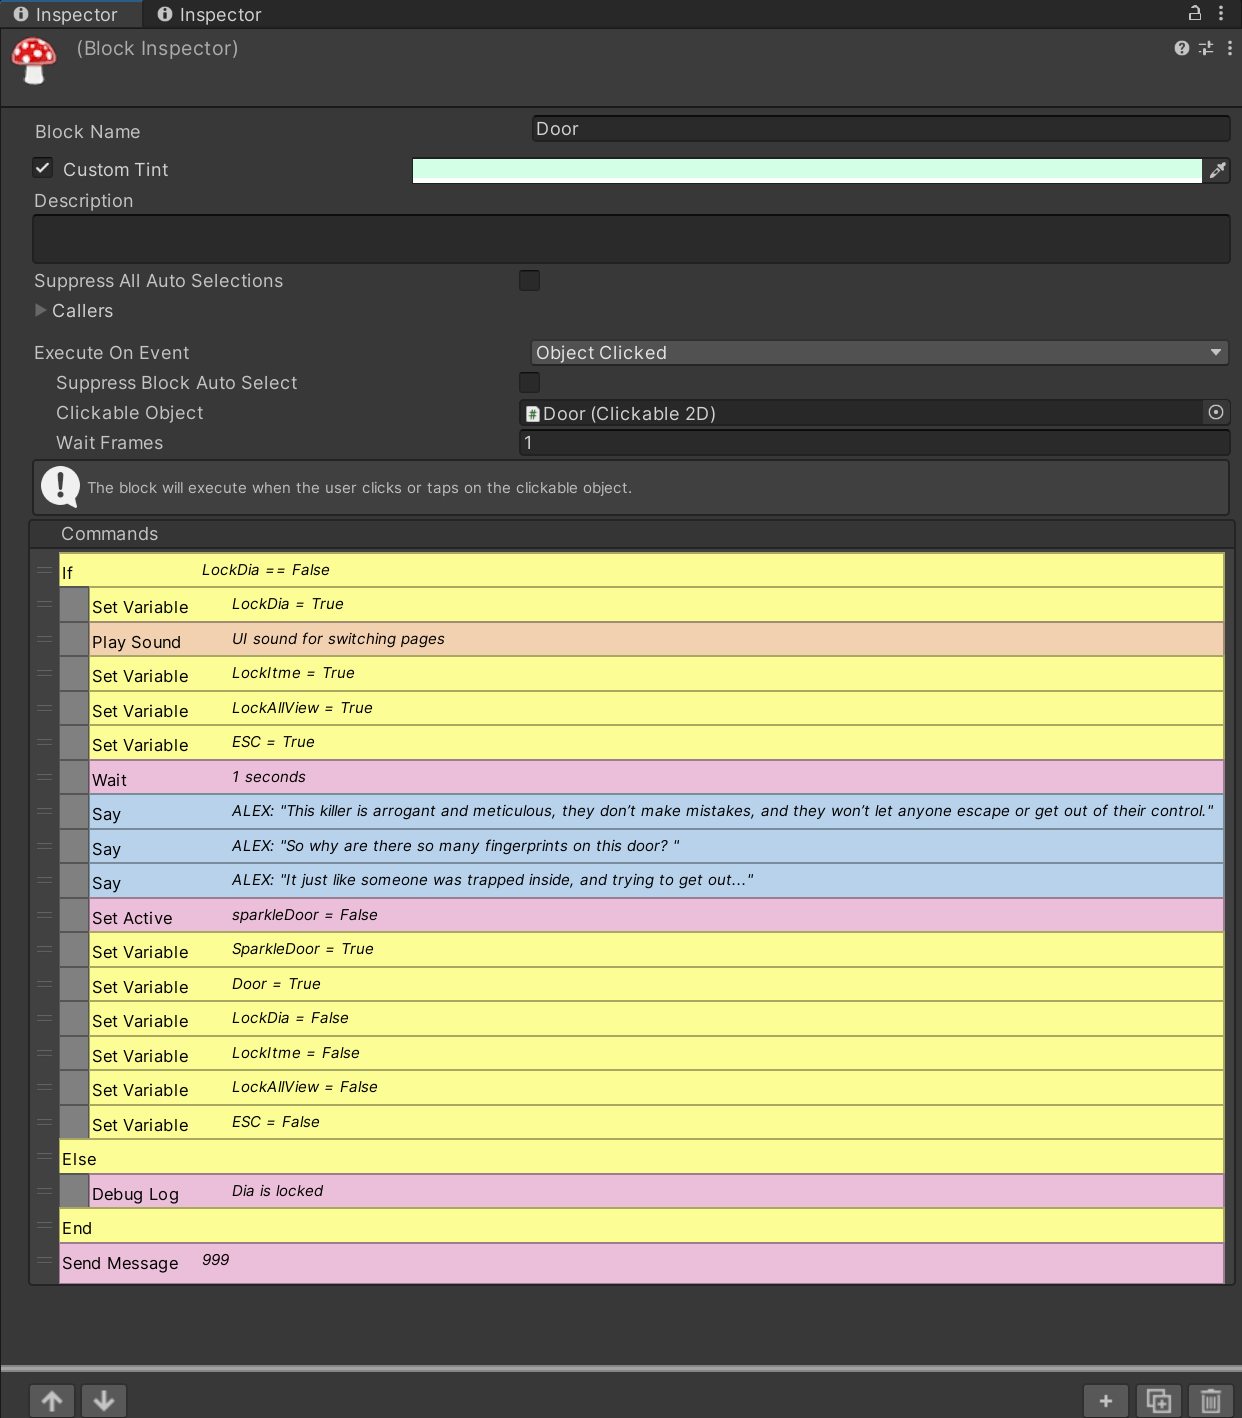
Basement A, Object Clicked: Blood on the Bed and Blood on the Wall
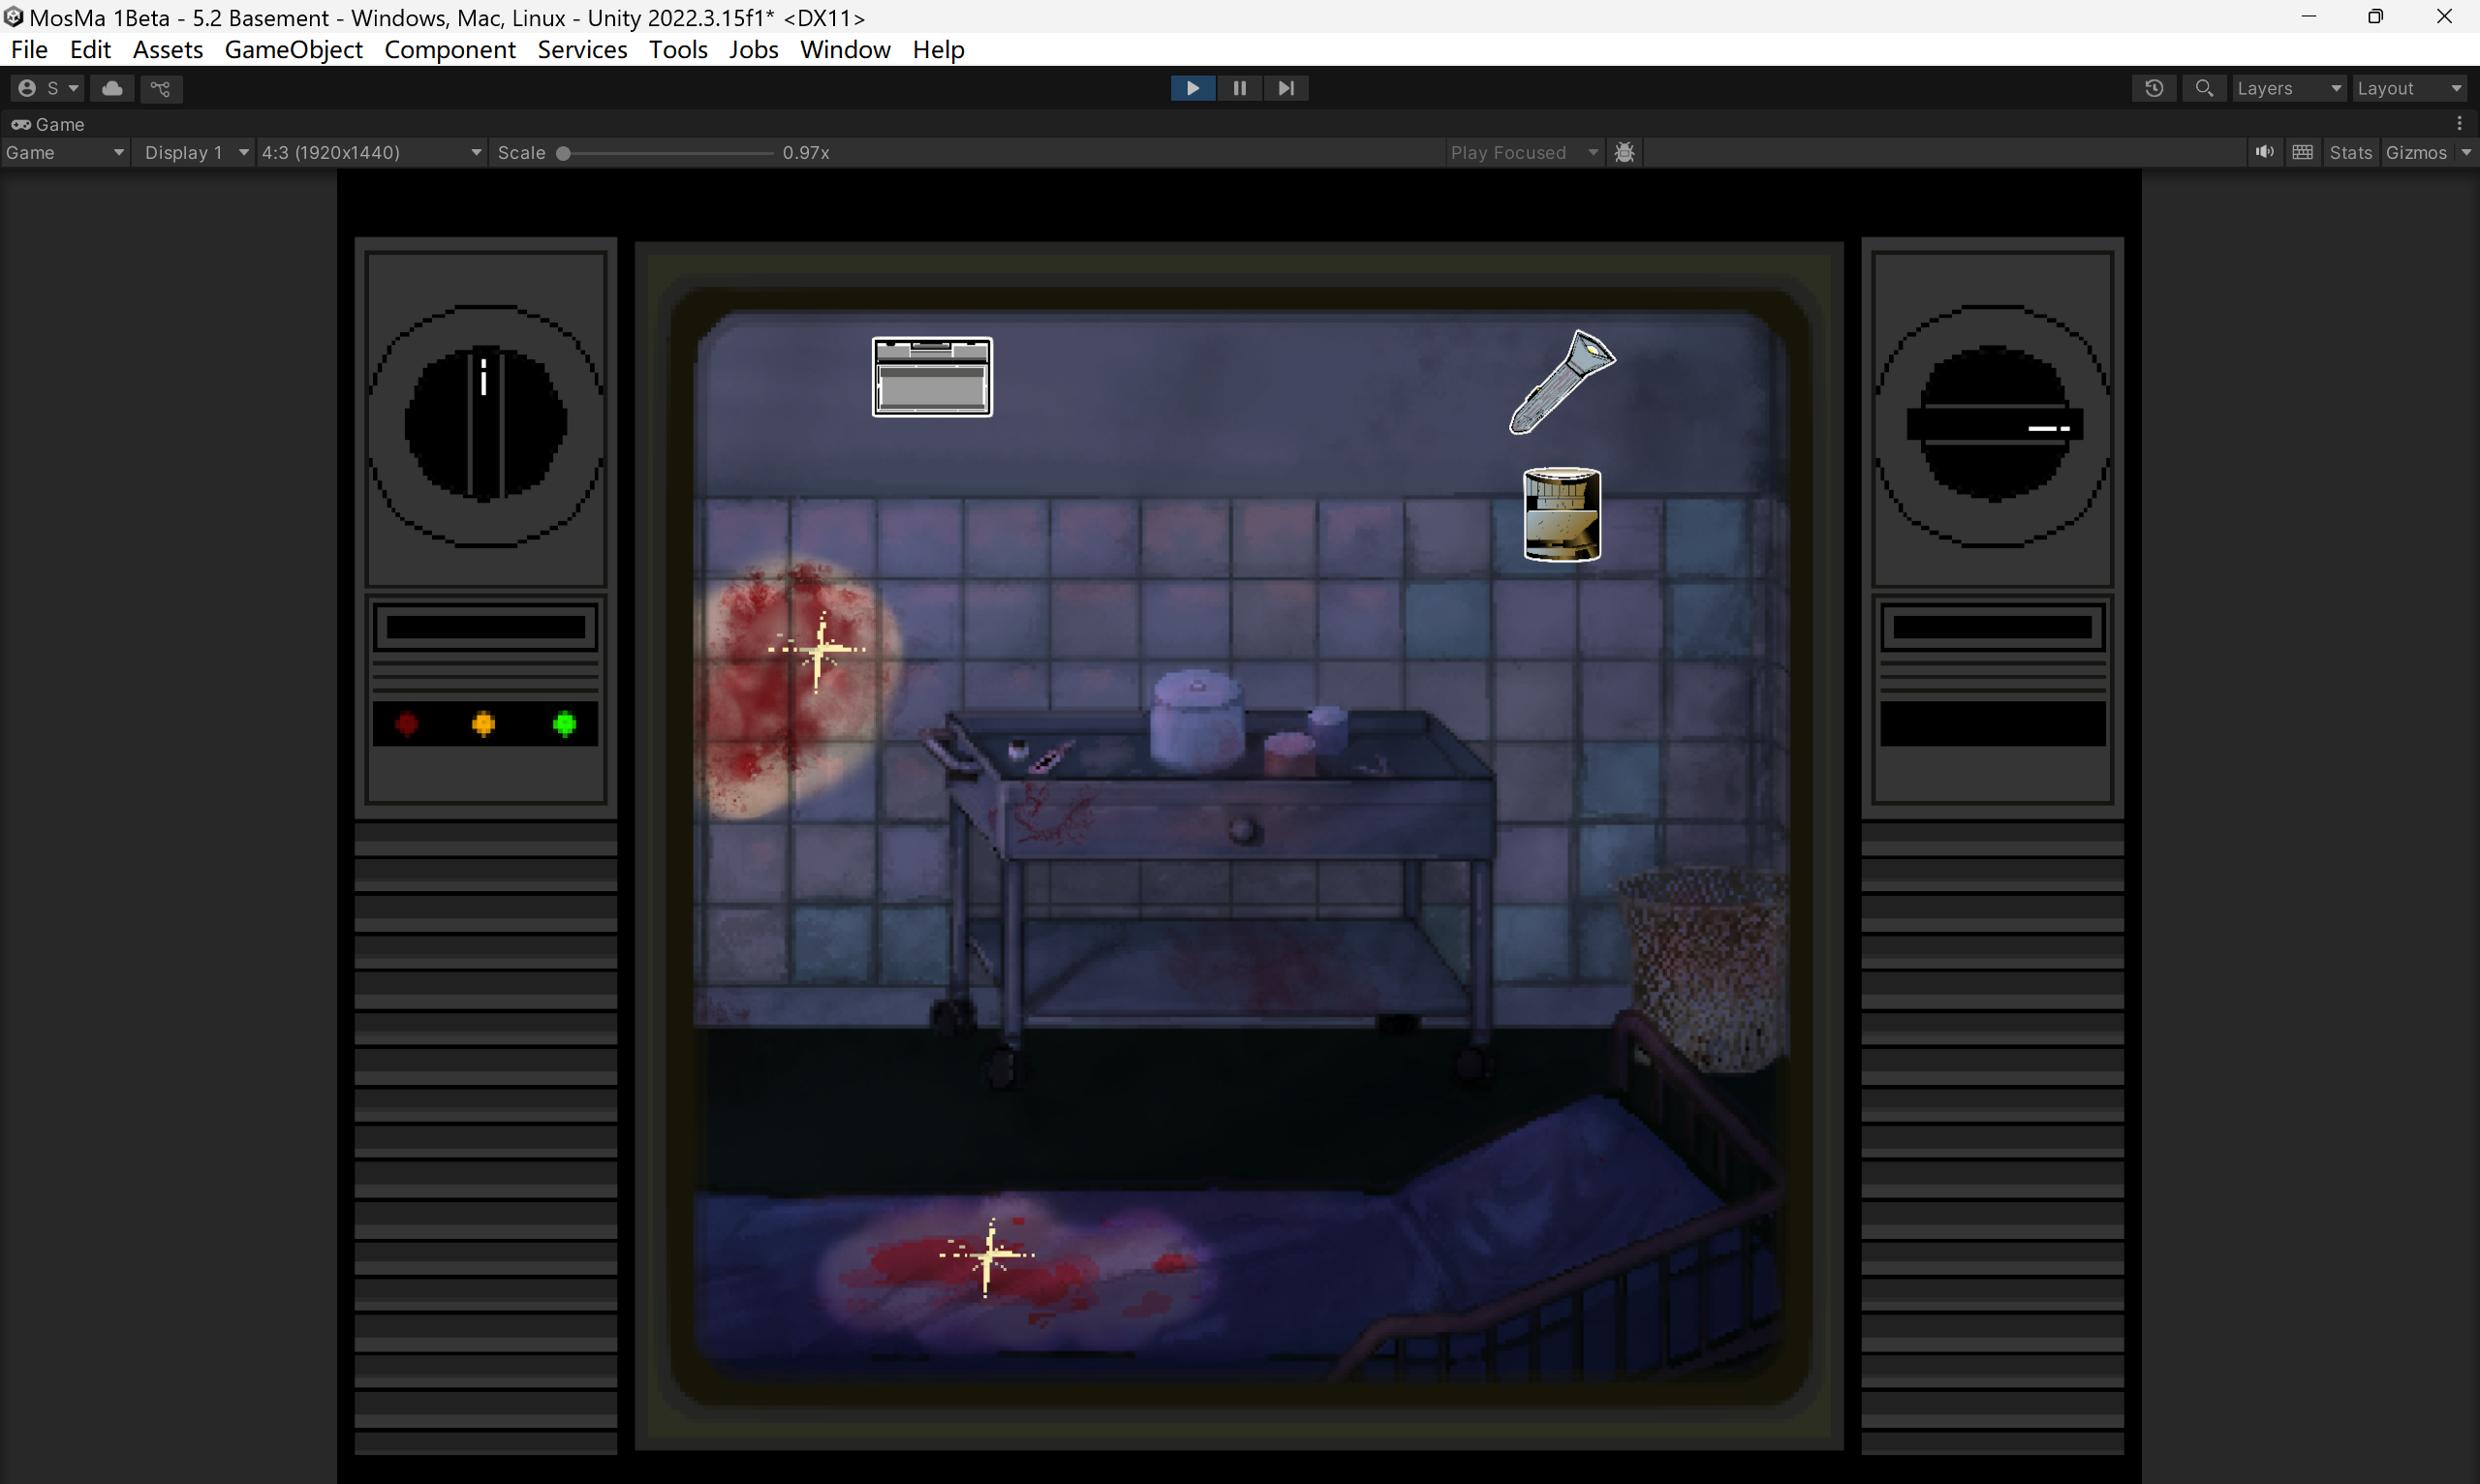
After the player uses the UV flashlight, new clickable spots appear on the operating bed and the wall. I added a spark effect to help guide the player’s attention.
- Blood on the bed
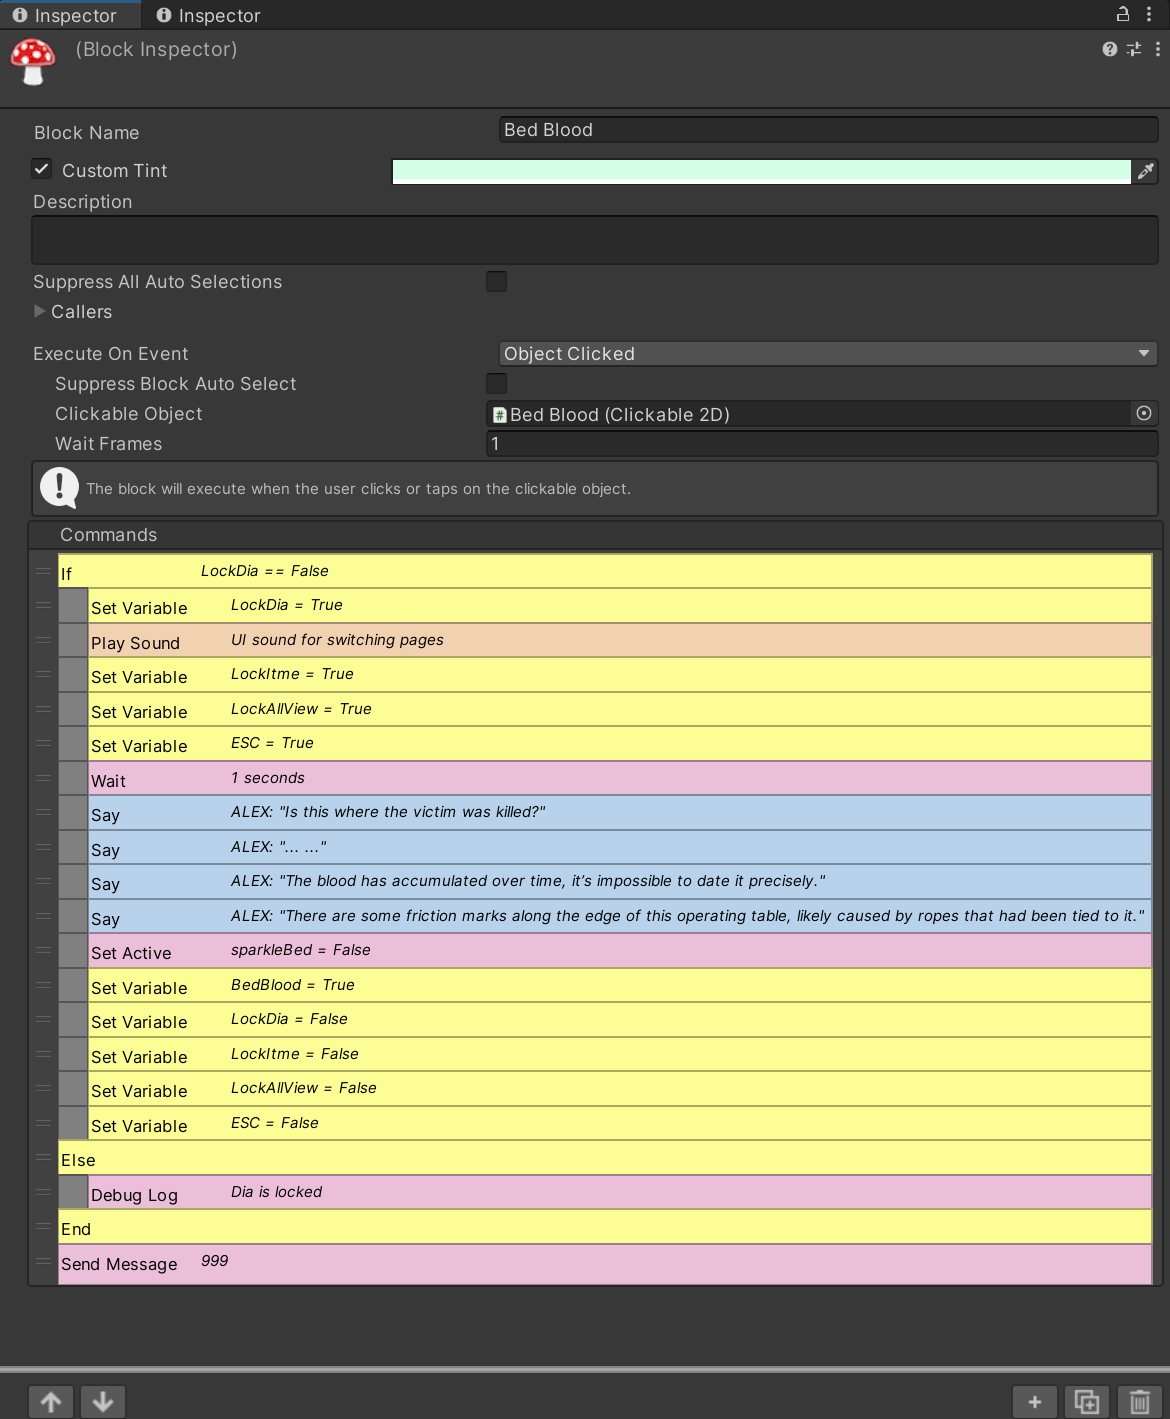
This line of dialogue hints at two things. First, the bloodstains on the bed are from a long time ago, suggesting that no one has been killed in the basement in recent years. Second, the rope marks beside the bed foreshadow Laura’s suicide. She hanged herself using a rope tied to the bedframe.
- Blood on the wall

The bloodstain on the wall also serves as a clue, suggesting that Laura tried to escape the locked basement and left a bloody handprint in the process. There is only a single handprint, rather than signs of a struggle, because she was alone at the time, and no one was fighting her.
Basement A, Object Clicked: Cart
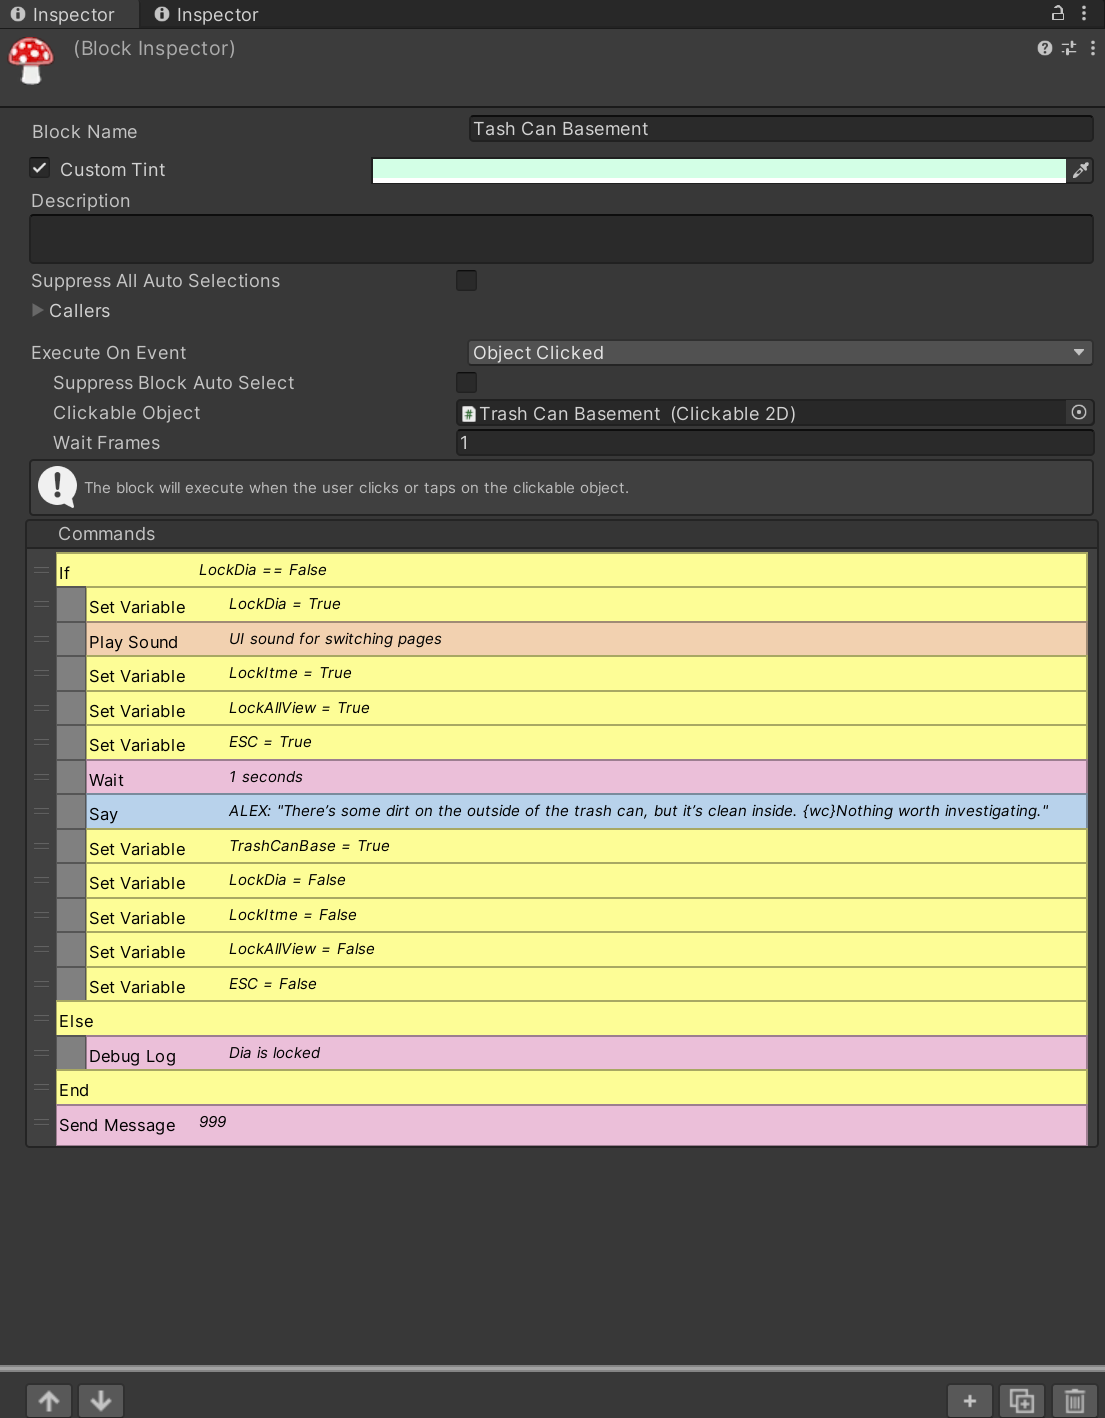
There is so much information in this scene that I didn’t place too much useful detail on some items.

Basement A, Object Clicked:
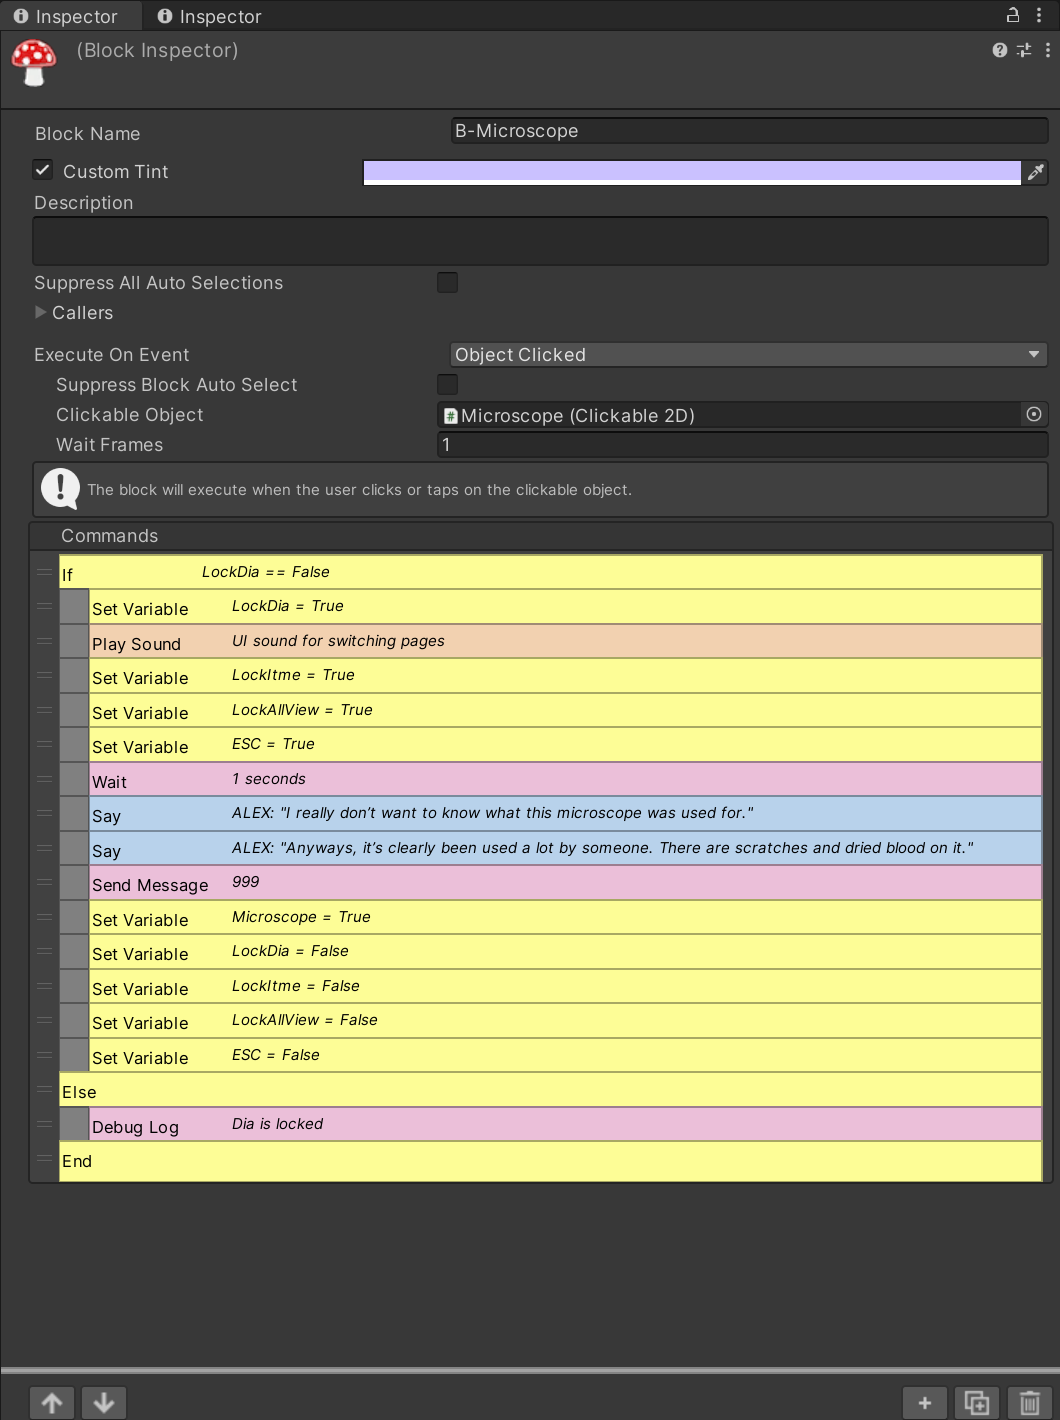
Basement B, Object Clicked: Microscope
Basement B, Object Clicked: Sink
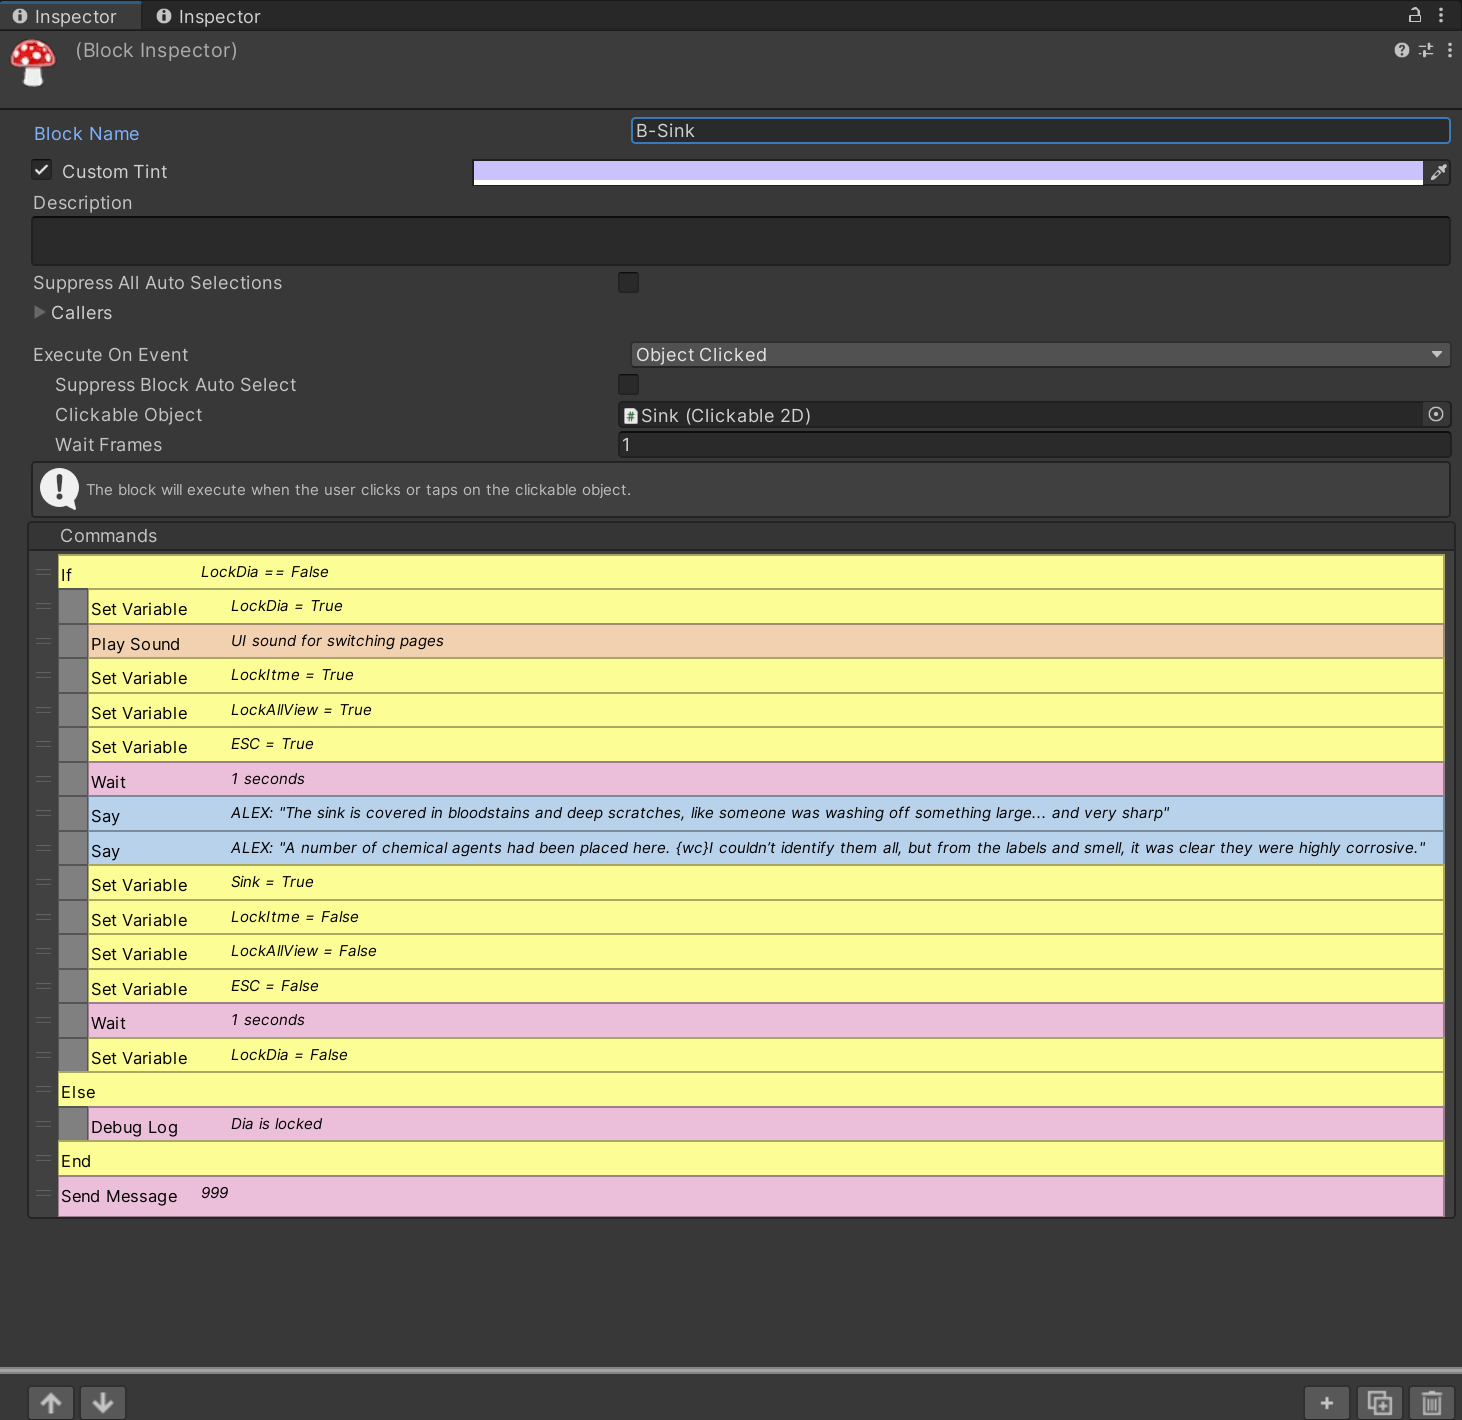
This passage corresponds with the 1925 film, where Theodore Horton is seen cleaning his murder tools and, at times, using the chemicals by the sink to destroy bodies. It adds a layer of horror to the atmosphere of the game.
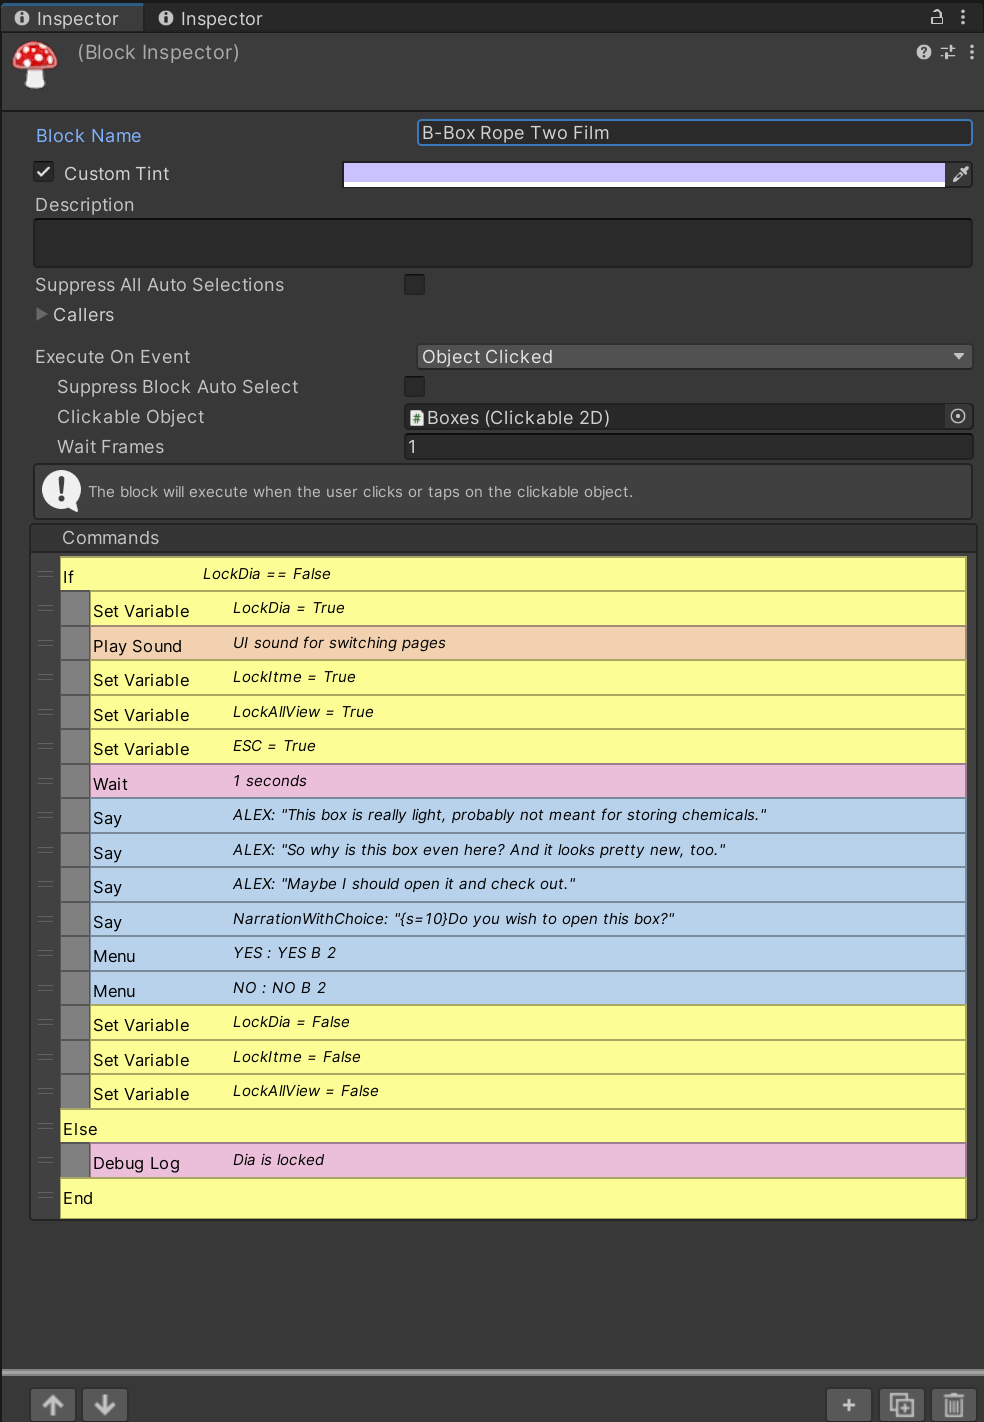
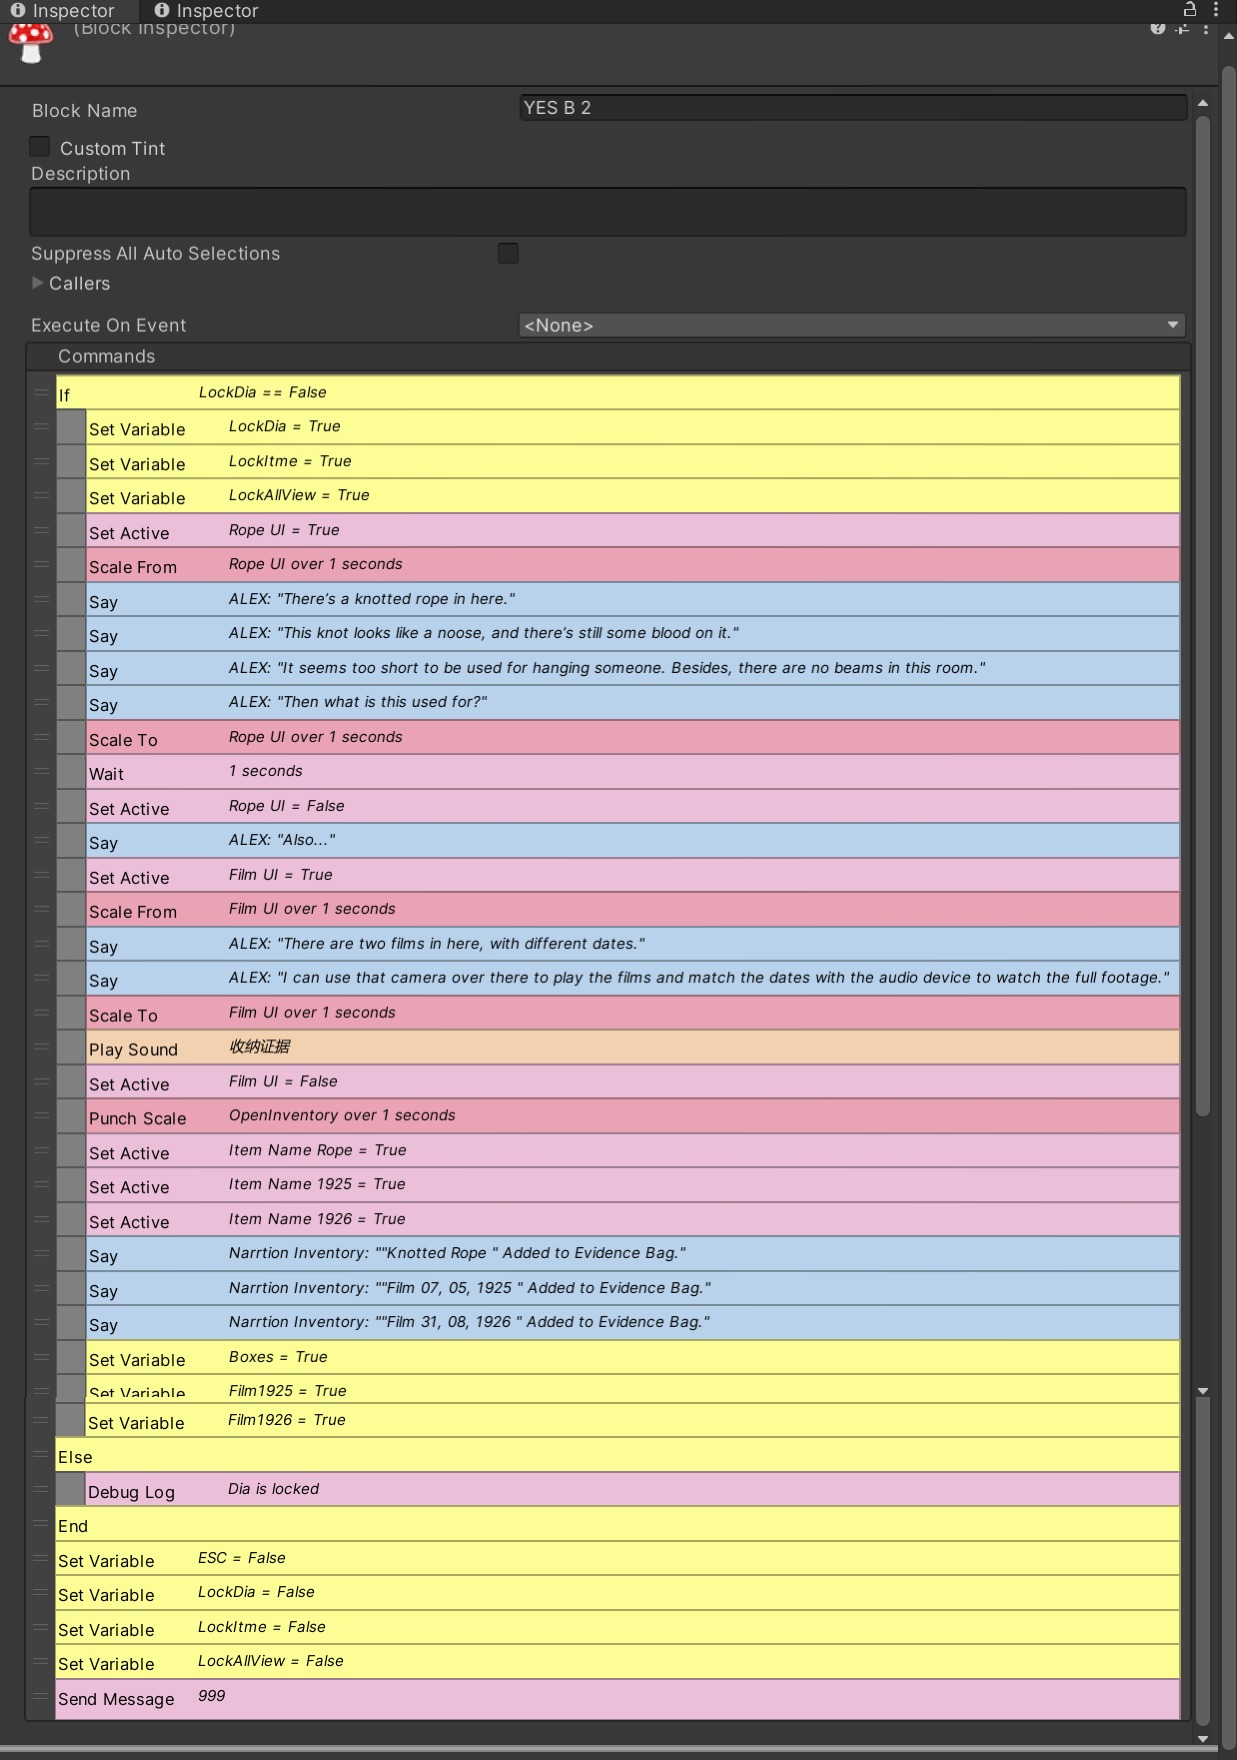
Basement B, Object Clicked: Box Under Sink
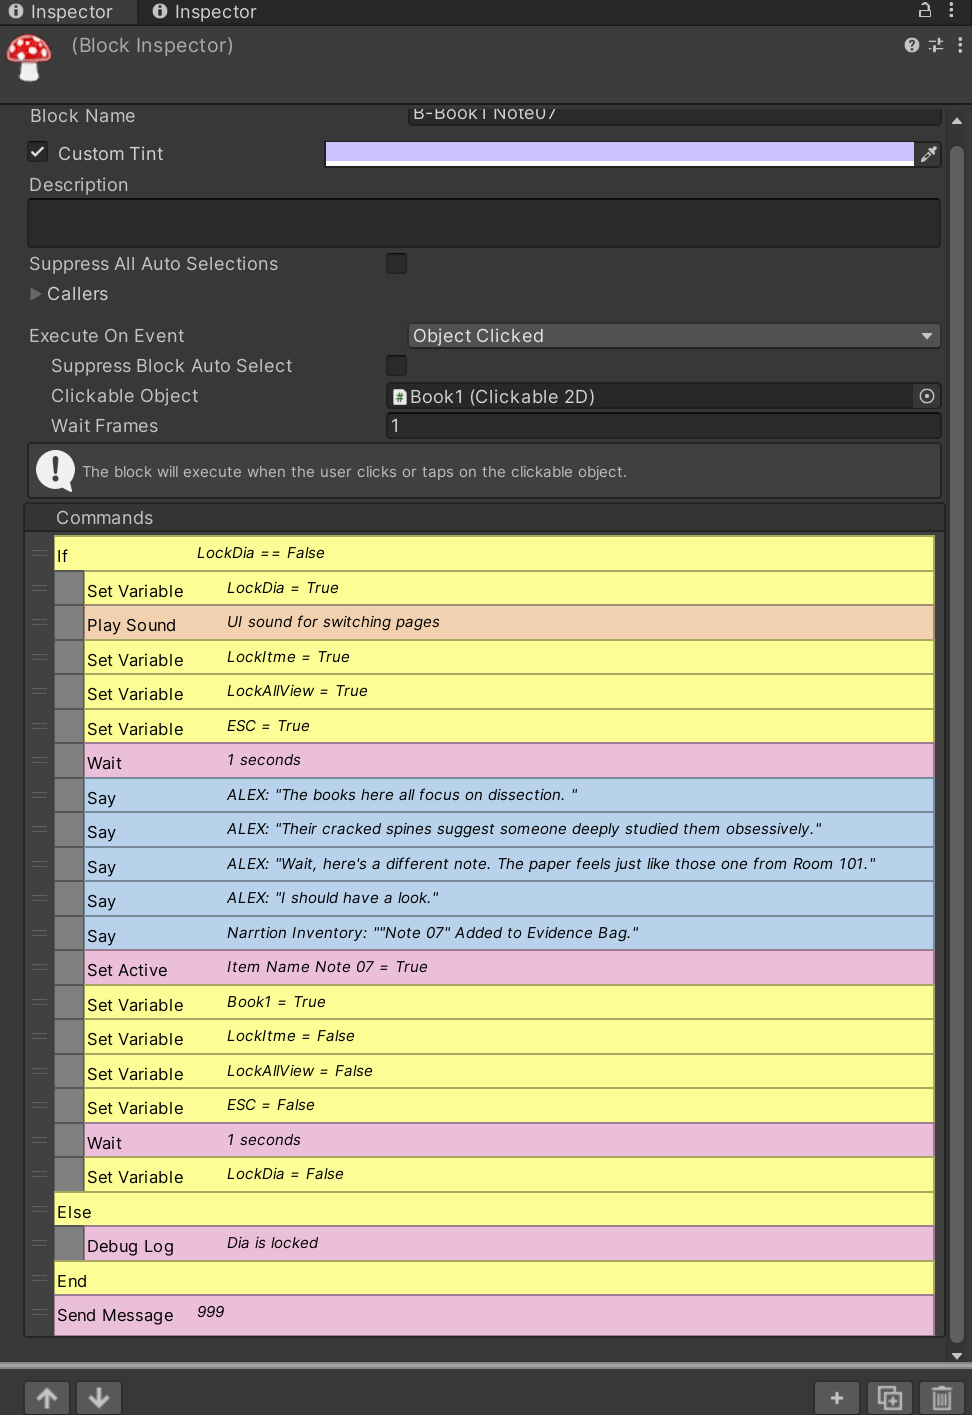
Basement B, Object Clicked: Book 1
(From Left to Right)
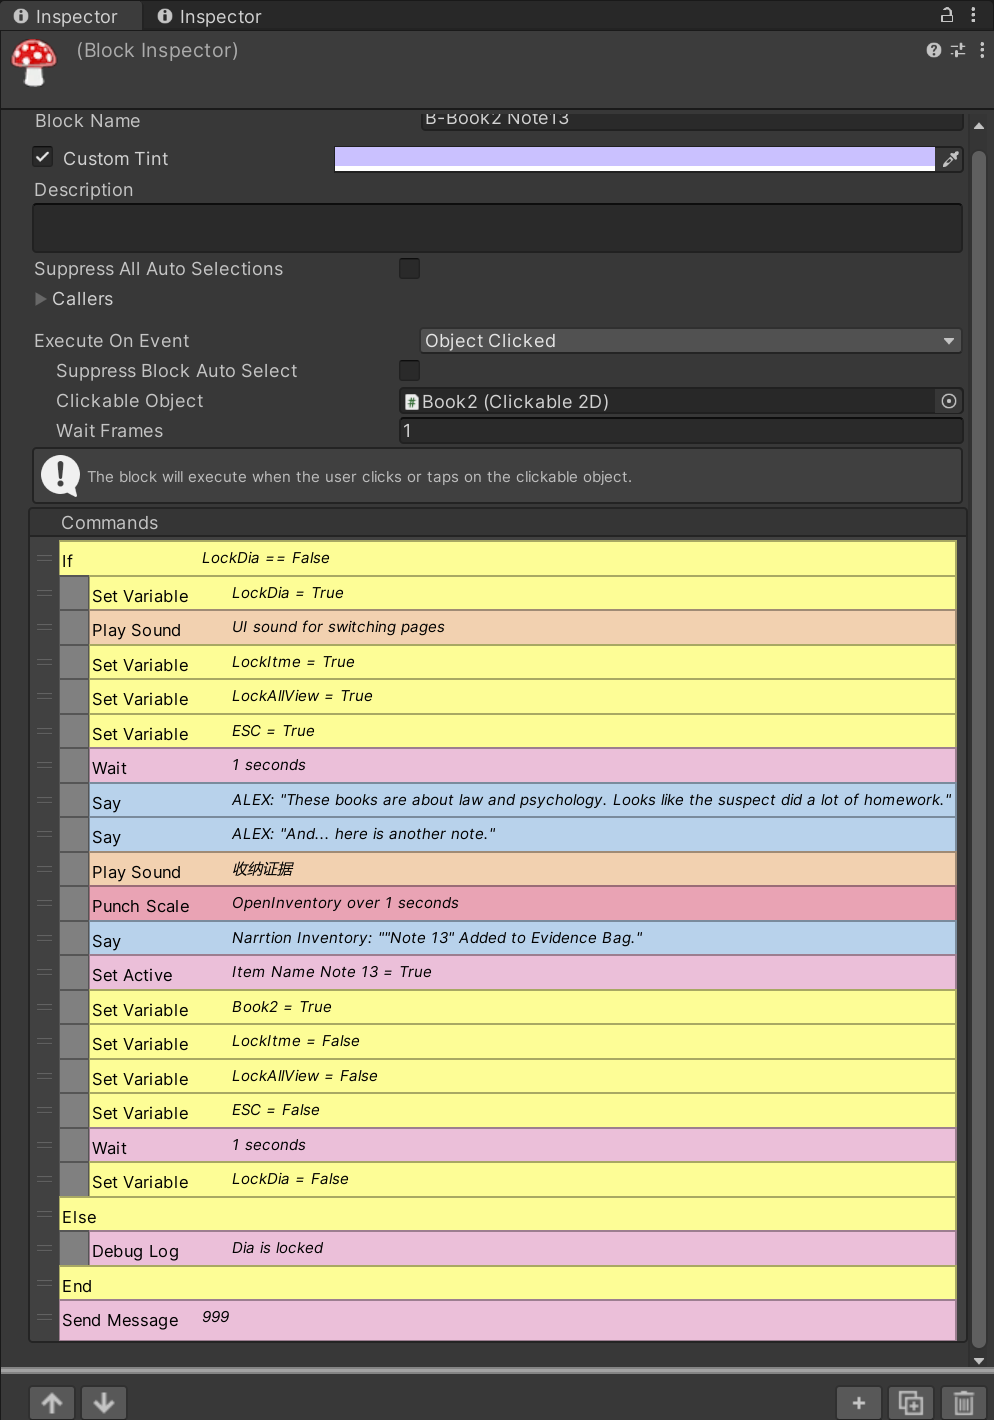
Basement B, Object Clicked: Book 2
(From Left to Right)
Basement B, Object Clicked: Book 3
(From Left to Right)

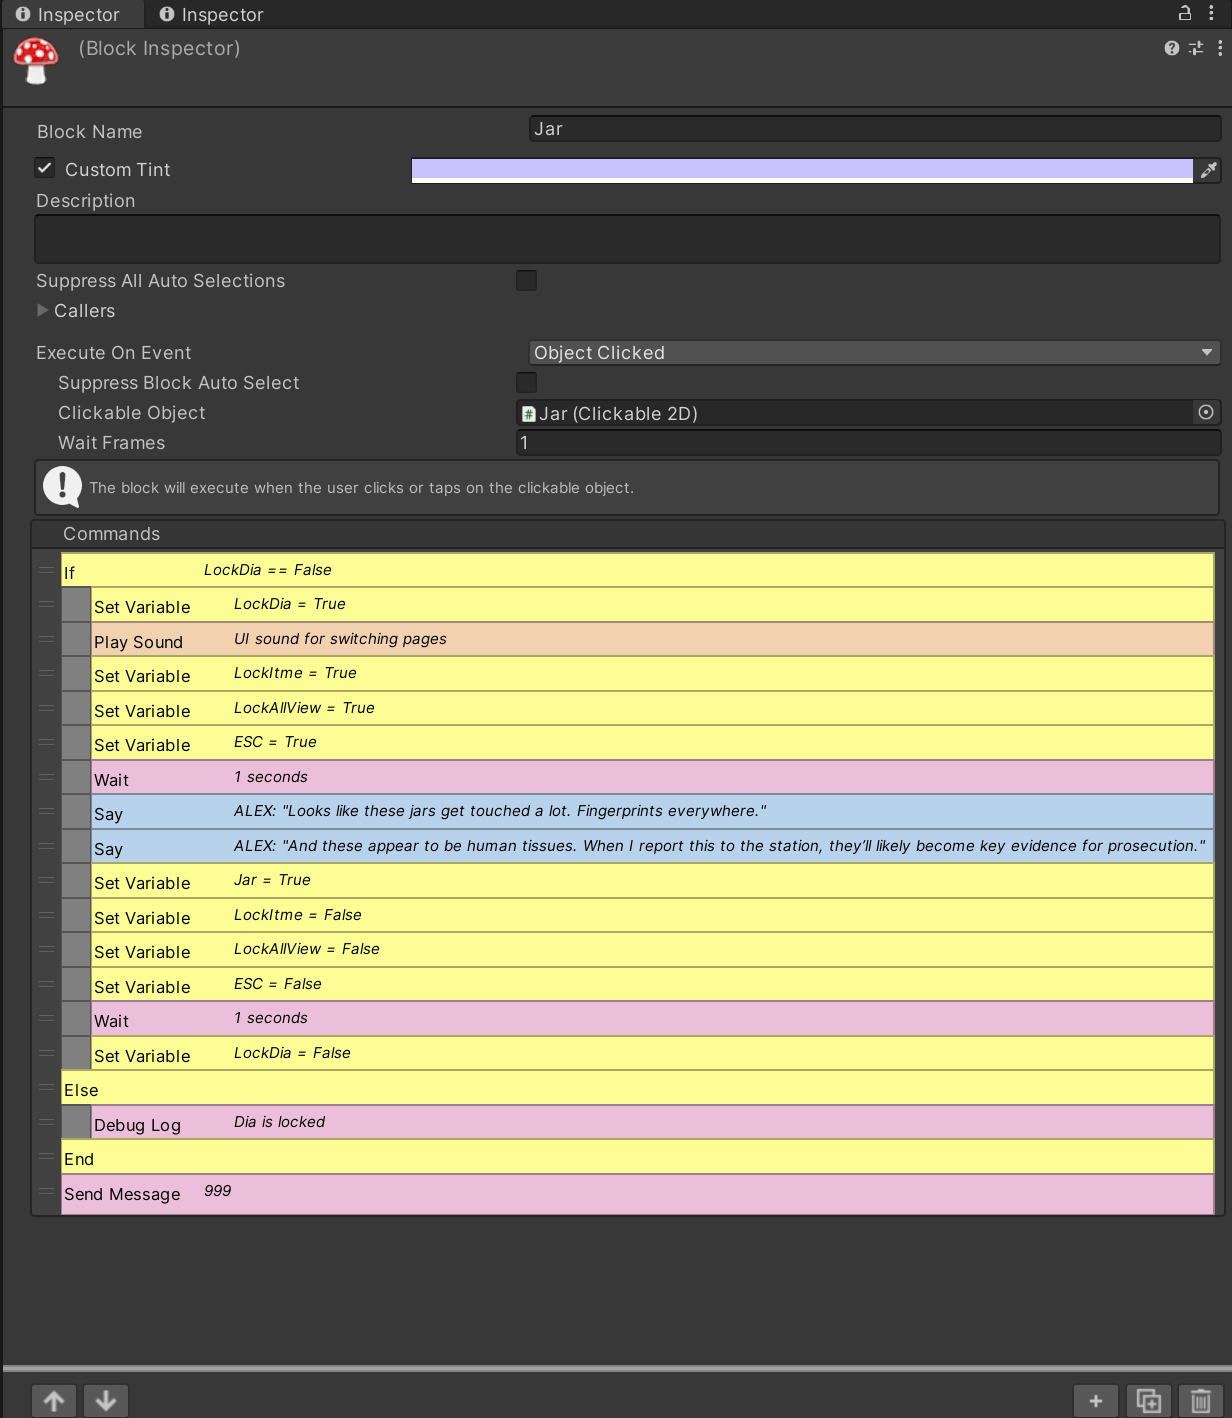
Basement B, Object Clicked: Jar
There are two jars here, but I don’t need them to provide any useful information, so I made only one of them interactive.
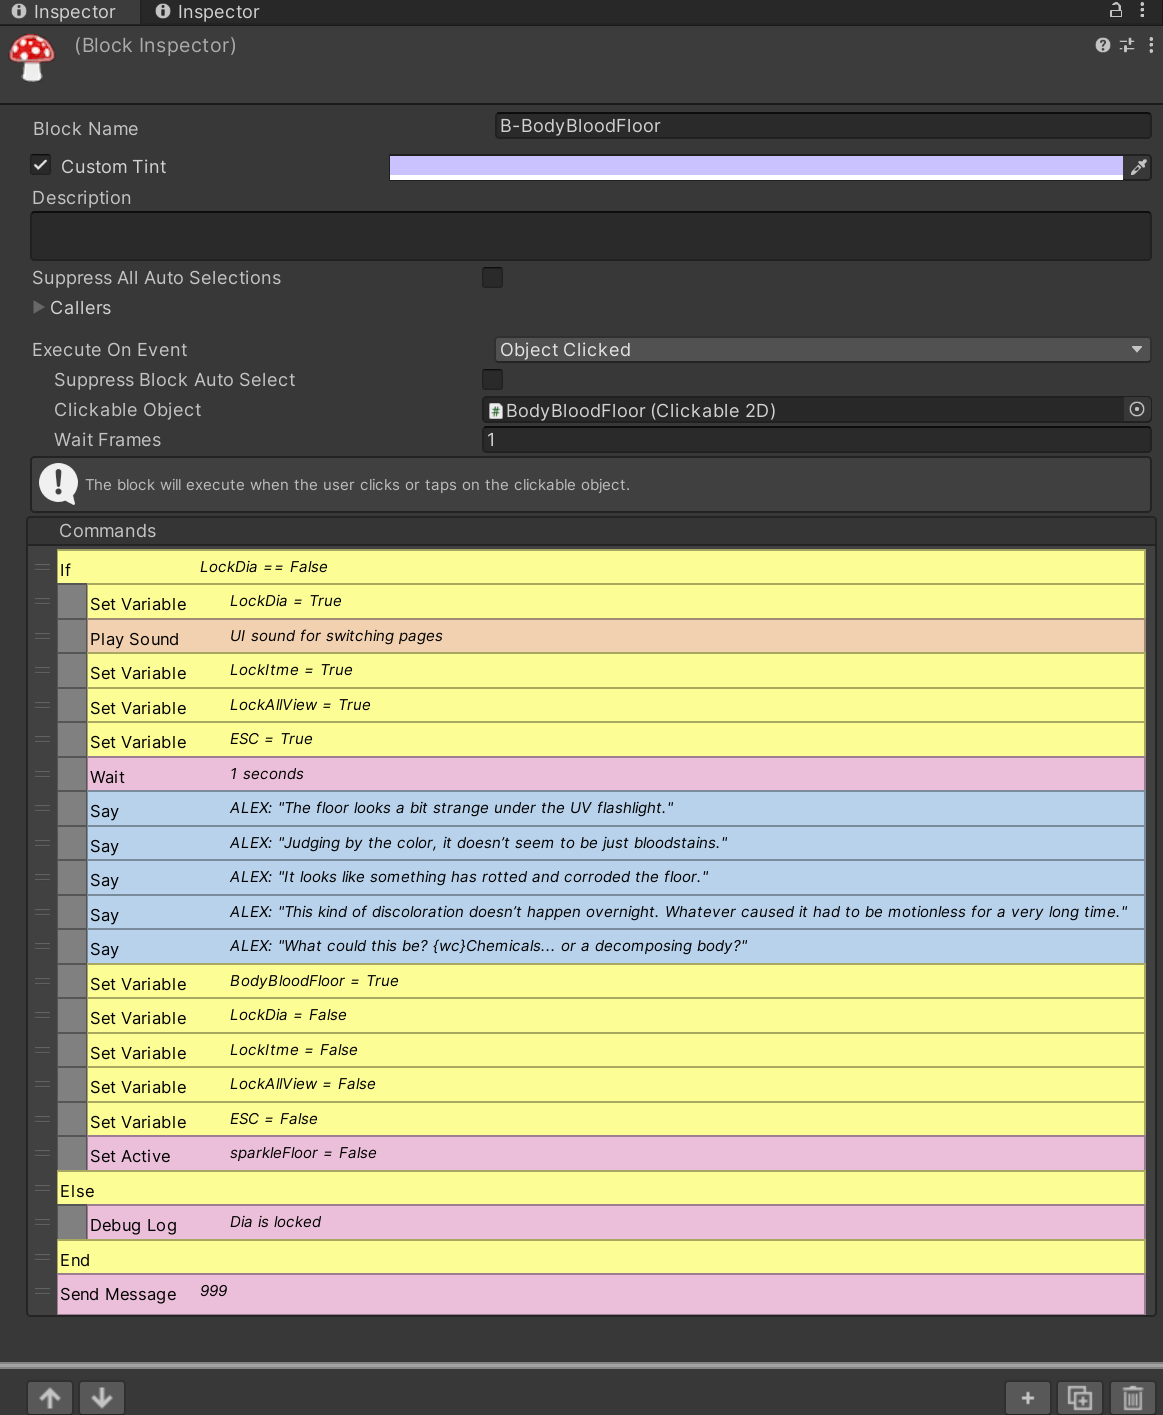
Basement B, Object Clicked: Body on the Floor
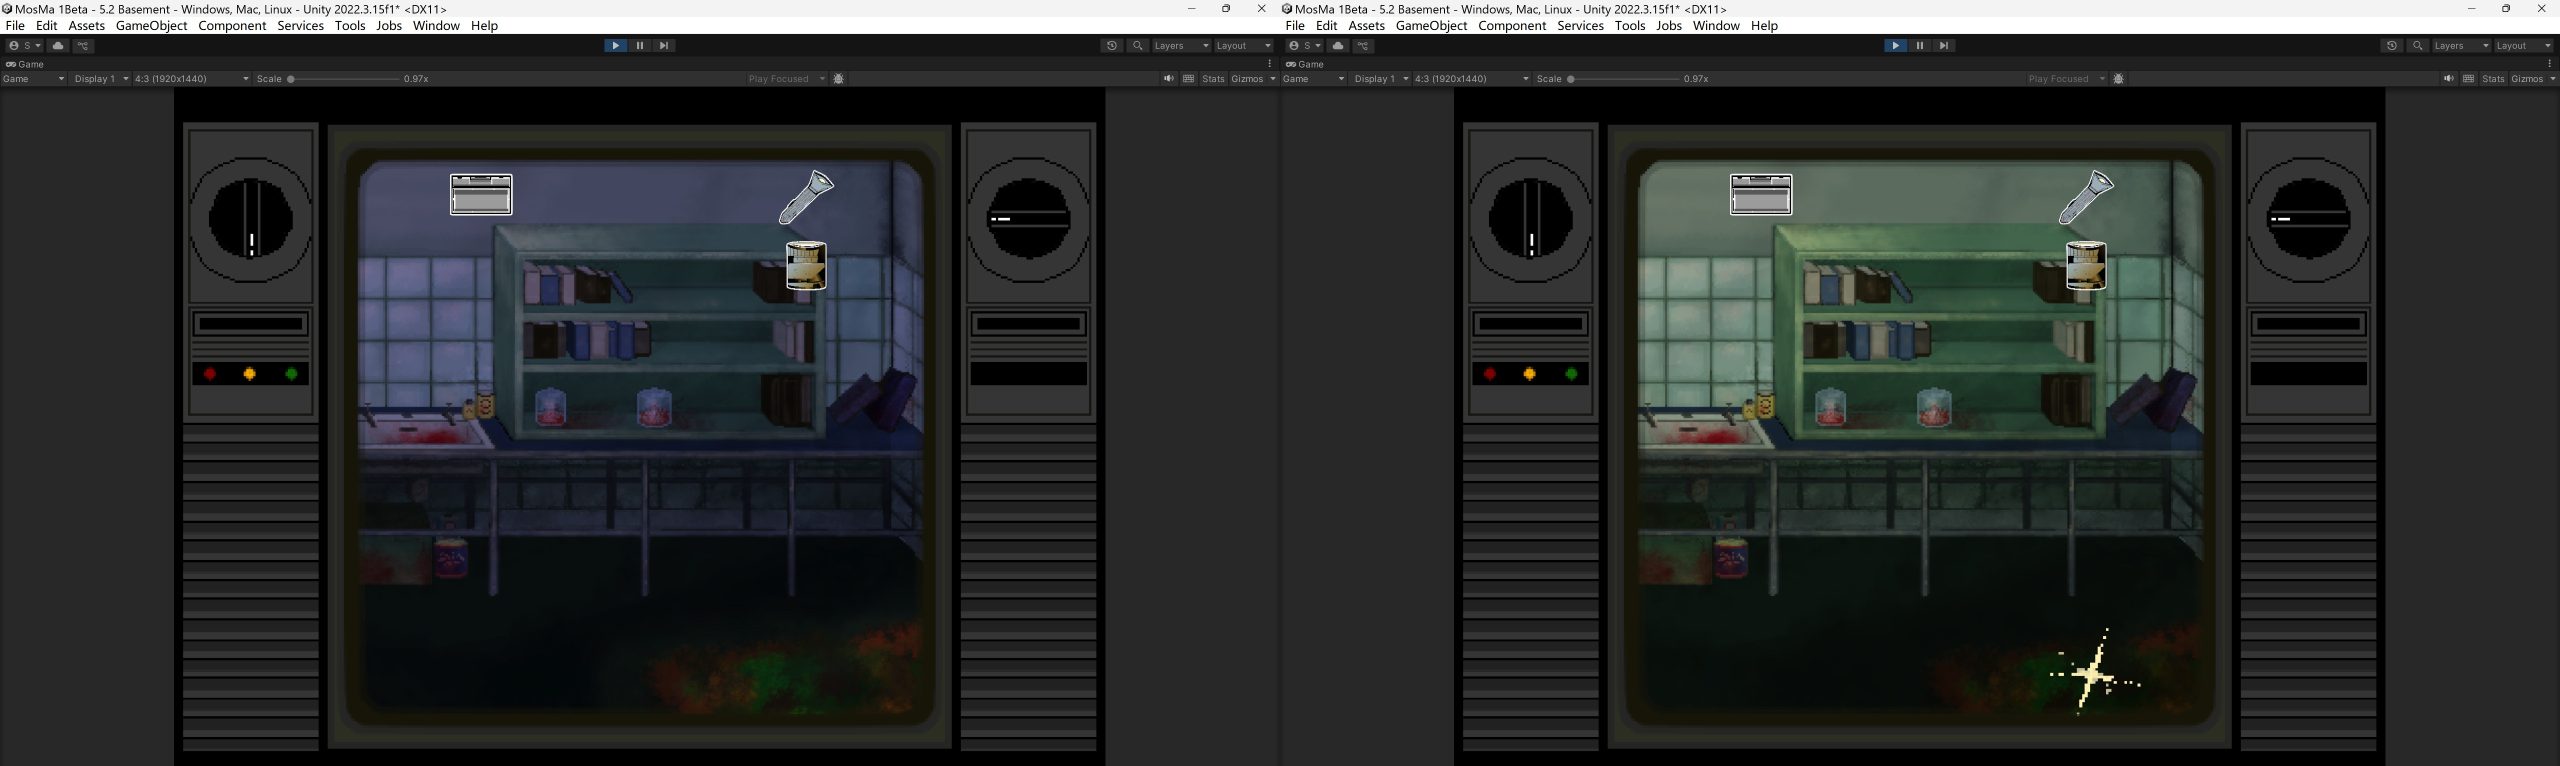
After the player clicks on the UV torch in Basement B, the far-left section of the floor changes to a mix of green, red, and brown tones.
This is where Laura’s body decomposed. I did some research and found that human decomposition produces bodily fluids of various colours, so I adjusted the floor’s appearance to reflect that.
After Everything in the Basement Is Clicked, and the 1925 and 1926 Films Are Watched
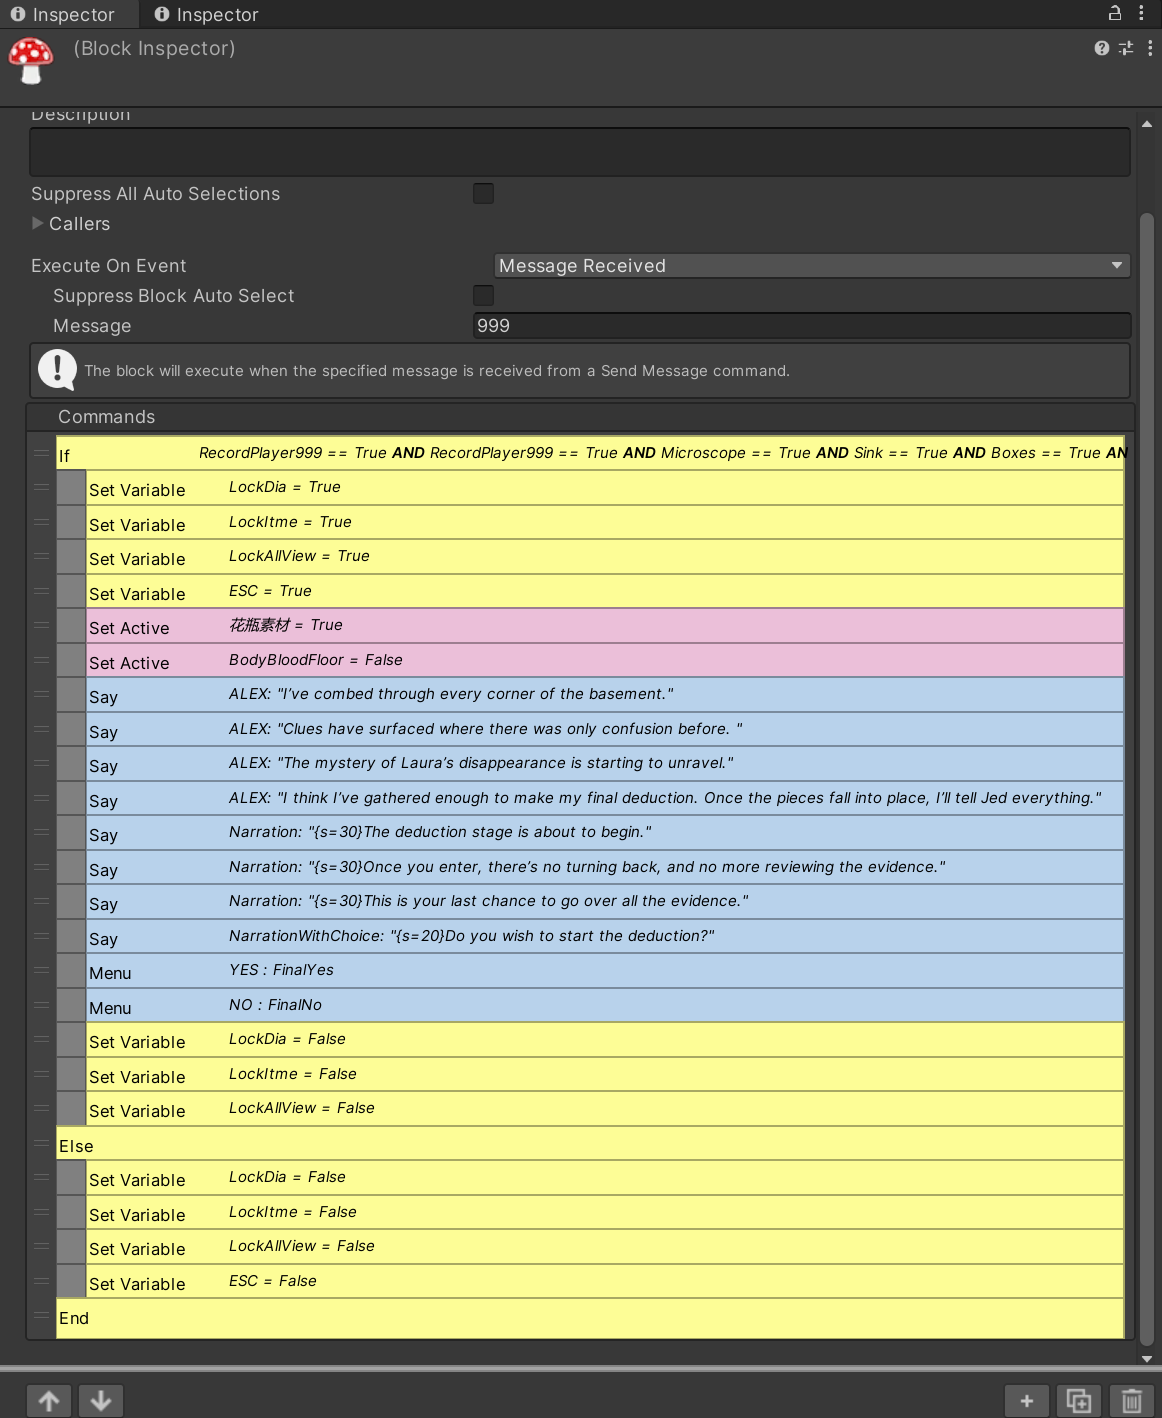
After the player has examined all the items and watched both the 1925 and 1926 films, the game will prompt them to begin the final deduction. However, the player can choose to decline and revisit the items in their inventory for further review.
Each time an item is clicked, a message ‘999’ is sent, and a variable indicating that the item has been clicked is activated. In the block that receives the message, if it detects this message and all the variables are in their activated state, it will trigger the dialogue, which starts the final deduction stage.

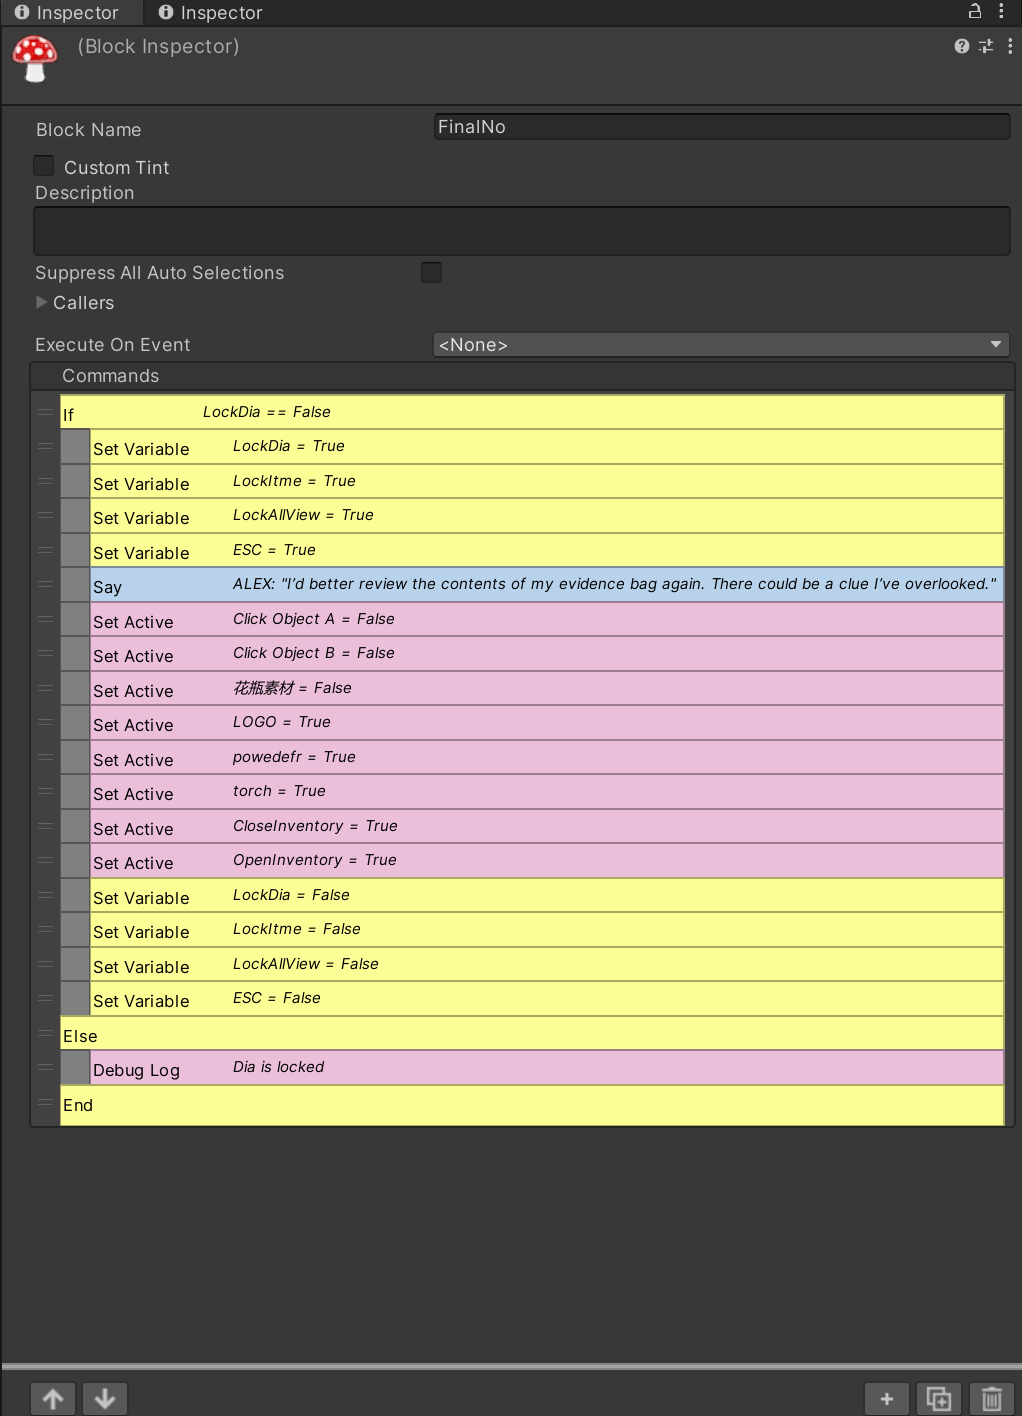
If the player chooses ‘NO’ to examine the inventory, the game logo will be displayed on the screen. The player can then click on the logo to reopen the dialogue asking whether they want to start the deduction stage.

Deduction Stage

The player is first presented with a crucial question: How did Laura die? It’s a tricky one, as the options, suicide and murder, are both difficult to choose between. However, according to the story we’ve written, Laura’s true cause of death is suicide. In the 1926 film, she explicitly mentions wanting to choose her own way of ending, subtly hinting at the true answer.
Furthermore, Rose, the true culprit who locked Laura in the basement, never intended to kill her. Her goal was to keep Laura with her forever. This twisted desire led to this tragedy, but not through a direct act of murder.
So the correct answer is suicide. However, during the showcase, only one player reached the true ending. This made us wonder whether the hints were too subtle. As a result, after the showcase, I added a few more lines of dialogue to guide the player toward the correct conclusion.

The second question is: Who killed Laura? This is another deceptively tricky question. While Rose didn’t directly murder Laura, her actions, locking Laura in the basement, ultimately led to Laura’s suicide. In that sense, Rose is responsible for Laura’s death, making her the real killer.
Throughout the game, we also worked to gradually clear suspicion from the other characters. For example:
- Henry appears only in Laura’s diary and is never directly shown or described in detail, reducing his presence and narrative weight.
- Steve is mentioned in the diary as already being in prison, which rules out the possibility of him committing the crime due to a lack of opportunity.
- Theodore Horton, while unsettling, clearly states in the 1925 film that he has no interest in killing women, and it’s revealed he was already planning to leave the motel.
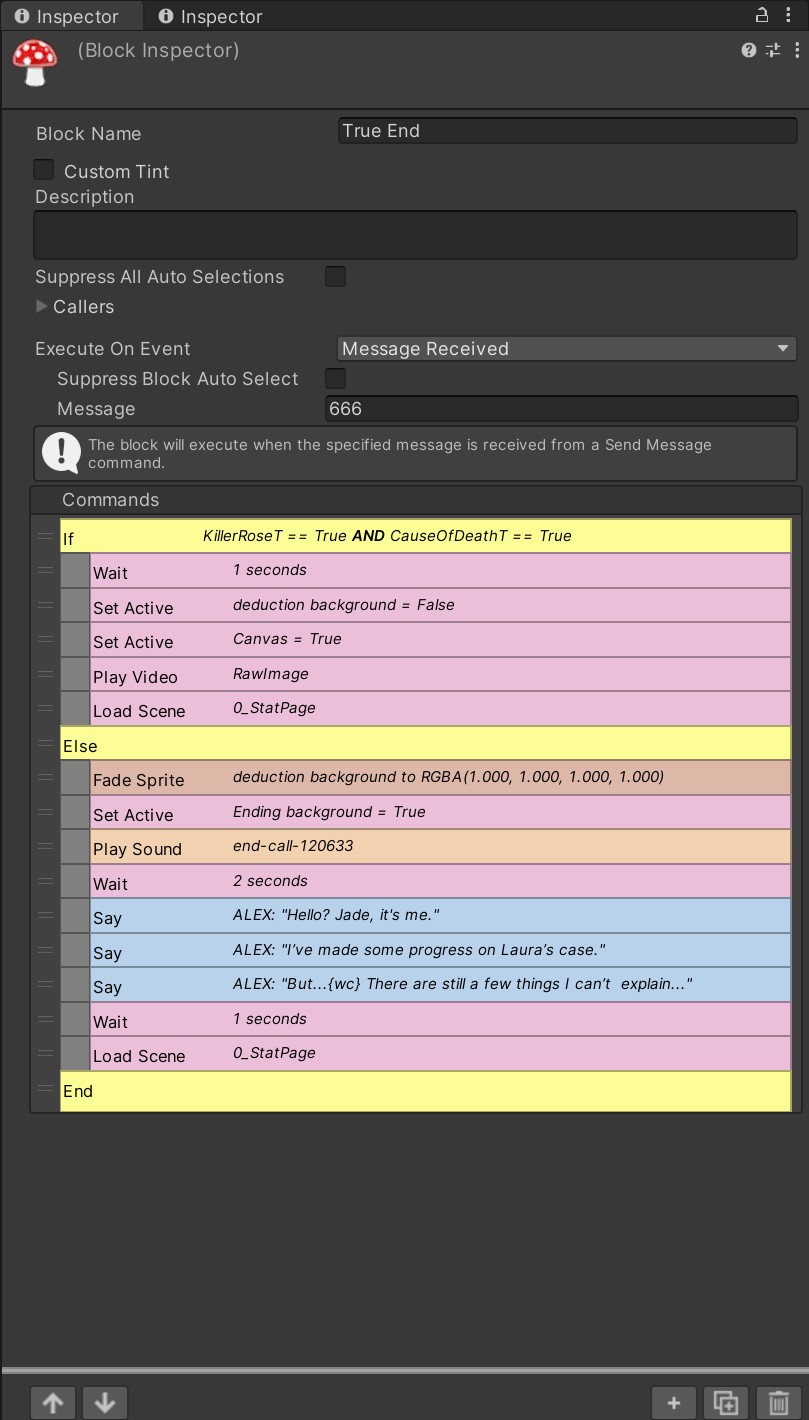
After the player makes their deductions, the game branches into two possible endings based on their choices. If both answers are correct, an animation will play, revealing Rose and Laura’s shared past. However, if either question is answered incorrectly, the game will shift to a conversation between Alex and Jade
Leave a Reply