Narrative
Within week 5 we learnt about adding narrative into our games. On Monday we had our lecture which included some tasks which I will talk about and show below and on Thursday we were lucky enough to have a guest speaker come in who works on creating murder mystery games which is a genre I love so I was very excited about that.
Three Act Structure
To help us come up with how are narratives may flow we looked at this structure
Introduction (beginning) – This is normally where you set the story up
Confrontation (middle) – This is normally where the main event happens within your story
Resolution (end) – Finally after the climax of the story you come towards the end where normally everything gets resolved
Using this type of structure will definitely help when I come to creating my own story board as I will be able to identify the different events that take place within my game and figure out how I need to lay it out for it to make sense.
A key point that I took away from this lesson is that when it comes to creating a narrative, the narrative doesn’t have to be necessarily spoken or written it an be told through images. Which was reassuring to know as sometimes it can be hard to find the words you want to describe what’s going on and it can be easier to tell a story through images. This will definitely be something I consider when it comes to creating my narrative for my game as I’ll identify the key events but then translate them through images within a storyboard.
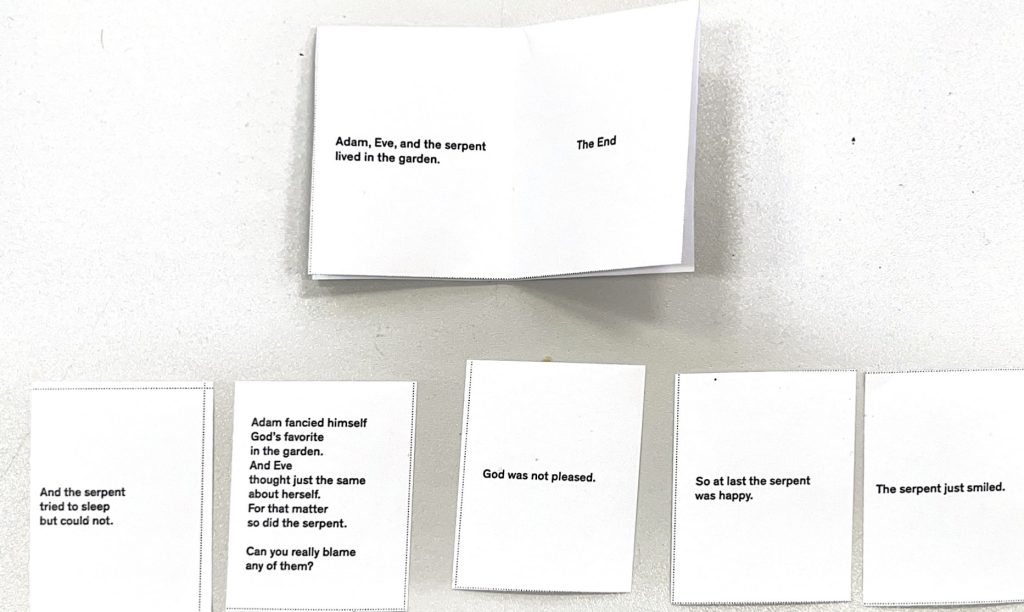
Activity – Deck of stories
During the afternoon session we got set the activity of creating some stories using 12 pieces of paper and then writing on them picking 5 at random then testing if they make sense. We had a list on the board that we got to choose from, myself and my group went with the story of Little Red Riding Hood as it was something we were all familiar with.
Firstly, we had ago with a tester which was premade for us just to give an idea of what it was that we were creating.
Then here’s our one that we created
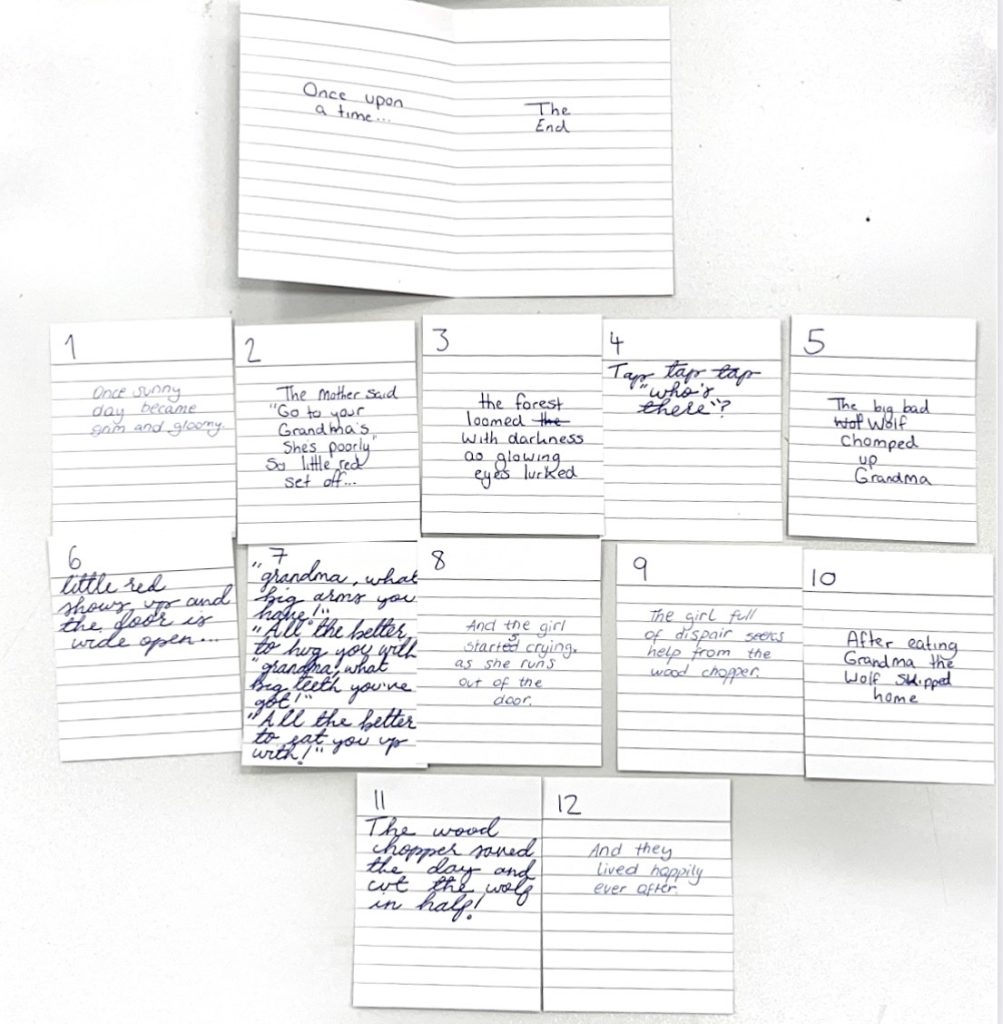
Afterwards we completed our story we then swapped with another group and gave one another feedback.
Feedback that we received was positive saying that they thought it was fun to read and that it had some strong elements to it.
Thursday’s Guest Speaker
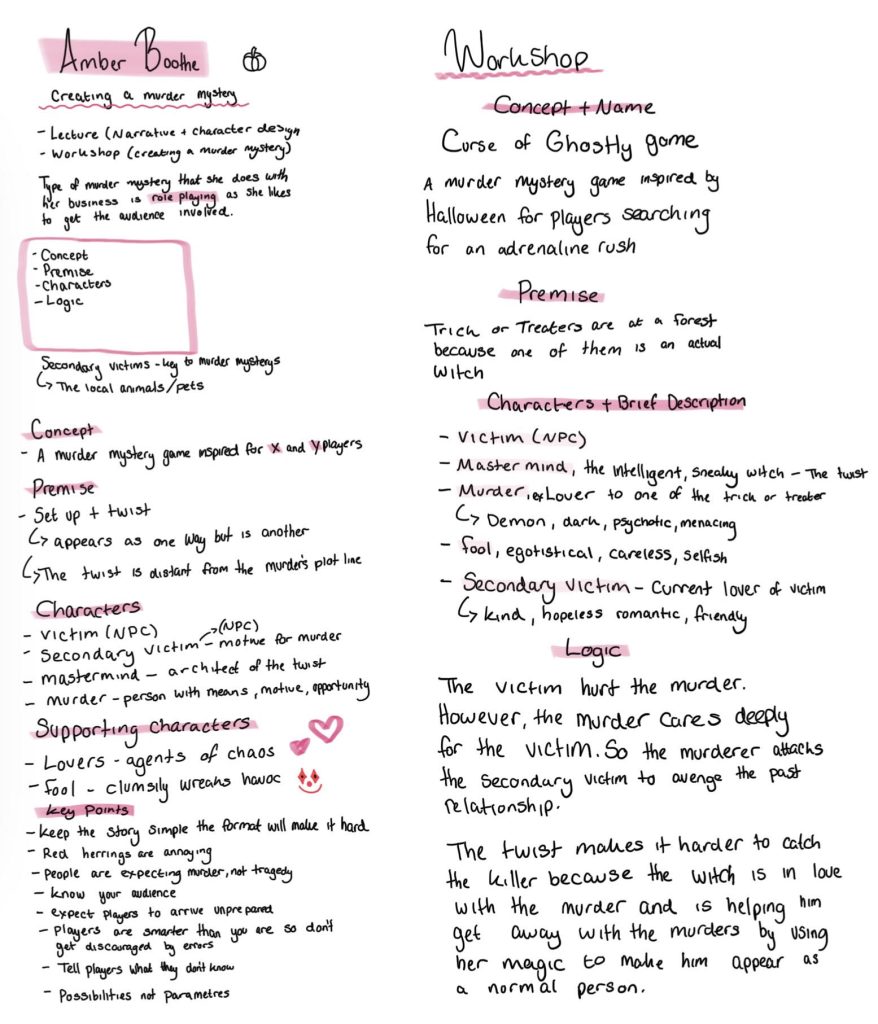
During our Thursday lesson we had a guest speaker called Amber Boothe who created murder mystery games for events. She gave us some really good tips covering both character and narrative design as shown in my notes to the side. In the second part of her lecture she set us the workshop of creating our own murder mystery games which I found really enjoyable. At the end of our talk she gave some really nice feedback stating that we all had some really good ideas which definitely could be turned into some games that she would use at her events.
Week 6
Game loops and Game systems + feedback
What components makes a good game loop?
• The player has an opportunity to ‘grow their skills’ and become better at playing the game.
• The loop can be used as an alternative to simply creating more content without causing players to feel like the game is stretched thin.
• The loop provides a consistent unifying experience so that players know what they are getting into as they enter new scenes of the game.
Questions to consider when thinking of my own gameplay loop
- What is the player’s goal at this moment
- What feedback will help them toward that goal?
Feedback
Before I get into the beginning of my game loop etc. I was paired up with another peer where we both had similar essential experiences and so we were able to explain our ideas and then gave one another feedback, I really enjoyed our conversation as the feedback given to one another was informative and helpful. They were also very helpful in the feedback they gave on my story board as well as helping me to start thinking of a flowchart to help aid my gameplay loop.
Flowchart
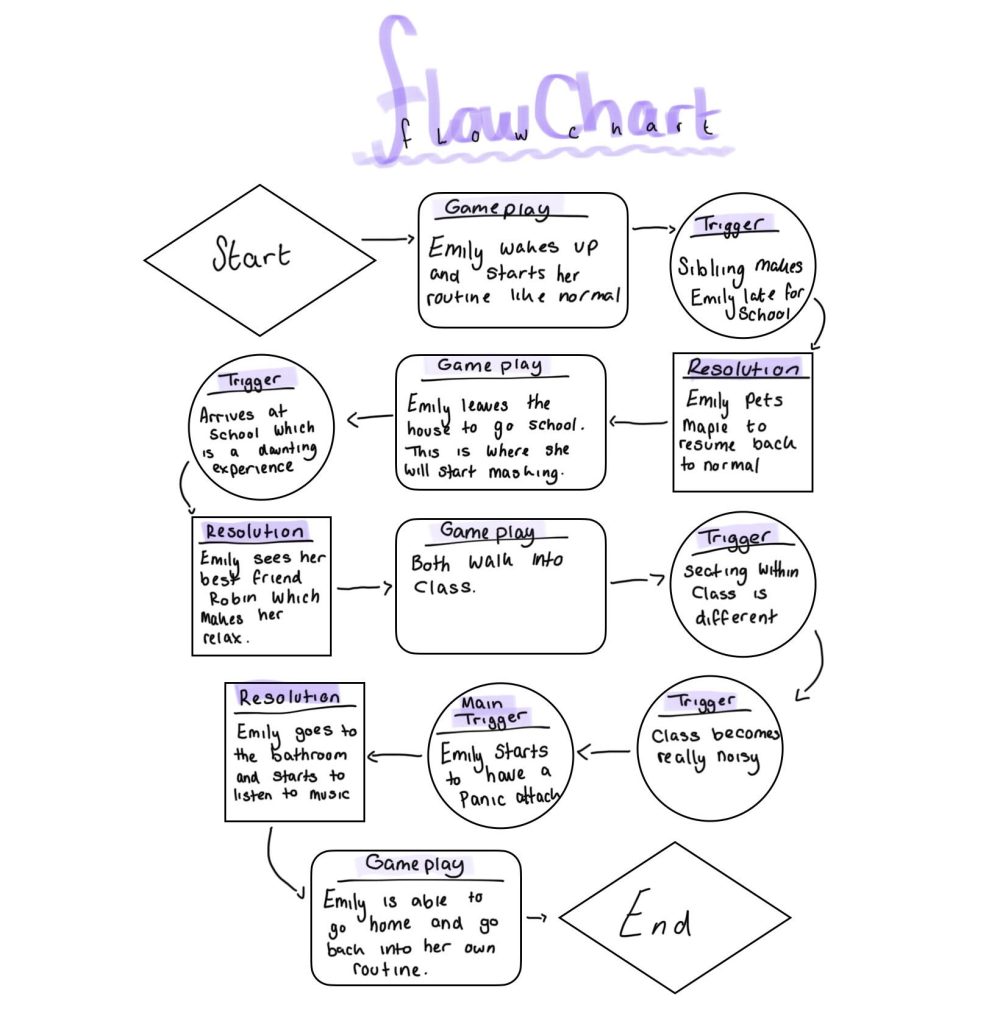
Within the lesson here was a little mockup of a flowchart that I did to help come up with a gameplay loop. I referred back to my story board to help me identify different sections of my game and I found for the majority it followed a set pattern, gameplay, trigger & resolution. However, when leading up to the main trigger the pattern changed and there appeared to be more triggers with a final resolution to help ease the character back into her normal storyline. I was also able to speak to Vanissa as initially I had no idea on how to create a gameplay loop let alone what would go in one but afterwards it became a lot more clearer and I was able to identify my gameplay loop (can be found here)
Week 6 Guest Speaker
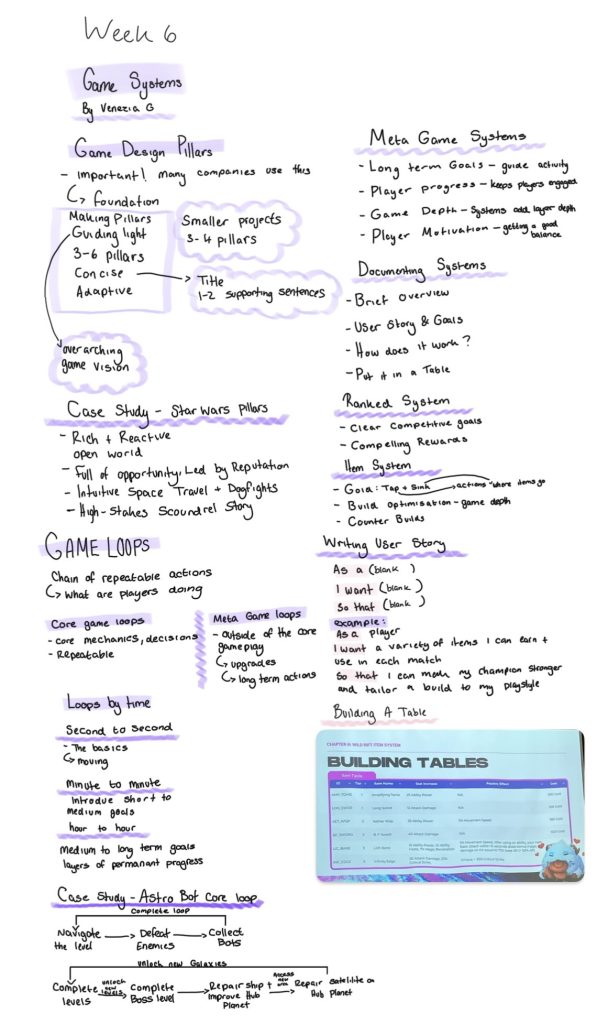
In week 6 we had Veneiza come in to talk to us about game systems where we learnt about game design pillars, game loops and some game systems. During the lecture we had discussion time and I was able to speak to both Vanissa and Venezia about how I was struggling with my game loop and how I could add resources in and Venezia gave some feedback that sometimes there might not be obvious resources but also if there wasn’t any that was completely ok as well. After this discussion I decided to go back and revisit my game loop which can be found here.