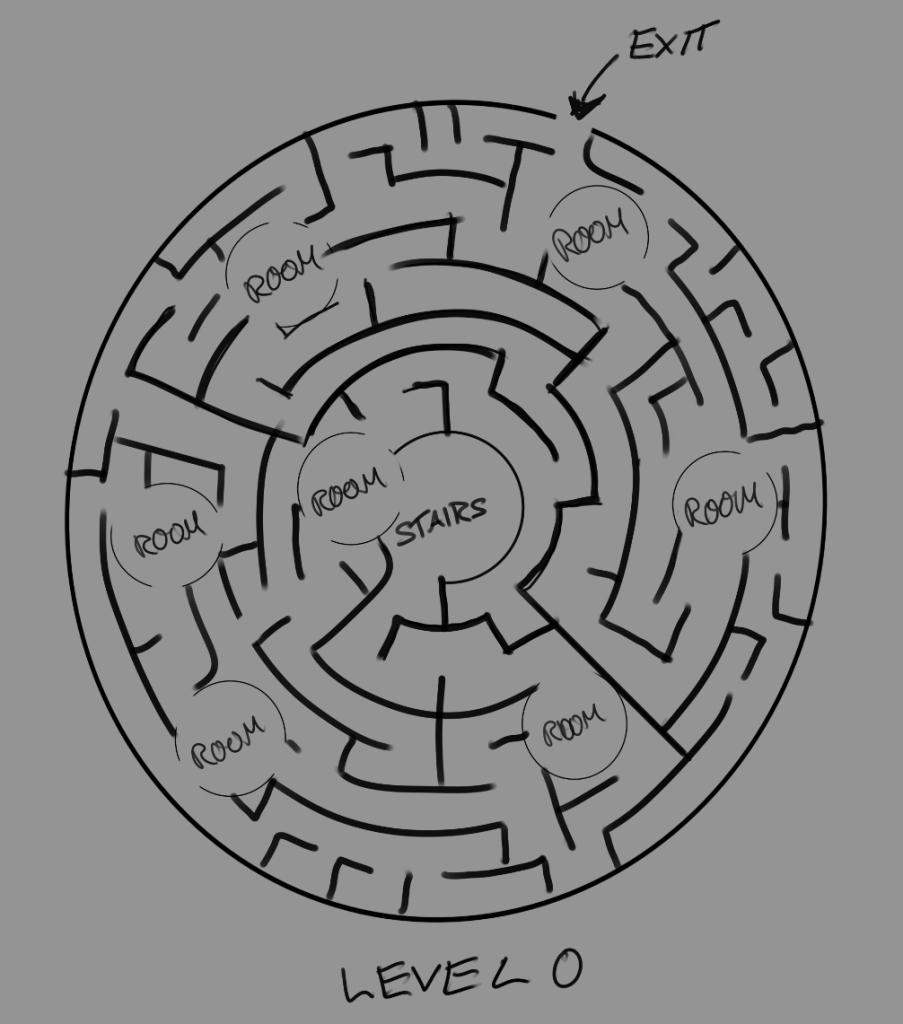
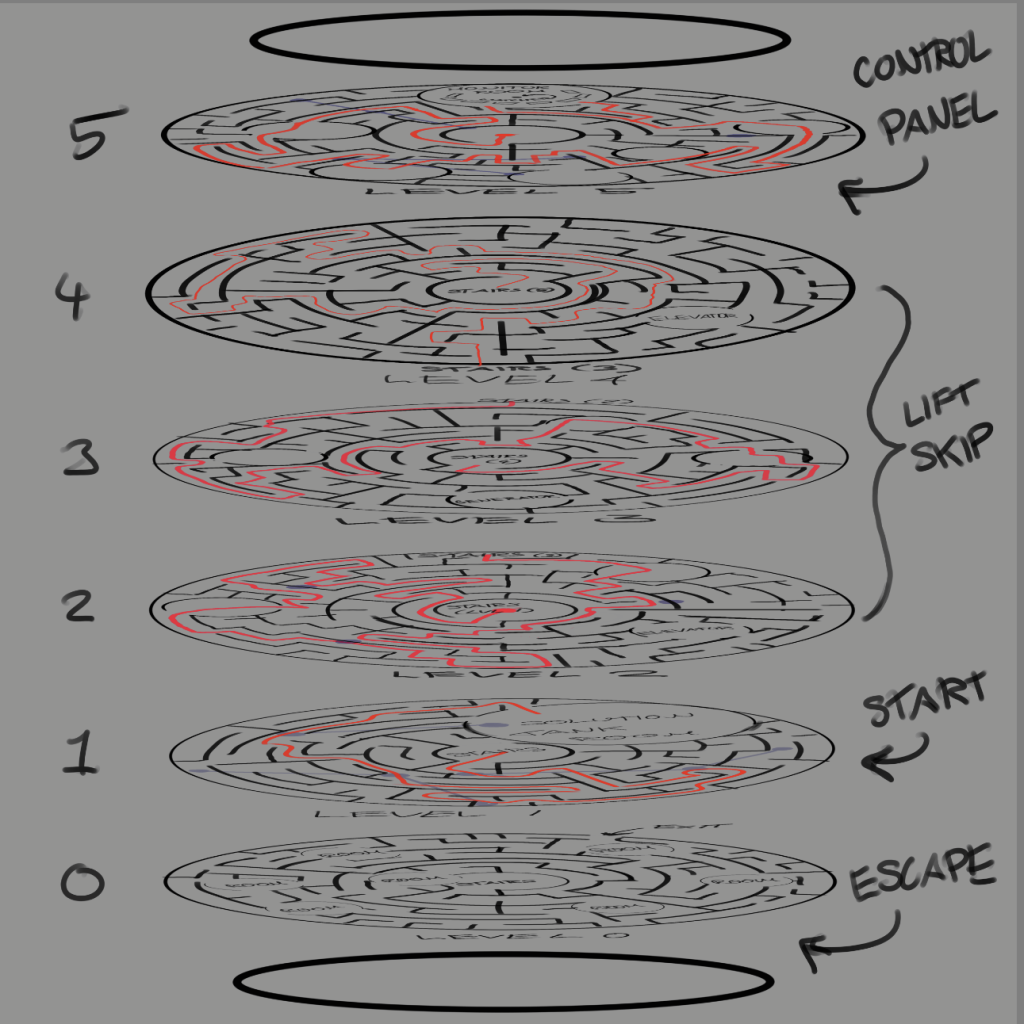
For mapping I wanted a rounded, cylindrical look to both represent a tower and make the payer feel as though they are “spiralling”. Each tower level has some uniqueness to it to make progression more interesting.
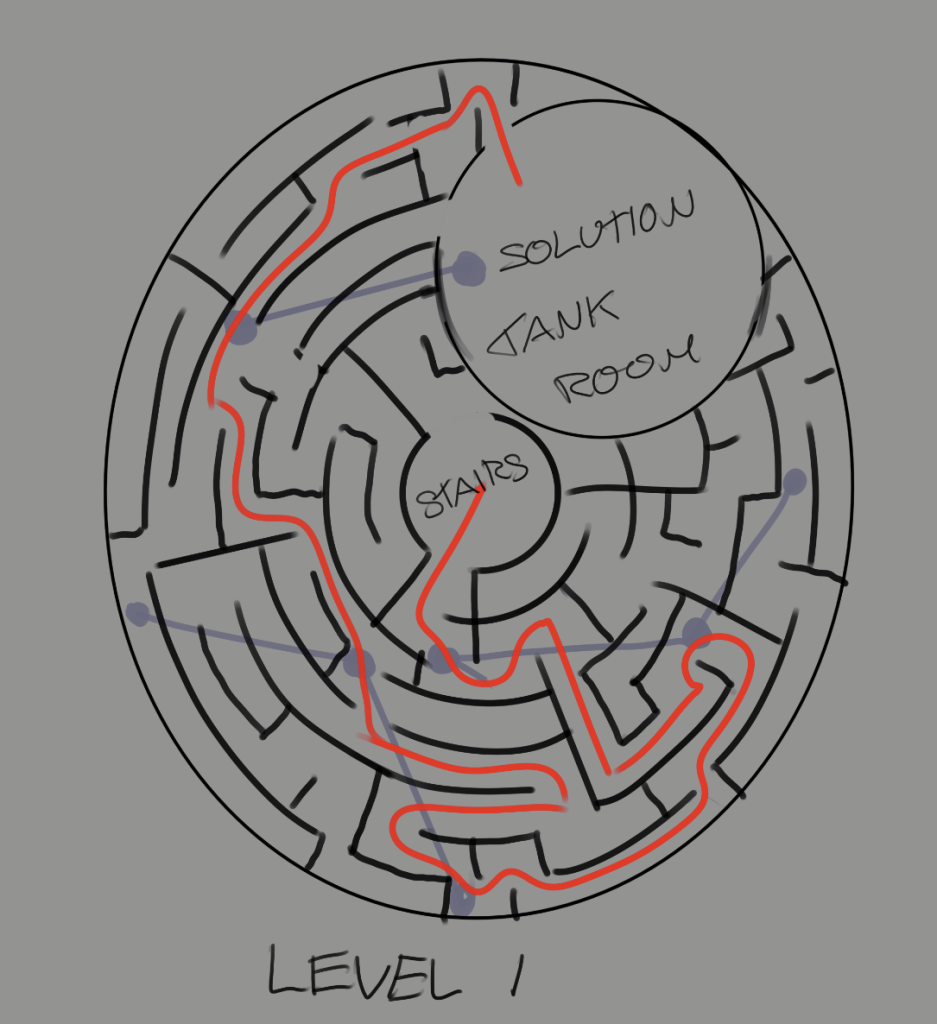
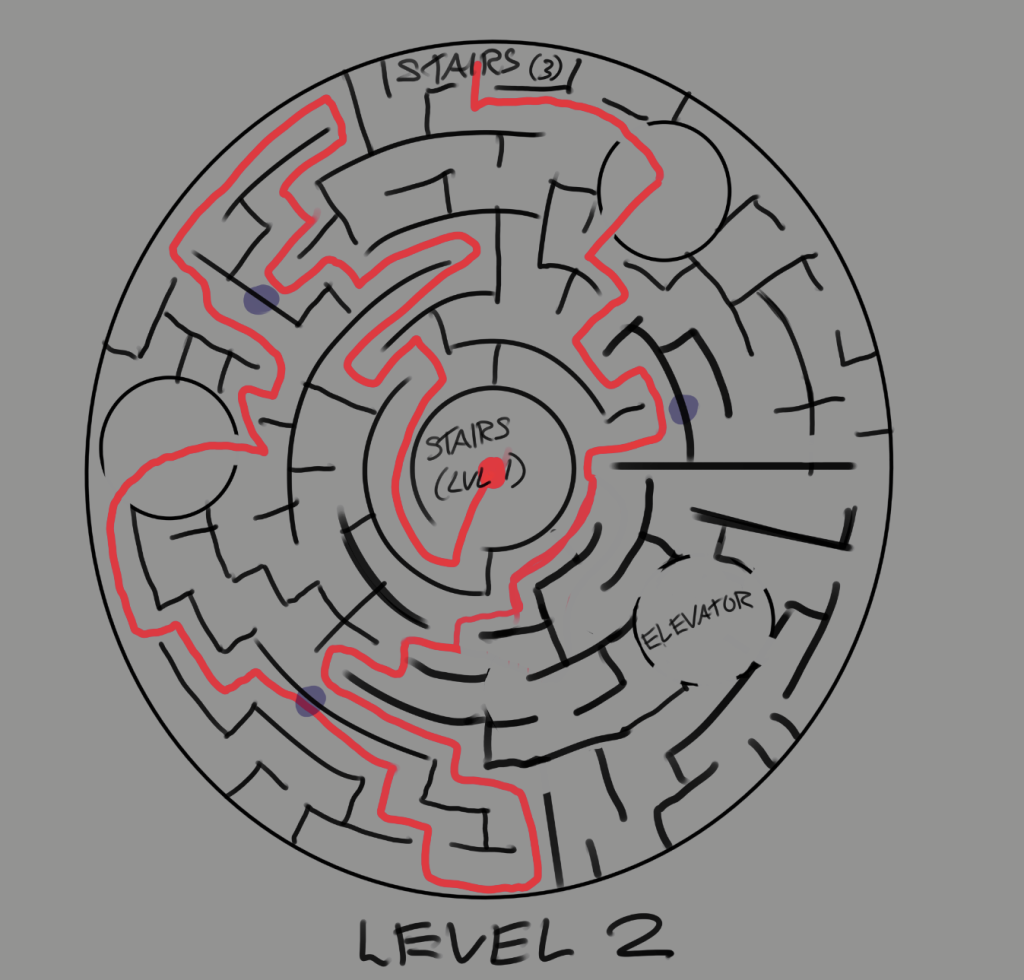
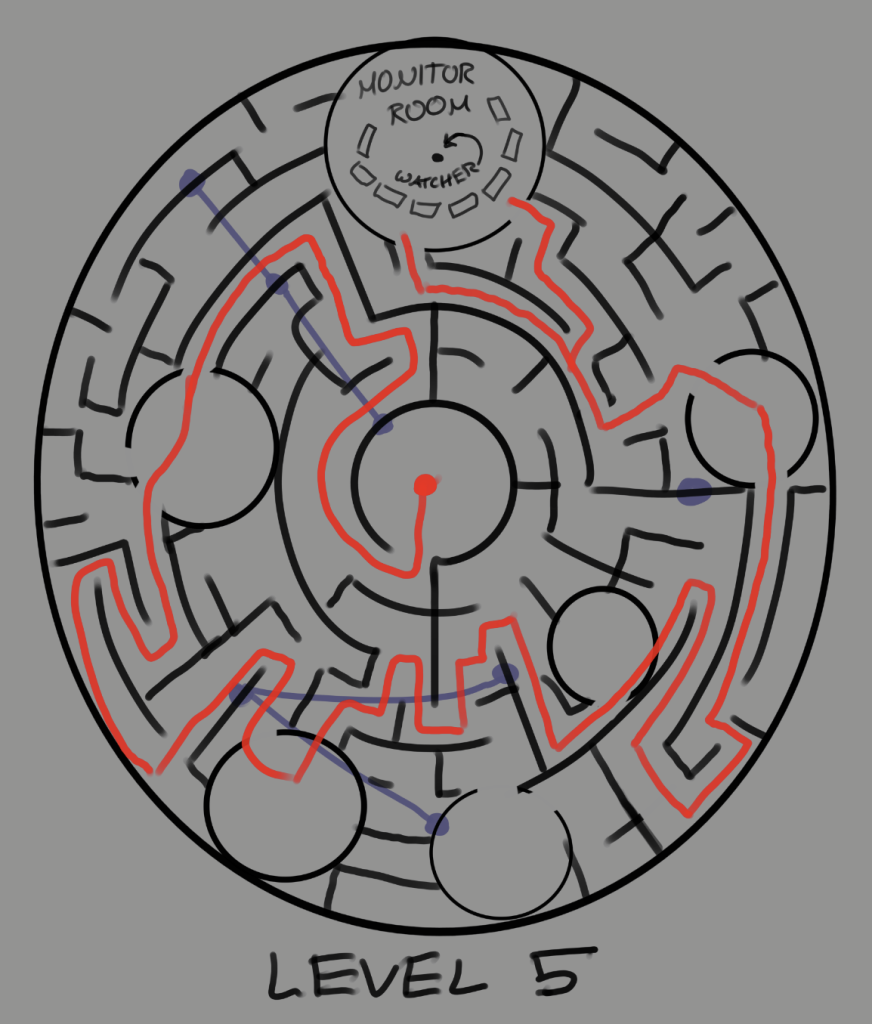
KEY:
- Red Lines: most optimal escape path
- Faded Blue: ventilation crawlspaces
Level 0 – Escape floor. This one is designed to be the most difficult, and as such has the most long-winded solution, many rooms, and no vents to exploit.
Level 1 – Easiest level. Most of it is taken up by the solution tank room. Multiple vents can be used, although some are red herrings.
Level 2 – More difficult, and features the elevator. While not on the most optimal path, the elevator will allow you to bypass level 3 – however is very difficult to do so.
Level 3 – Features the power generator. Tripping this allows you to cut power to the cameras for a precious few minutes, allowing the player to quickly run through a lot of the level.
Level 4 – The second to last hardest. Features where the elevator comes up, although it is difficult to leave the elevator without being seen.
Level 5 – Hardest room. Monitor room itself has cameras. You must sneak around the monitors and come up from behind to surprise-attack the Watcher.

Leave a Reply