Overview
PARANOIA is a 3-act game where every phase affects the next. New players will feel the authentic horror of realising this, while returning players can employ a level of strategy in knowing and working around it – this way the game has some replayability.
Phase 1
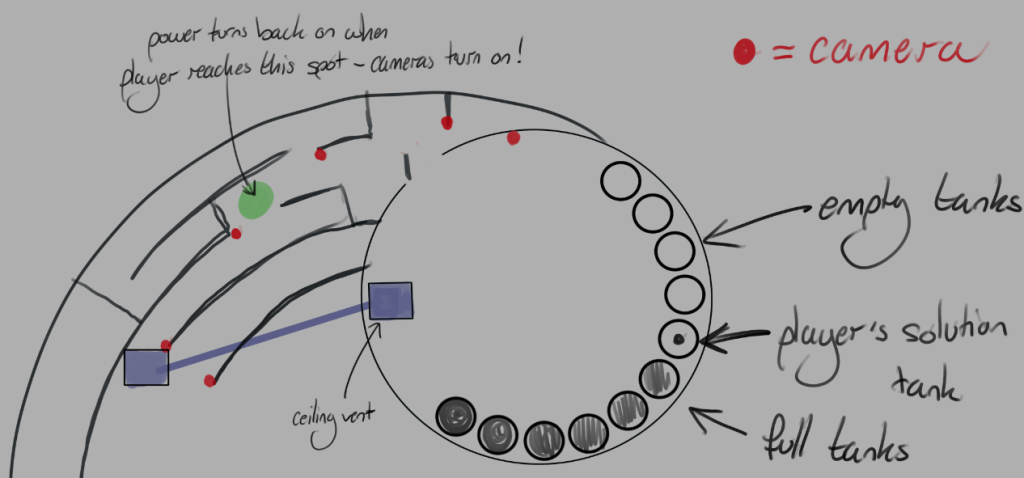
Tutorial Level (Solution Tank Room)
The Solution Tank Room on Level 1 serves as a brief tutorial to key players in to their goals without a lengthy cutscene/exposition. It features the Solution Tanks, machines, a single camera, and hidden clues hinting at escape.
Depending on what clues the players manage to find, they will get a hint to avoid cameras, a hint to use vents, a hint to destroy cameras, and a map of the facility. Playstyle will differ depending on which clues the player is able to find, or what they are able to pick up intuitively. The stakes are low, because the power has not come on yet, therefore they are not being watched by the camera yet.
From the tutorial there are 2 exits:
- Through the main door
- The main door leads into a sterile corridor with cameras perched just outside the door’s frame, and one on the junction of each end. Once past this corridor, the power should switch back on and the cameras come alive.
- Through a vent
- If the player manages to use a vent, the power will switch back on by the time they reach its end. Before they exit the vent, they have to get past 2 stationed cameras by using their blind spot, however they will have travelled further than by using the main door if they manage it.
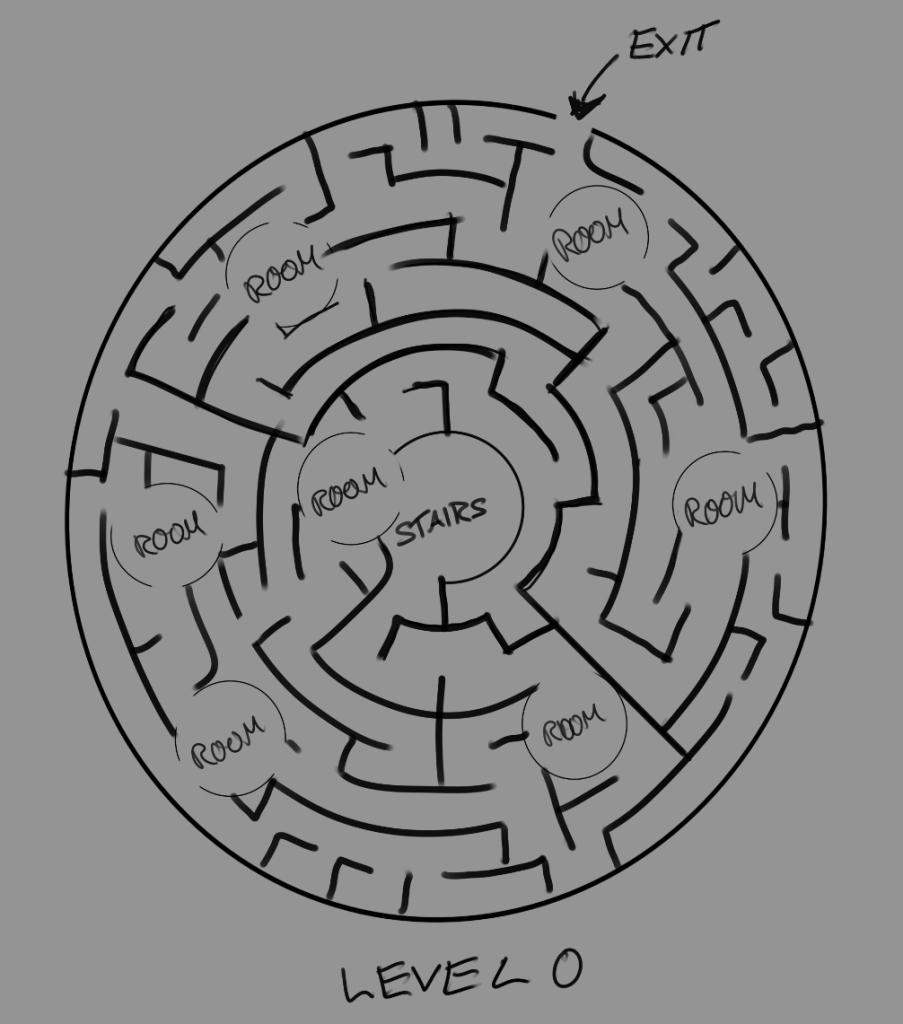
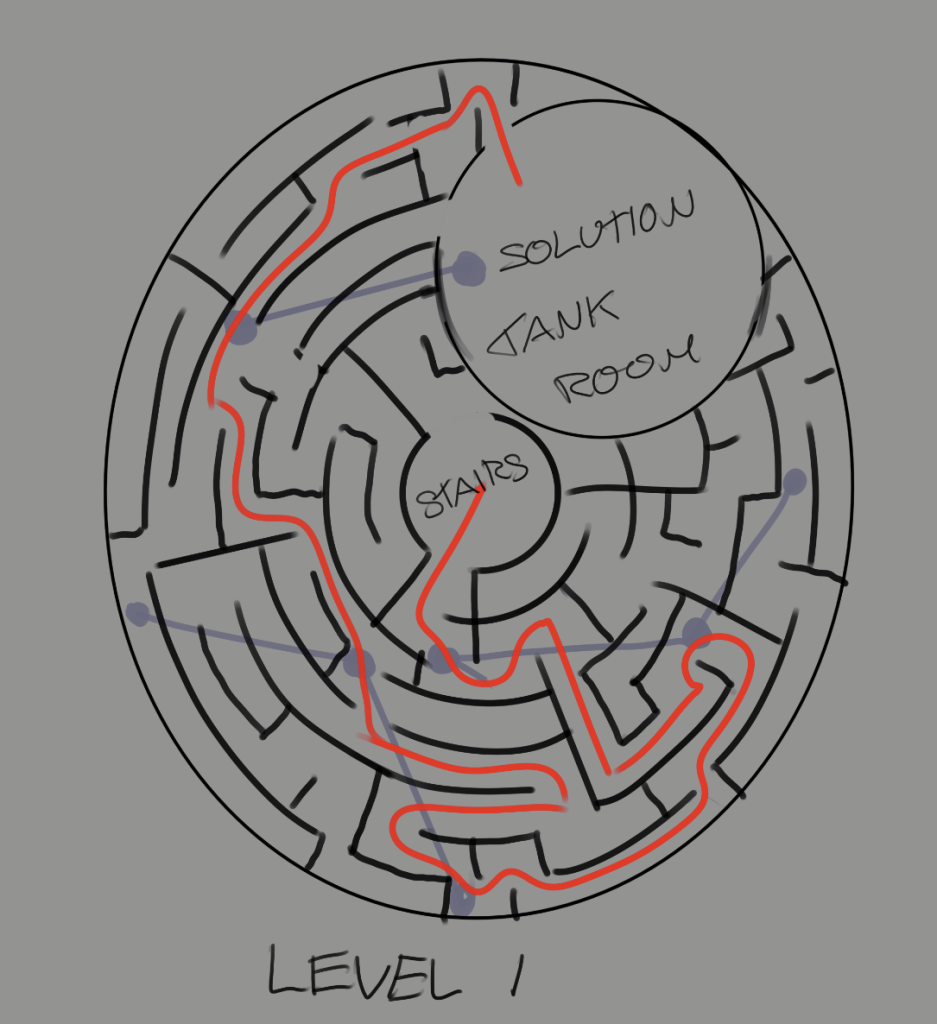
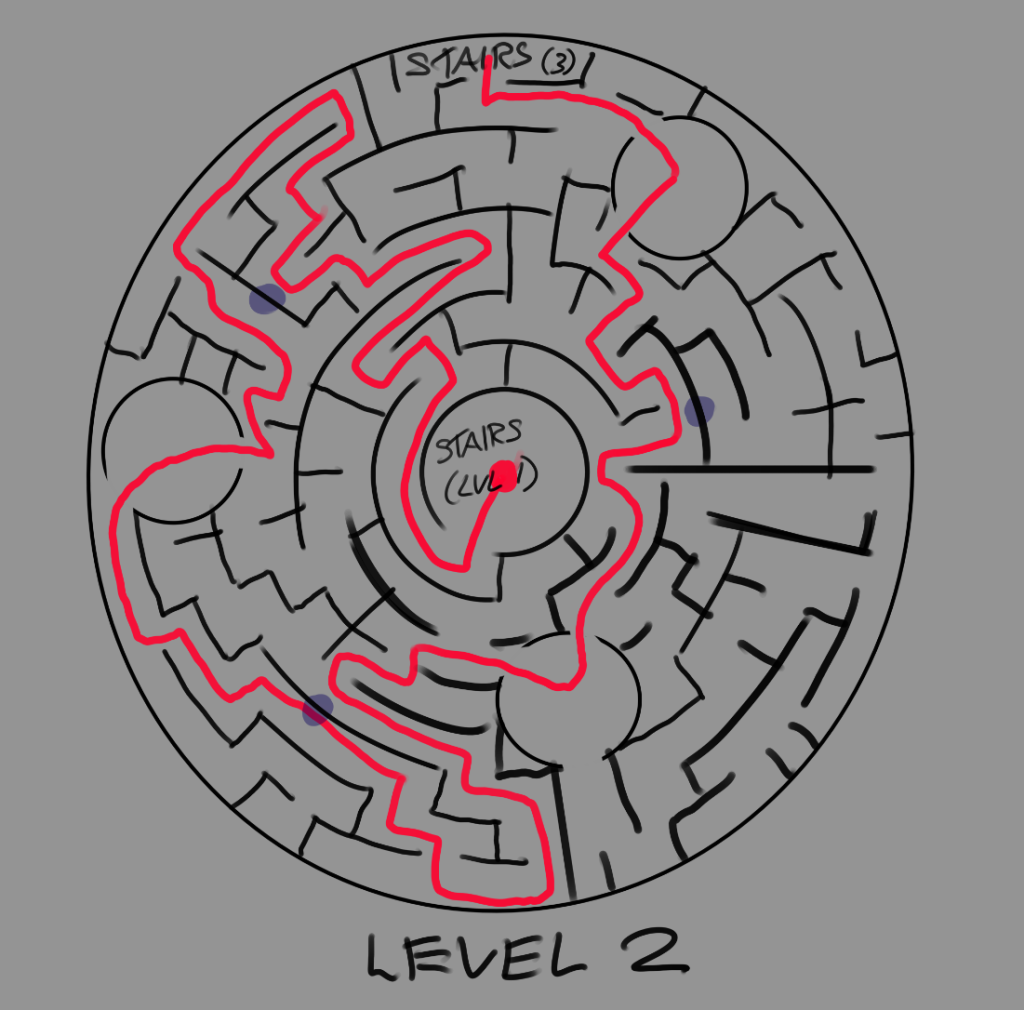
Tower Levels 1-4
The Panopticon tower is divided into 4 levels, with each one slowly upping the difficulty level depending on the player’s difficulty settings.
- Level 1
- Static camera movement
- A couple rooms are trapped
- Level 2
- Cameras have limited range of motion
- Some rooms are trapped
- Level 3
- Cameras have full range of motion
- Most rooms are trapped
- Level 4
- Cameras have full range of motion
- Every room and corridor is trapped
Level 2 contains an elevator that allows players to bypass Level 3 and go straight to Level 4. However, this is extremely difficult to accomplish due to heavy camera placement and a trap laid just before it. Exiting the elevator also has a trap.

Phase 2
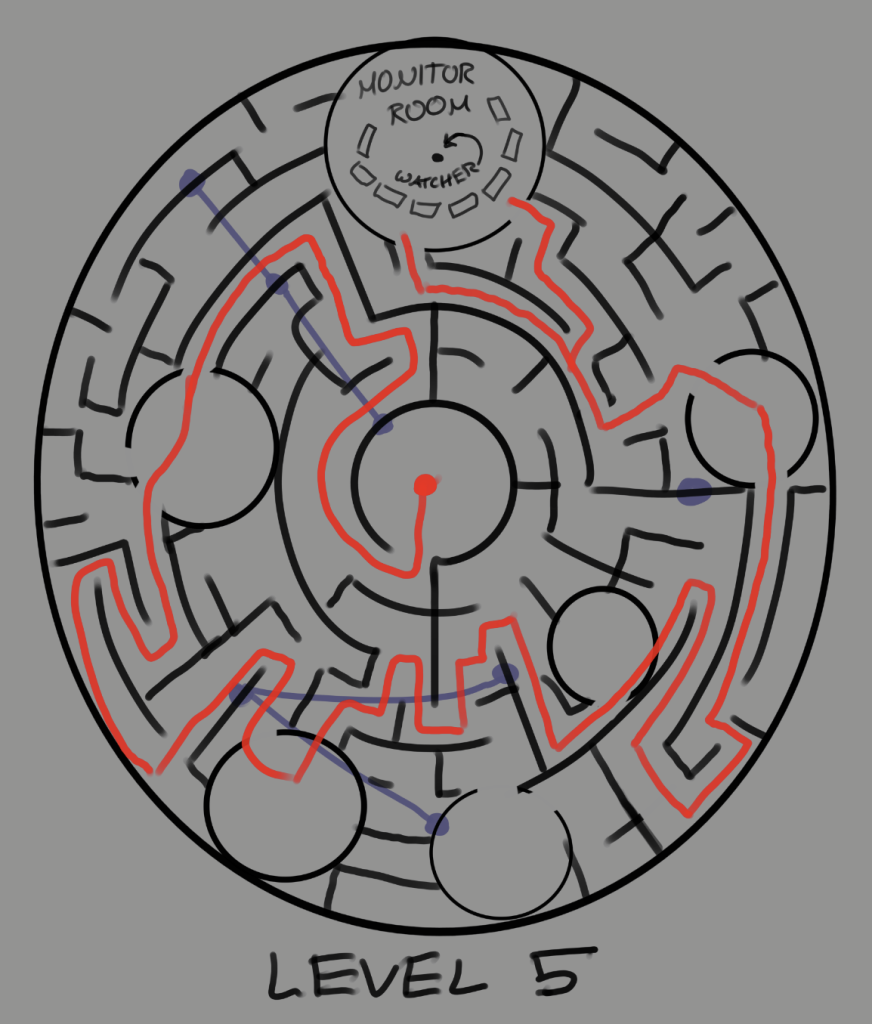
Control Panel (Level 5)
During phase 2, the player must balance warding people away from the tower while detaching themselves from the Control Panel – the catch being that the more detached they become, the less control they have over the panopticon. This plunges the player into a paranoid state.
While keeping attackers at bay is a constant, removal from the control panel is divided into two segments, which are further divided into three:
- Removing your eyepiece. Doing this results in monitors going down.
- Your eyepiece is hooked to specific monitors and re-engages them automatically when they start to turn static.
- Turn a dial on each monitor you are attached to, to turn its feedback back to static.
- Once a monitor has reached static, you can turn it off. When every monitor you’re attached to is turned off, the eyepiece will fall off automatically.
- Unplugging yourself from the control panel. Doing this prevents you from shifting corridors, so the player must ensure they have an escape route first.
- A wire panel is situated near to the player. One of the wires goes up into their neck while the other five don’t; figure out which one goes into your neck by using the reflection of an empty screen.
- Shut down the wire panel so you don’t get electrocuted using a flip-switch puzzle. All of the lights must be turned off, but switching some turns others on, so you must switch them in the correct order. Completion of this step stops player control on corridor movement.
- Detach the corresponding wire from your neck
To finally remove the monitor, the player will grab the front and pull. This should detach them completely from the Control Panel.
Phase 3
Level 0 (EXIT)
During phase 3, the player must find the exit located on the ground floor using the route they made in phase 2. If they were not able to make a route during phase 2, escape is still possible, just more roundabout and difficult, heightening chances of being seen.
When they descend to level 3, all cameras re-activate. The difficulty level remains high for the entirety of phase 3 with full camera movement and trap operability.
- Level 4
- Power outage. No overt threats.
- Level 3
- Power turns back on midway through.
- Cameras have static range of motion while the facility comes back online
- Some room and corridors are trapped, unless player has disabled them in Phase 1.
- Level 2
- Cameras have full range of motion, unless they have been destroyed in Phase 1.
- Most rooms and corridor is trapped, unless player has disabled them in Phase 1.
- Level 1
- Cameras have full range of motion, unless they have been destroyed in Phase 1.
- Every room and corridor is trapped, unless player has disabled them in Phase 1.
- Level 0
- Cameras have full range of motion
- Every room and corridor is trapped
Map Randomness
To prevent PARANOIA from being optimised too easily, the layout of the tower will differ based on a variety of 5-10 maps per level each time a new game begins. This way the structure remains fresh, prevents players from easy mastery of the game, and will incite players to play again with a new map.
Leave a Reply