As the technical designer with a role heavily directed towards programming and Unity itself, it will often be my responsibility to implement art within Lament. Despite not creating the art for the game it is up to me to put assets into the game.
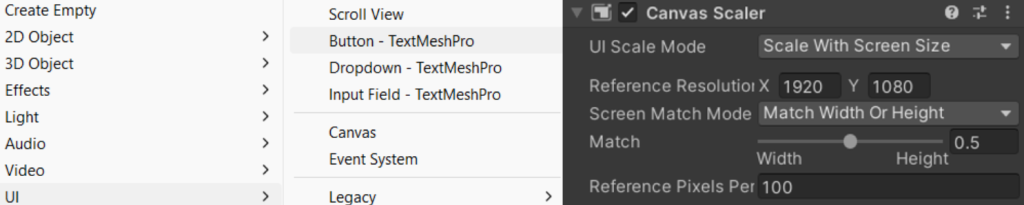
To begin with the start menu, I created a new scene and named it ‘MainMenu’. With this new, empty scene I created four Buttons in the scenes hierarchy (called: ‘Start’, ‘Credits’, ‘Options’ and ‘Exit’). This created a ‘Canvas’ gameobject and automatically made these buttons children to it; this ‘Canvas’ gameobject acts as a renderer for all UI gameobjects within Unity. Within the ‘Canvas’ gameobject, I changed some values in the ‘Canvas Scaler’ component. Notably UI Scale Mode and Reference Resolution, these change would ensure that no matter what system opened the game, its UI would always scale accordingly to the size of a 16:9 aspect ratio screen – which is the most common aspect ratio.
Creating functional buttons
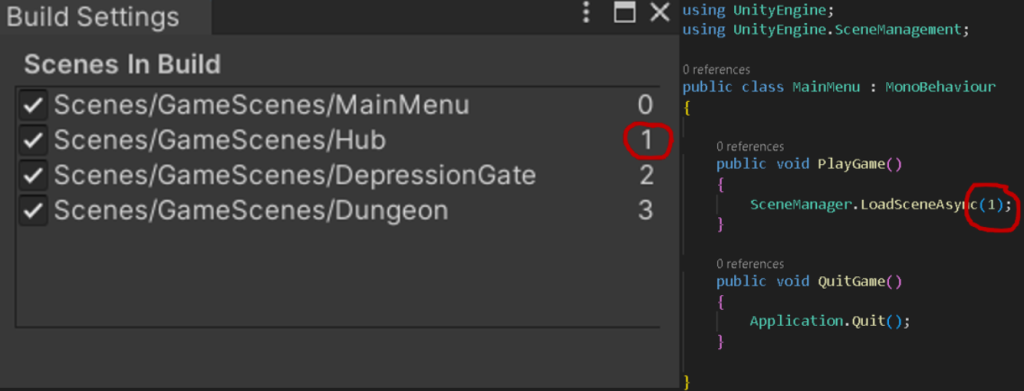
In order to make these buttons functional, they must call a script when they are activated (clicked on). Therefore I created a ‘MainMenu’ script and applied it onto the scenes ‘Main Camera’ – as this gameobject would always be present within the scene. For now, only the ‘Start’ and ‘Exit’ buttons needed to work for the playtest and, later in development, I would come back and add functionality to the ‘Credits’ and ‘Options’ buttons. Luckily for me, the ‘Start’ and ‘Exit’ buttons are extremely easy to code. Using the SceneManagement library in Unity, I only need one line of code in a PlayGame( ) method to start the game, as long as I place the scenes in the right order in the build settings of the project.
Now that the methods for the ‘Start’ and ‘Exit’ buttons were made, I had to then call these methods whenever the button was pressed. For both of these buttons, I accessed the ‘Button’ component in the inspector and assigned both of them the appropriate method in the OnClick( ) drop down. PlayGame( ) for the start button and QuitGame( ) for the exit button.
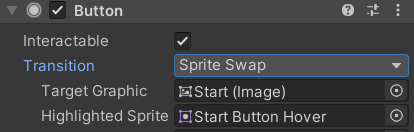
This is the Button component for the ‘Start’ button:

Implementing artwork
After our Mechanics Designer, Aysa, completed the artwork and uploaded them to our group google drive, I was able to download and add them to the Start Menu scene. The assets consisted of:
– An two images for each button, a static and hover version
– A background image
– A title image
– A tree of sorrow image

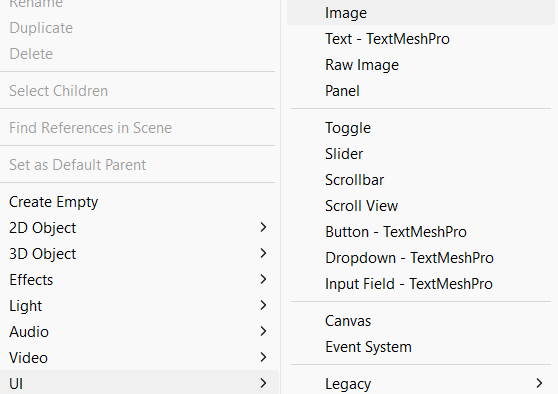
In order to add static art to the MainMenu scene, I created three Images (Create empty > UI > Image). I then changed the source image to whatever asset was required, whether it be the background image, the title image, or the tree of sorrow image

For the buttons, the implementation of the static assets was a similar process, I just had to replace the source image with the corresponding button sprite. However, the process for the hover images was slightly different – in the Button component for the buttons, I changed the ‘Transition’ variable from ‘Animation’ to ‘Sprite Swap’. This would allow me to alter the sprite for ‘Highlighted Sprite’ to the hover version of the button sprite.
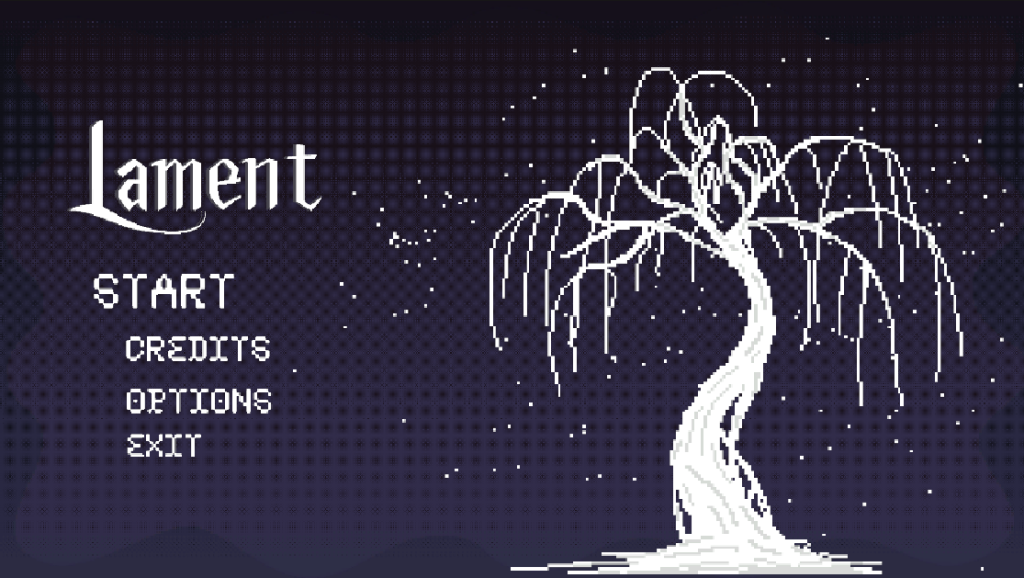
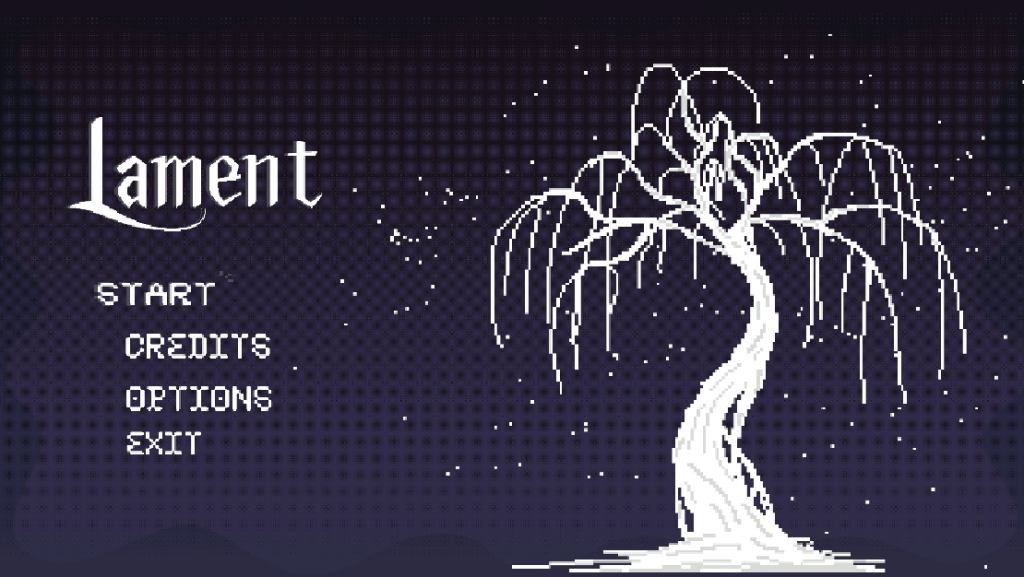
This was the result of this version of the Start Menu. Where, in this build of the project, the ‘Start’ button would open the Hub scene and the ‘Exit’ button would cause the application to close.

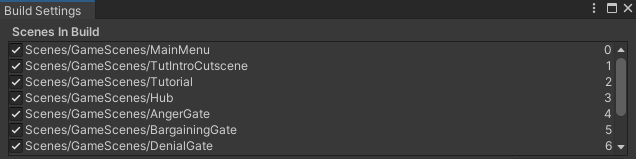
After our UI Desiger, Ayse, developed the intro cutscene for the game, I changed what scene the start button takes the player to. Simply by reordering the scenes in the build settings of the game and making the intro cutscene be the scene after the main menu.