I think that this is one of the best engines to use to create Lament, although another game engine like Godot is also perfectly fine.
What do I want out of this prototype?
- A better understanding of the feel of the mechanics – particularly movement and how the general gameplay felt. It needs to be playable.
- To check if my values corresponded to good gameplay – are the enemy health pools correct? Is player damage correct?
- Improve my knowledge of working with C#, Unity’s scripting language.
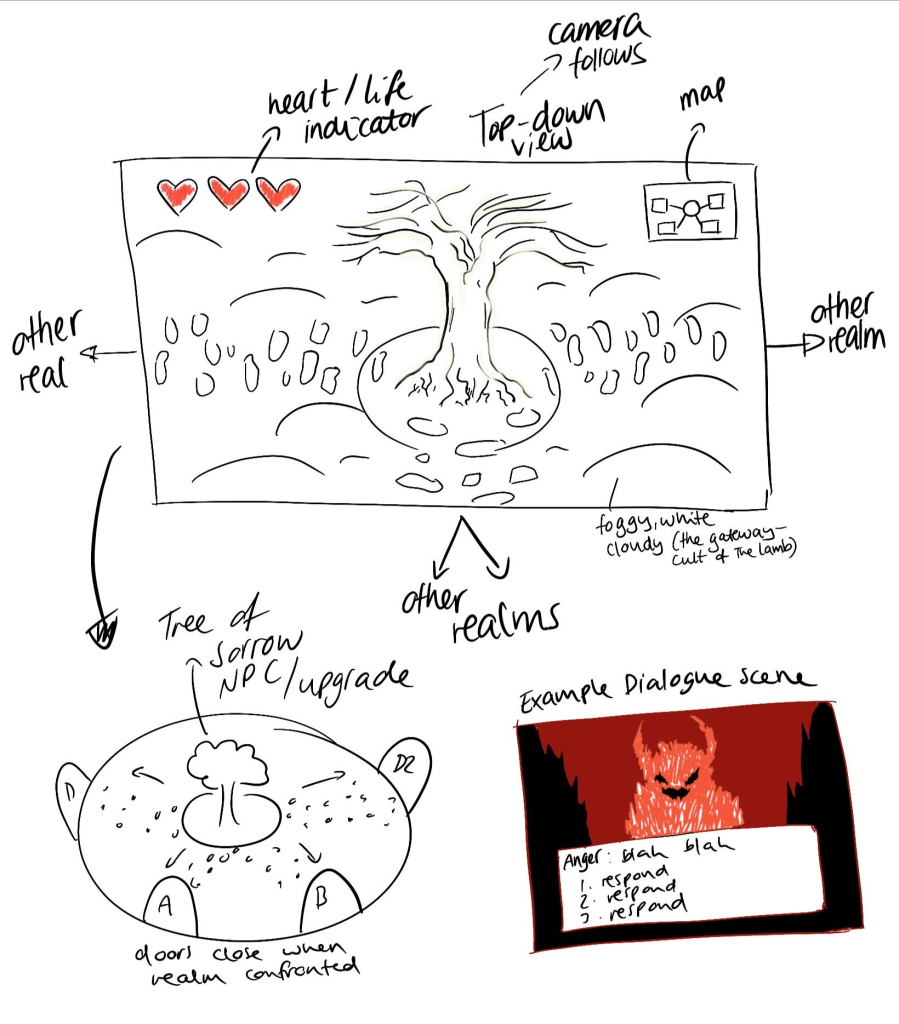
I drew up a quick mock up sketch of how I wanted the game to potentially look like, the map was an extra feature I don’t think I’ll keep but if I can get a playable prototype ready in time with the essential features I can have a look at implementing it to test.
Key features of the prototype:
Gameplay Mechanics: Movement & combat
Art and Design: Placeholder art assets found on Itch.io: (click on me)
Player Art: https://otterisk.itch.io/hana-caraka-base-character
Tilesets: https://ohnoponogames.itch.io/retro-cloud-tileset, https://byandrox.itch.io/32-16pxs-textures
Enemy Art: https://penusbmic.itch.io/dungeon-enemy-pack-3
Other: https://admurin.itch.io/nature-trees
UI/UX: Main menu and HUD
Inititally I wanted the game to be top down in a 2.5d style (have 2D objects inside of a 3D world). I started off with a simple capsule object and a plane for the ground, then applied movement with help of the Input System package that comes in the Unity registry to make everything that little bit easier.
Camera and Sprite
Then it was time to get the camera sorted, my goals for the perspective:
1. Slightly angled above the player
2. Following the player
For this project I used the Cinemachine package, its codeless and modular camera system is designed to easily compose sophisticated behaviors, while my camera movement and perspective is far from complex, it also allowed me to tune, iterate and experiment in real-time. I created the new virtual camera object, attached the player object to the camera and tweaked its offset and angle to make sure they were positioned the way I wanted and that the FOV felt good and not disorientating.
Once the camera felt right, it was time to start importing sprites, which admittedly was a first for me. Whilst I had worked on Unity last year for a platformer prototype, it was very very (very) basic – I had only used shapes to convey… well, everything. At this point I didn’t have any art of my own to important so I headed to Itch.io for free quick and easy assets.
I turned the capsule object into a child of the Player object, I did this to allow there to be a shadow casted by the mesh of the capsule and keep its collider. I thought I might as well add this small dynamic feature since I was already working in a 3D space (it also meant I could avoid using shaders). Then it was just the case of dragging the sliced sprite onto the player object in the scene and resetting its position.
Once I got to the point of adding textures to the plane, I started to realise I was no longer enjoying the 2.5D style, or working in a 3D space for that matter. I felt way too out of my comfort zone and things didn’t look or feel the way I wanted to. So, I restarted. In a 2D space this time.
Prototype 2
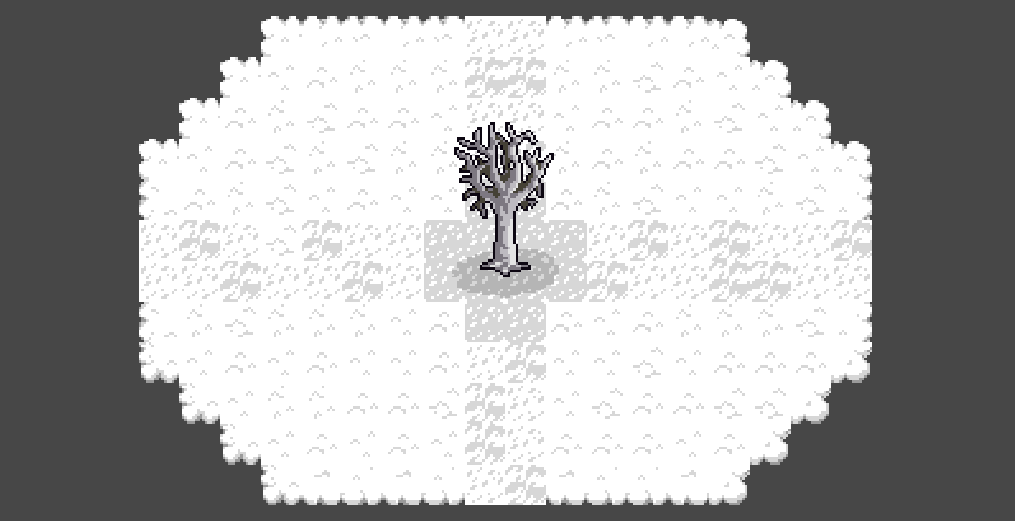
Funnily enough I had a harder time starting the 2D project than I did with the 3D one, this is because I got hit with another small setback – learning how to use tilesets. I’d never done it before and it hadn’t even crossed my mind before this. It wasn’t too big of a learning curve though, I shrunk the camera view down and got to importing and slicing the tilesets I got from Itch.io. Then I was quite literally painting the world grid with tiles.
Movement
I used the same Input System package from the first attempt, taking the OnMove import and handling the movement for the player character as well as how to handle any collisions. This was successful and as you can see below I now had movement in all directions.
After this I gave a go at animation. This meant working out the best sample rates, slicing more spritesheets and creating the animation clips for each “event”, this included the main:
– Idle
– walk
– attack (with sword)
– death
I used the animator window to link up the transition between the animations through boolean conditions and triggers so that everything flowed smoothly. For example, the player character should go back to idling after they have stopped walking or attacking, which are actions triggered by conditions (have the movement keys (WASD) been pressed? If so, move in that direction). One small problem I saw was that the player character was not facing the direction they were moving in, but this was an easy fix using the sprite renderer to flip the sprite whenever it was necessary.
Camera and Combat
The Cinemachine package was used again to follow the player but with less tweaking this time – all that had to be done was set the virtual camera to follow the player object.
Leave a Reply