The tutorial acts as the place where you’re able to teach players what you want them to learn and engage them in the game from the start. A good tutorial can make players feel engaged and motivated to continue playing, while a poor tutorial can lead to frustration and churn.
– Alexia Mandeville, Game Designer
The work I have produced was informed by insights gained from reading Designing a Good Game Tutorial and engaging with an online lab on the subject. These resources provided valuable background knowledge and practical understanding, which contributed to the development of my work.
What to keep in mind when designing a game’s tutorial:
- Make it fun, not boring
- Scaffold information
- Introduce long term and short term goals
It’s important that the player has fun and feels a sense of gratificaiton from the gameplay as soon as possible. The faster they get invested the better it is to keep them motivated. This can be done through agency of choice, a fun mechanic to play with, or allowing them to make progress and offering a quick reward.
Scaffold Information
Scaffolding information means listing out the information the player needs to be taught and prioritising it. For Those Left Behind that is:
- Make sure survivors have enough food every day
- Make sure you gather enough materials by the end of the week
- Surviving a week means progressing the story
- Dialogue choices in the storyline have impact (short term goals)
The tutorial can’t overload the player with too much information, doing so will likely overwhelm, frustrate or lead them to forgetting it. The best games excel by using good, intuitive UI/UX and as little text as possible.
Players should always know what they need to do and how they are progressing. Great games have long term goals and short term goals. Explaining the long term goals as soon as possible helps give context to the game.
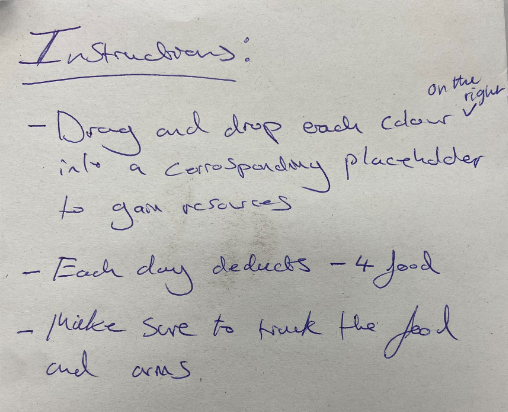
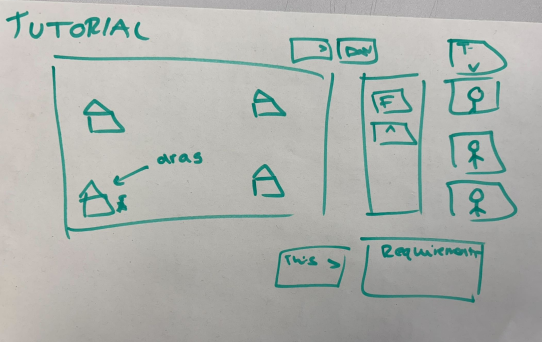
Using the instructions Joe wrote out on paper during the first playtest (figure on the right), I’m going refine them into steps that will appear as a series of pop-ups at each area of interest on the screen guiding the player’s actions for “Day 0”.
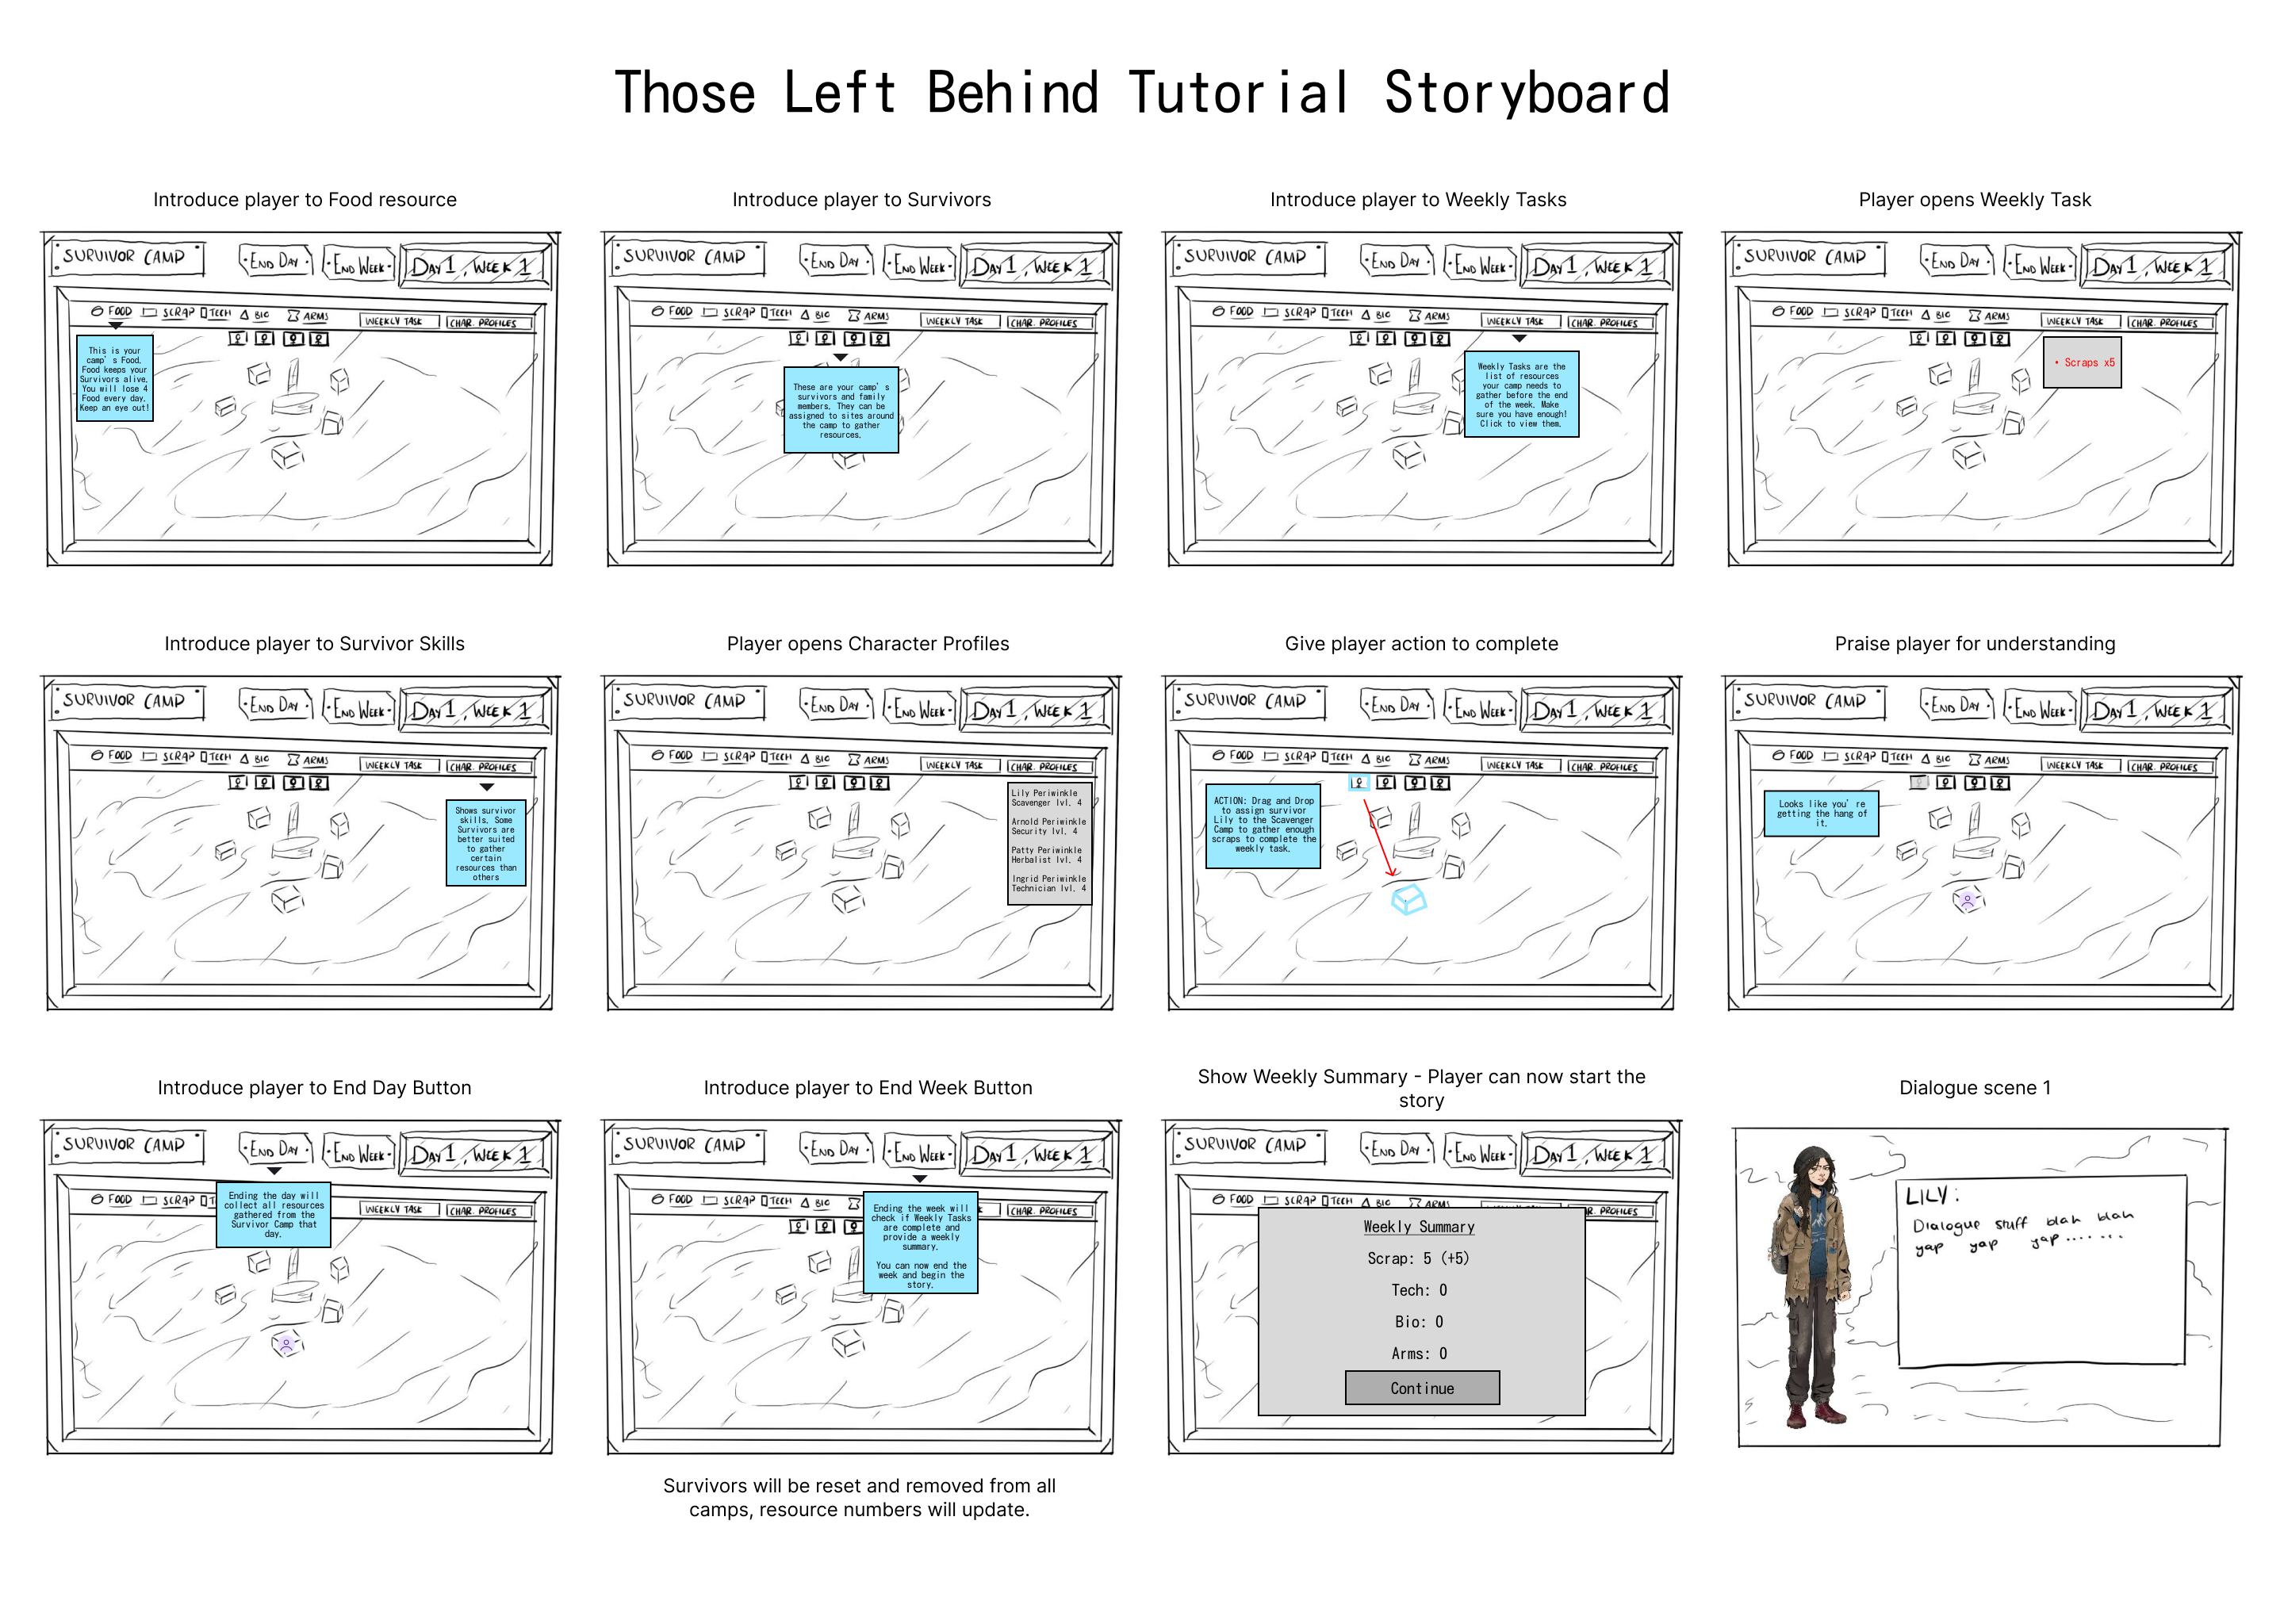
Tutorial events:
- Introduce player to Food resource – tell player that food keeps survivors alive, every day they will lose 4 food. Ending the day with less than 4 food is fatal.
GOAL: Keep survivors alive - Introduce player to Survivors – tell player they can be assigned to work in different camps to gather other resources.
- Introduce player to Weekly Tasks – tells the player what resources need to be gathered by the end of the week. Failing to do so means survivors do not have enough to keep going.
GOAL: have enough resources - Introduce player to Suvivor Skills in character profiles- tells player some survivors are better suited to gathering certain resources than others.
- ACTION: Assign a survivor to a camp by drag and drop
- Praise Message – tell the player they’re getting the hang of it.
- Introduce to End Day button – tell the player they can now end the day and collect the resources from the camps
- Introduce End Week button – tell the player they can now end the week, checking if they have completed the daily tasks and providing a weekly summary. They can now end the week and begin the story (begin dialogue scene 1)
Tutorial Storyboard
Changes
In the meeting that the tutorial was discussed, the technical designer suggested the tutorial occur before the first dialogue scene as shown in the storyboard above. Upon finishing the tutorial, Joe considered the tutorial from a player standpoint and believes it would be more effective if the tutorial occurred quickly after the dialogue scene. This is as simple as changing the last panel into the first panel and pushing everything forward.
I agree with the changes, it helps the flow of the gameplay and the player is granted context to the game through a character before they are able to play.
Leave a Reply