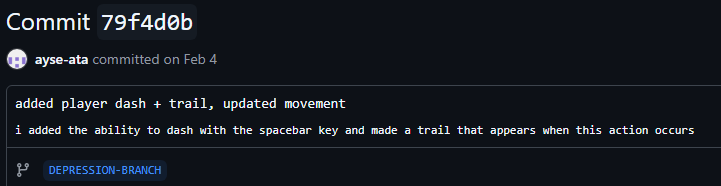
As one of my responsibilities for this project is working on mechanics, my first task was to produce a dash mechanic to expand on the E-Jay’s player movement. The goal for this mechanic is:
- The dash occurs when the player presses an input key.
- They will dash matching the direction they faced when they initiated it.
- A visual should be used to show that the player is faster when active.
Team Discussion
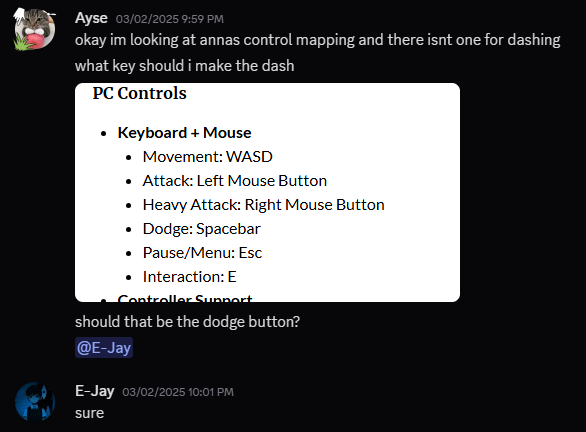
Before commencing work on the dash mechanic, I referenced back to Lament’s GDD, specifically the control mapping section. I needed to know if Dash already had an intended input key, I wanted it to mesh well with the other controls, however, it had no assigned key.
I had an idea for the dodge to become the dash, as they would relatively have the same purpose of evading enemy attacks, and be another option for movement. I wanted to ask my teammates for their opinion on whether that was a good idea. After getting confirmation from others, I knew that the input key for the dash would now become ‘SPACE’ and could therefore commence on programming the mechanic.
Research
As I am a complete newbie to coding, I had to prepare myself to tackle this first assignment. I prepared by looking into tutorials, forums and utilising my problem-solving skills. As I have already made goals for what I want this mechanic to achieve, it helped narrow down sources that would be of use to me and helped me in this stage. This is one of the videos I watched for research.
This video covers coding a dash and includes a trail renderer explanation. I had to do my own research using experience I’ve had before to work out how to blend this with the existing movement system. But from this video, I learnt that I need to include these to make a good mechanic:
- Include the input you want using a ‘getkeydown’ method, which makes it so all the dash code only occurs when the linked button is pressed
- Make a field for the trail renderer to link them together.
- have a dash counter, a cooldown counter, the length you want it to last for and a new speed variable for the dash.
- Make sure that you put this code in the update method, as it needs to constantly check if the player can dash.
Production
As we wanted to condense the amount of scripts that we use in this project and have a sense of organisation among them, I decided to add the dash mechanic into the existing player controller that E-Jay made, as the dash action is a form of movement.
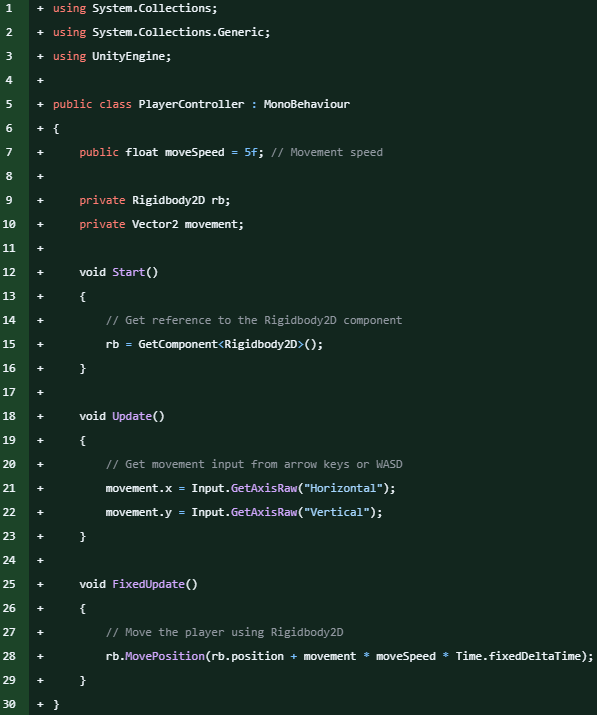
E-Jays PlayerController
Player moves using ‘WASD’ or ‘arrow keys’ (constant checking by code as it’s in the update method), movement speed is set to a default speed of 5, but can be altered in the inspector, moves using rigidbody2D.
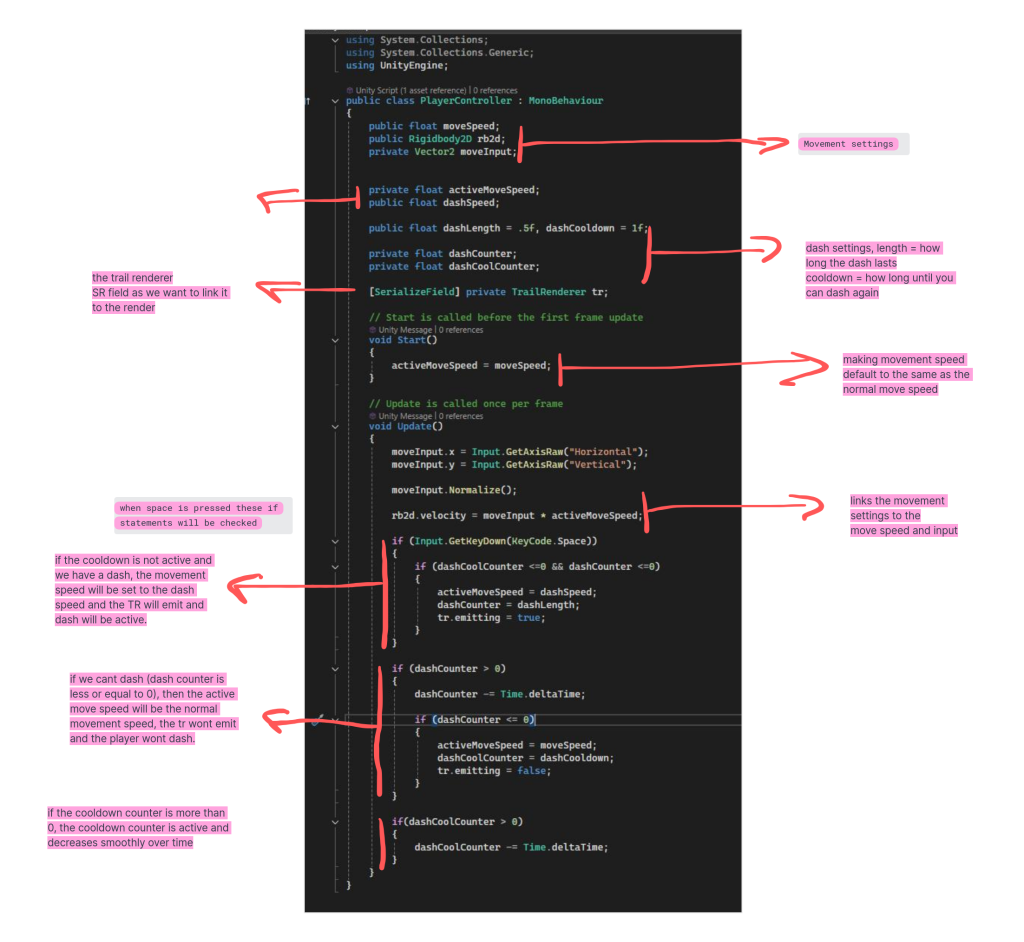
E-Jays code + the addition of my dash mechanic.
(In-depth explanation below).
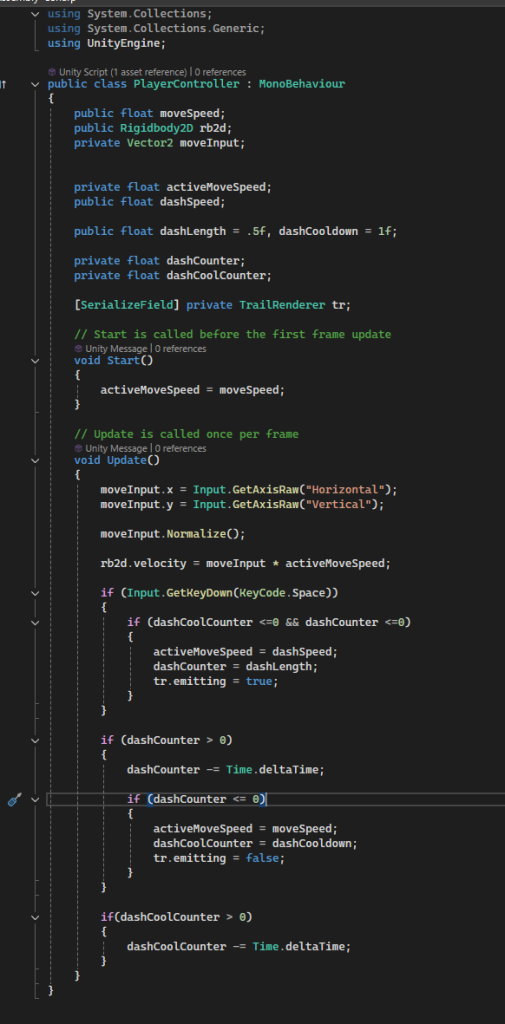
I tried to organise the floats into separate sections: movement settings, speeds of movement and dash, dash settings. I then created a serialize field for the trail renderer. The trail render is the visual I will be using to show that the player is dashing/faster, so it’s important that I make a slot for it in the inspector. In the update method, I left the movement E-Jay made and then added in my dash code.
Code Breakdown

After the dash mechanic was made and successful, I had to add in the visual trail renderer. In the code I’ve already included everything the trail needs to activate and deactivate and the inspector slot for it to be linked to the code with. I only had to add the trail render to the player object and tweak the settings in the inspector.
The image to the left shows that the player controller has my additions linked and active with the placeholder figures for the speed, cooldown and length. Below in the trail renderer section, the graph adjusts the width/length of the trail, which I adjusted. The time section is where the active time the trail would occur. I also had to turn off emitting as I wanted it to be a full trail block instead of having breaks in it. The colour section is default white but can be changed anytime to fit in with the game’s art.
Personal Review
For my first experience of coding in Unity, I found it fun as it was challenging and worked my brain a lot, which I liked. It took me around a day to implement this. I’m sure that this mechanic will be tweaked in the future as more of the game gets made. I have committed this and asked my team what their opinions on it are, this is mentioned in the next post.